How filters work
Each filter consists of three parts.- Key: The attribute you want to filter (for example,
Severity,Category, andEcosystems). - Operator: The comparison logic (for example,
equals,in, andcontains). - Value: The target value to evaluate (for example,
CriticalandVulnerability).
Filter implementation techniques
You can use the following filter types to manage your findings effectively.- Basic filters: Use the filter bar in the Endor Labs user interface to quickly segment findings by common attributes.
- Advanced filters: Use advanced filters to create powerful queries that drill deeper into the dataset to fetch results with a specific context.
- Saved filters: Save your custom filters for reuse across projects.
Search for findings using basic filters
Use the following basic filters to search for information in your findings.- Finding Level: Limit results by finding severity level.
- Dismissed: Include or exclude dismissed findings. See Filter dismissed findings to learn more about filtering dismissed findings.
- Category: Choose from CI/CD, Malware, license risks, operational risks, RSPM, GitHub Actions, SAST, AI models, containers, secrets, security, supply chain, or vulnerability and view related findings.
- Projects: Narrow findings by one or more project names.
- Custom Tags: Narrow down the list based on custom tags.
- Attributes: Narrow down the list based on a range of factors such as:
- if a patch is available to fix the findings
- if the vulnerable function is reachable
- if the dependency is reachable
- if the dependency originates from a current repository or a current tenant
- if the dependency is a test dependency
- if the dependency’s discovery type is manifest, phantom, or segment match
- if the finding originates from itself, direct, or a transitive dependency
- if the SAST finding is generated by the AI SAST detection agent
- if AI SAST analysis has classified the SAST finding as a true positive or false positive
- filter the findings by the Exploited tag from CISA KEV
- filter the findings by the Warn or Break the Build options set in the action policy
- EPSS Probability: Choose the Exploit Prediction Scoring System (EPSS) score range.
- Ecosystems: Filter by language or ecosystem.
- Location: Narrow findings by where they occur (for example, path or location in the repository).
- Confidence: Narrow findings by detection confidence.
- SAST Languages: Narrow SAST findings by programming language.
- Container Layers: Narrow container findings by image layer.
- Remediation: Narrow vulnerability findings by fix status.
- Endor Patch Available: Filters findings where an Endor-provided patch is available to fix the vulnerability.
- Recommended Upgrade Available: Filters findings where a recommended version upgrade is available.
- All Time: Choose a time range.
Search for findings using advanced filters
For complex queries, use the advanced filter syntax to combine multiple attributes and apply logical operators. Toggle the Advanced option in the filter bar to enter API-style filter expressions directly in the Endor Labs application. The Advanced Filters use theGetFinding API call to fetch results. The following table lists the available attributes for finding filters.
Interactive filter builder
API filter use cases
The following examples demonstrate how to combine these attributes for common security and compliance workflows.Prioritize critical and high severity fixable findings
Prioritize critical and high severity fixable findings
Find critical and high-severity findings where a fix is available and the vulnerable function is reachable.
Find high-probability exploitable vulnerabilities
Find high-probability exploitable vulnerabilities
Identify vulnerability findings with an EPSS score greater than 10% to focus on issues most likely to be exploited in the wild.
Scope findings to a specific project
Scope findings to a specific project
Retrieve all active, non-dismissed vulnerability findings for a single project.
Find vulnerabilities in a specific ecosystem
Find vulnerabilities in a specific ecosystem
List all vulnerability findings from PyPI packages across the namespace.
Find Maven findings with provided native scope
Find Maven findings with provided native scope
List vulnerability findings whose affected Maven dependency has native scope
provided. Normalized scope stays Normal. Gradle source scans and JVM binary scans always report compile, so this filter does not apply to them.Audit dismissed findings
Audit dismissed findings
Review all dismissed findings across the namespace to verify exception policies are applied correctly.
Find findings from a specific branch
Find findings from a specific branch
Retrieve findings scoped to a specific branch or repository version by providing the context ID.
Identify KEV-listed exploited findings with no fix
Identify KEV-listed exploited findings with no fix
Find findings tied to CVEs in the CISA KEV database that have no available fix, to assess unmitigatable risk.
Review AI SAST findings confirmed as true positives
Review AI SAST findings confirmed as true positives
Surface the SAST findings that the AI SAST detection agent generated and AI analysis confirmed as true positives, so triage starts with the highest-confidence results.
Exclude AI SAST findings from SAST results
Exclude AI SAST findings from SAST results
Return only the SAST findings that static rules produced, with AI SAST findings filtered out.
Find supply chain findings for direct dependencies
Find supply chain findings for direct dependencies
Surface supply chain findings that affect only direct dependencies to prioritize the most actionable issues.
Saved filters
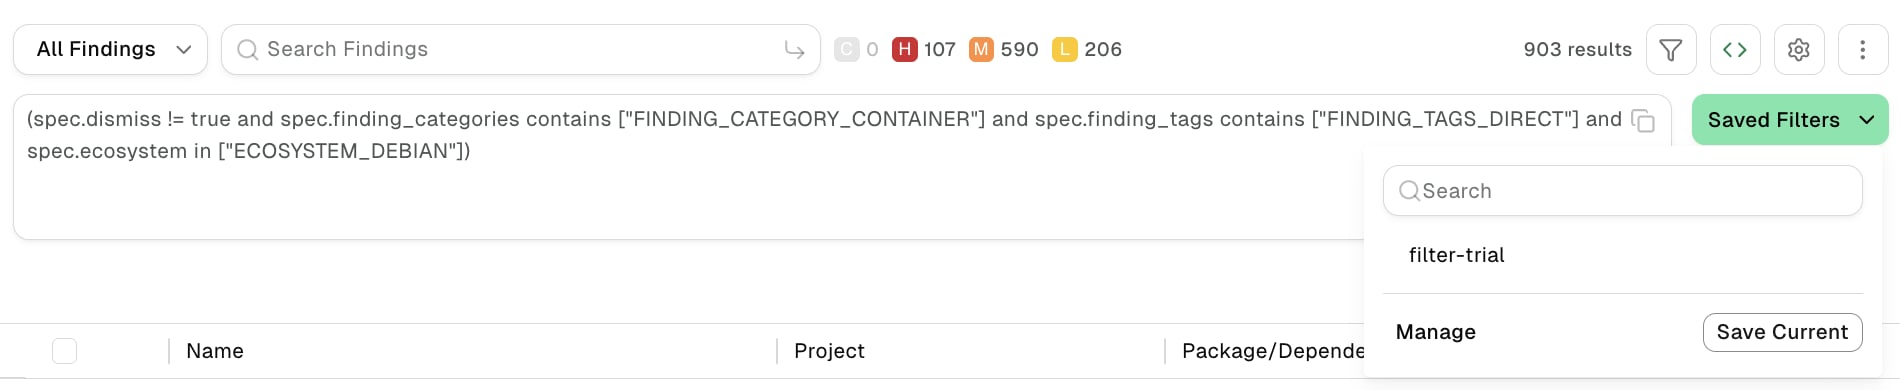
Saved filters are customizable filter settings that users can create and reuse across projects in Endor Labs. They improve efficiency by eliminating the need to manually recreate filters. You can save the advanced search filters that you created to fetch curated search results. Saved queries are visible in the drop-down list. To create a saved filter:- Select Findings from the left sidebar.
- Toggle Advanced in the top right corner.
- Type or build your query in the filter bar.
- Click Saved Filters in the top right corner.
- Click Save Current.
- Enter a name in the Choose filter name field.
- Click Save.
Manage saved filters
To delete a saved filter:- Select User menu > Settings from the left sidebar.
- Select Saved Filters.
- Click the vertical three dots on the right side of the filter you want to delete and click Delete.
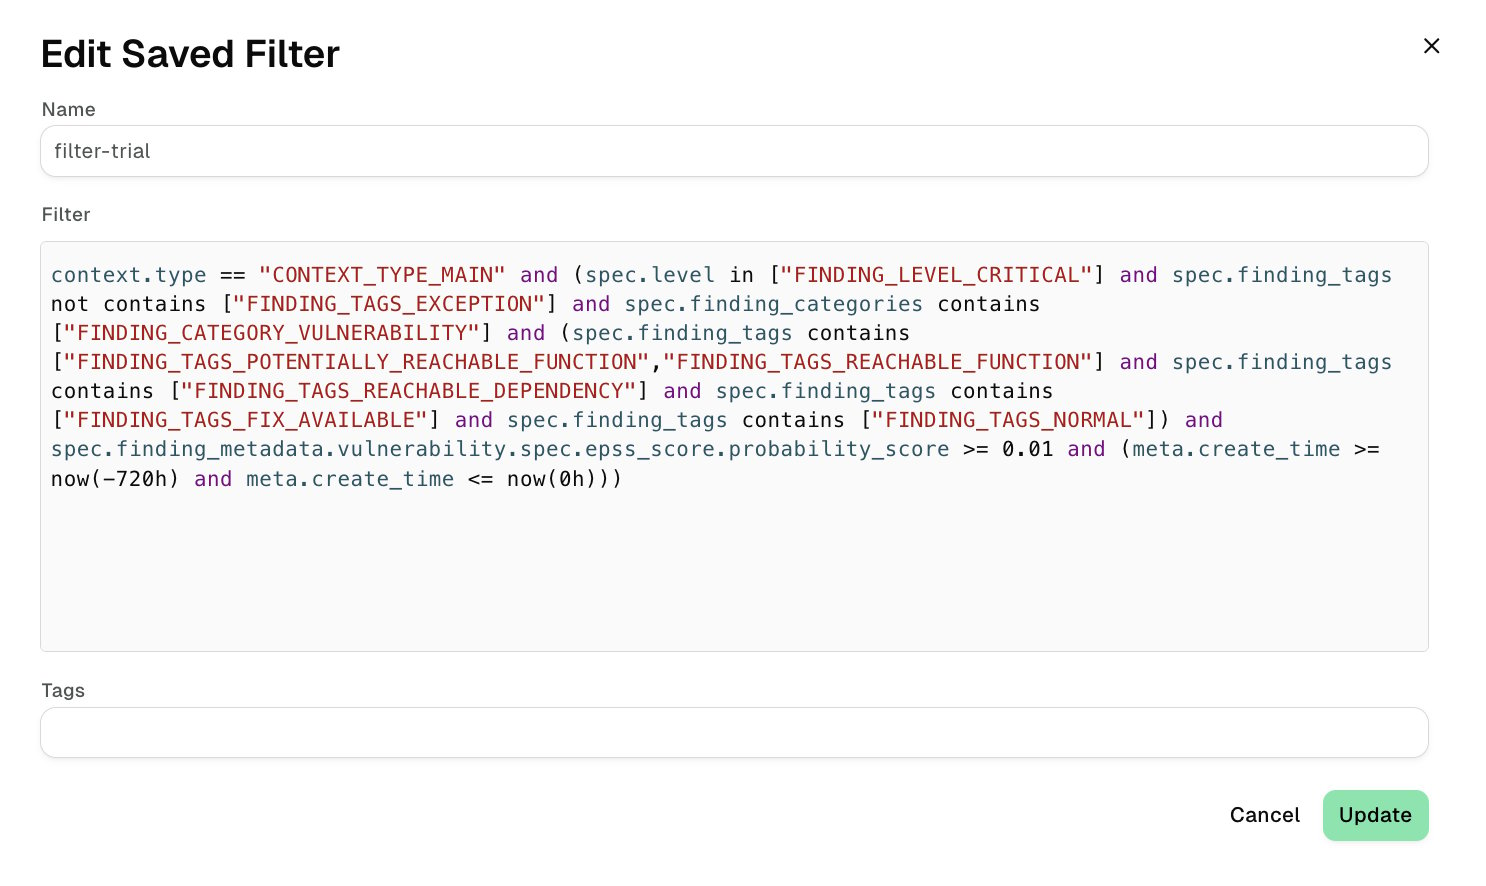
- Select User menu > Settings from the left sidebar.
- Select Saved Filters.
- Click Edit next to the filter you want to edit.
- You can update the name, query, and tags.
- Click Update to save the updated changes.