

View licenses
To view licenses:- Select Inventory from the left sidebar.
-
Select Licenses to view the list of licenses.
You can view the license name, OSI approval status, license type, and project count.
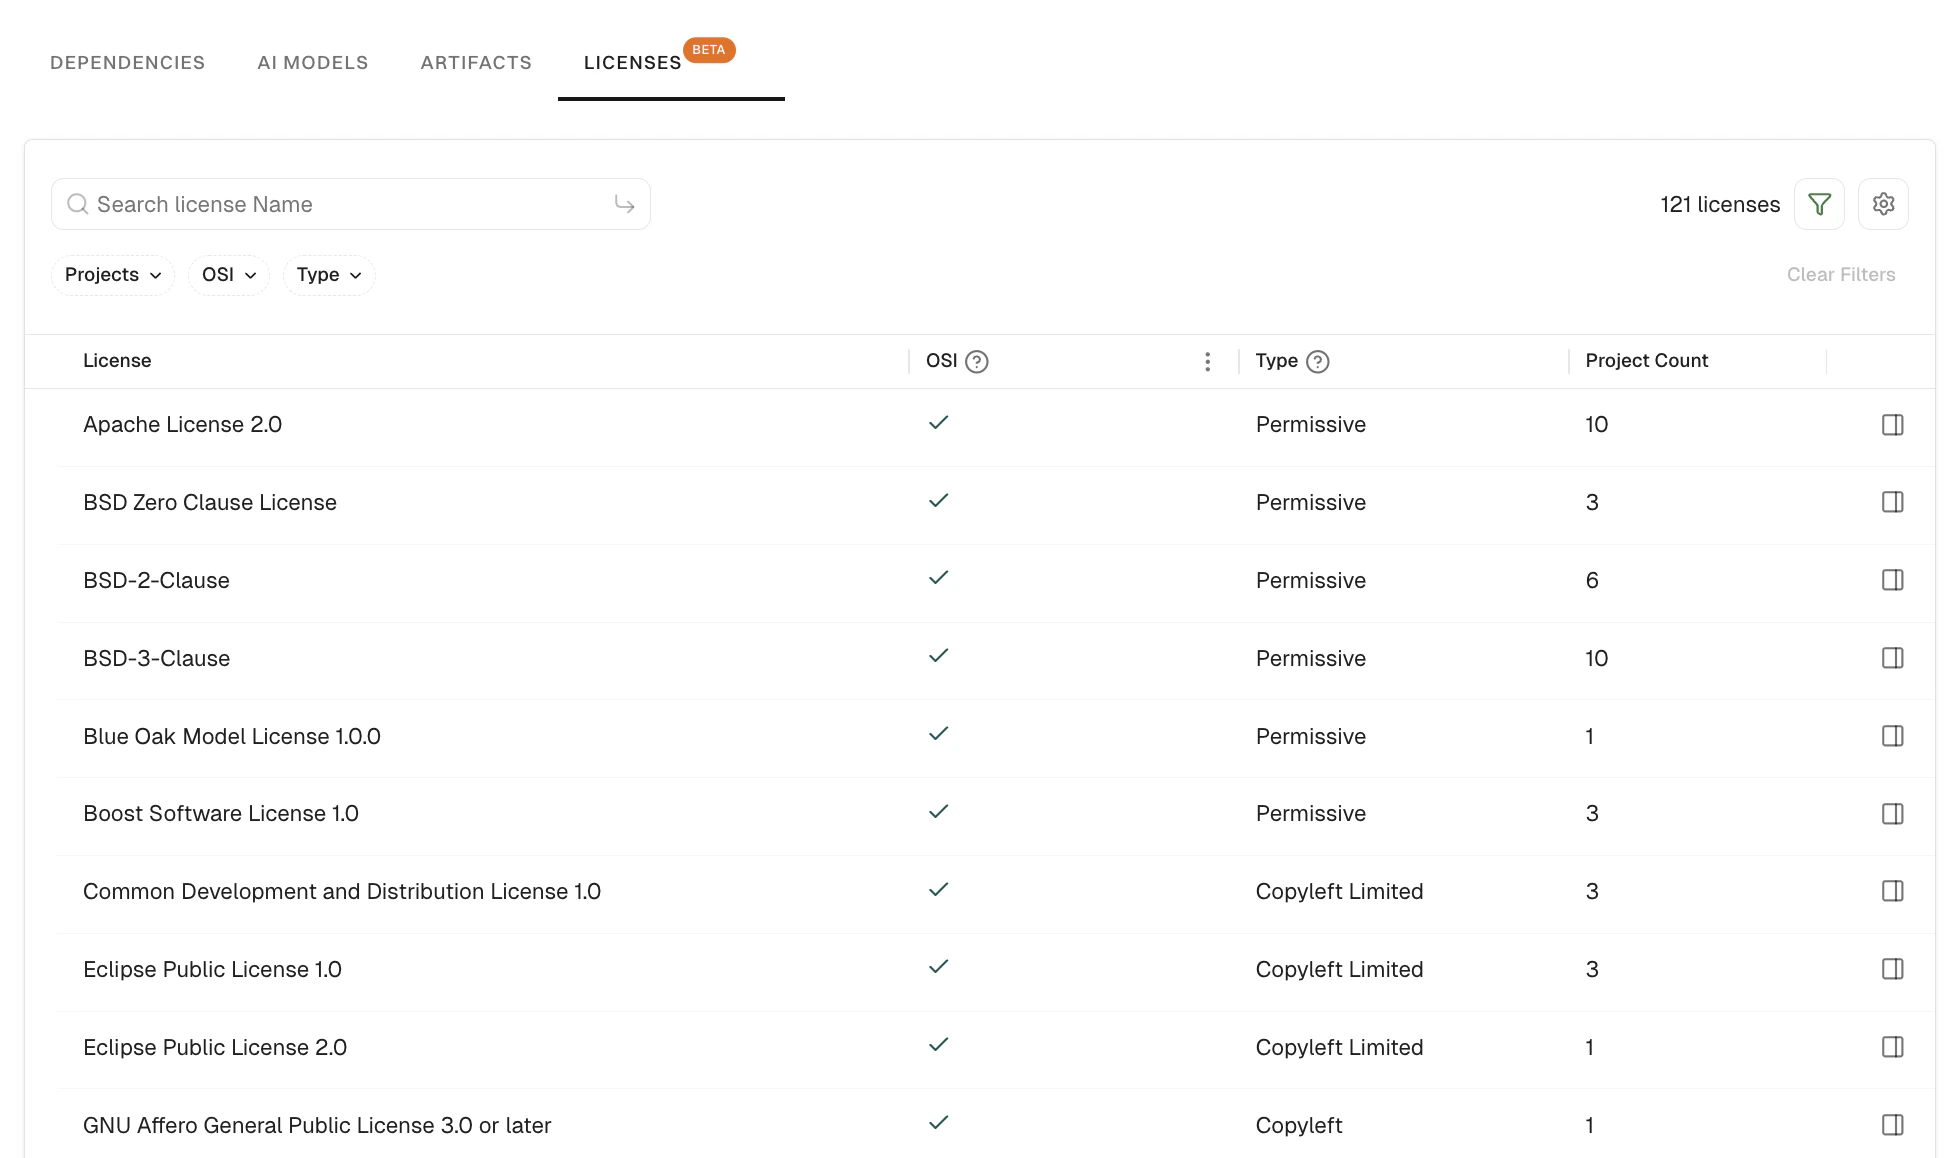
- Use Search license Name to filter the list or search for a specific license.
- Use the OSI, Projects, and Type filters to narrow the list.
-
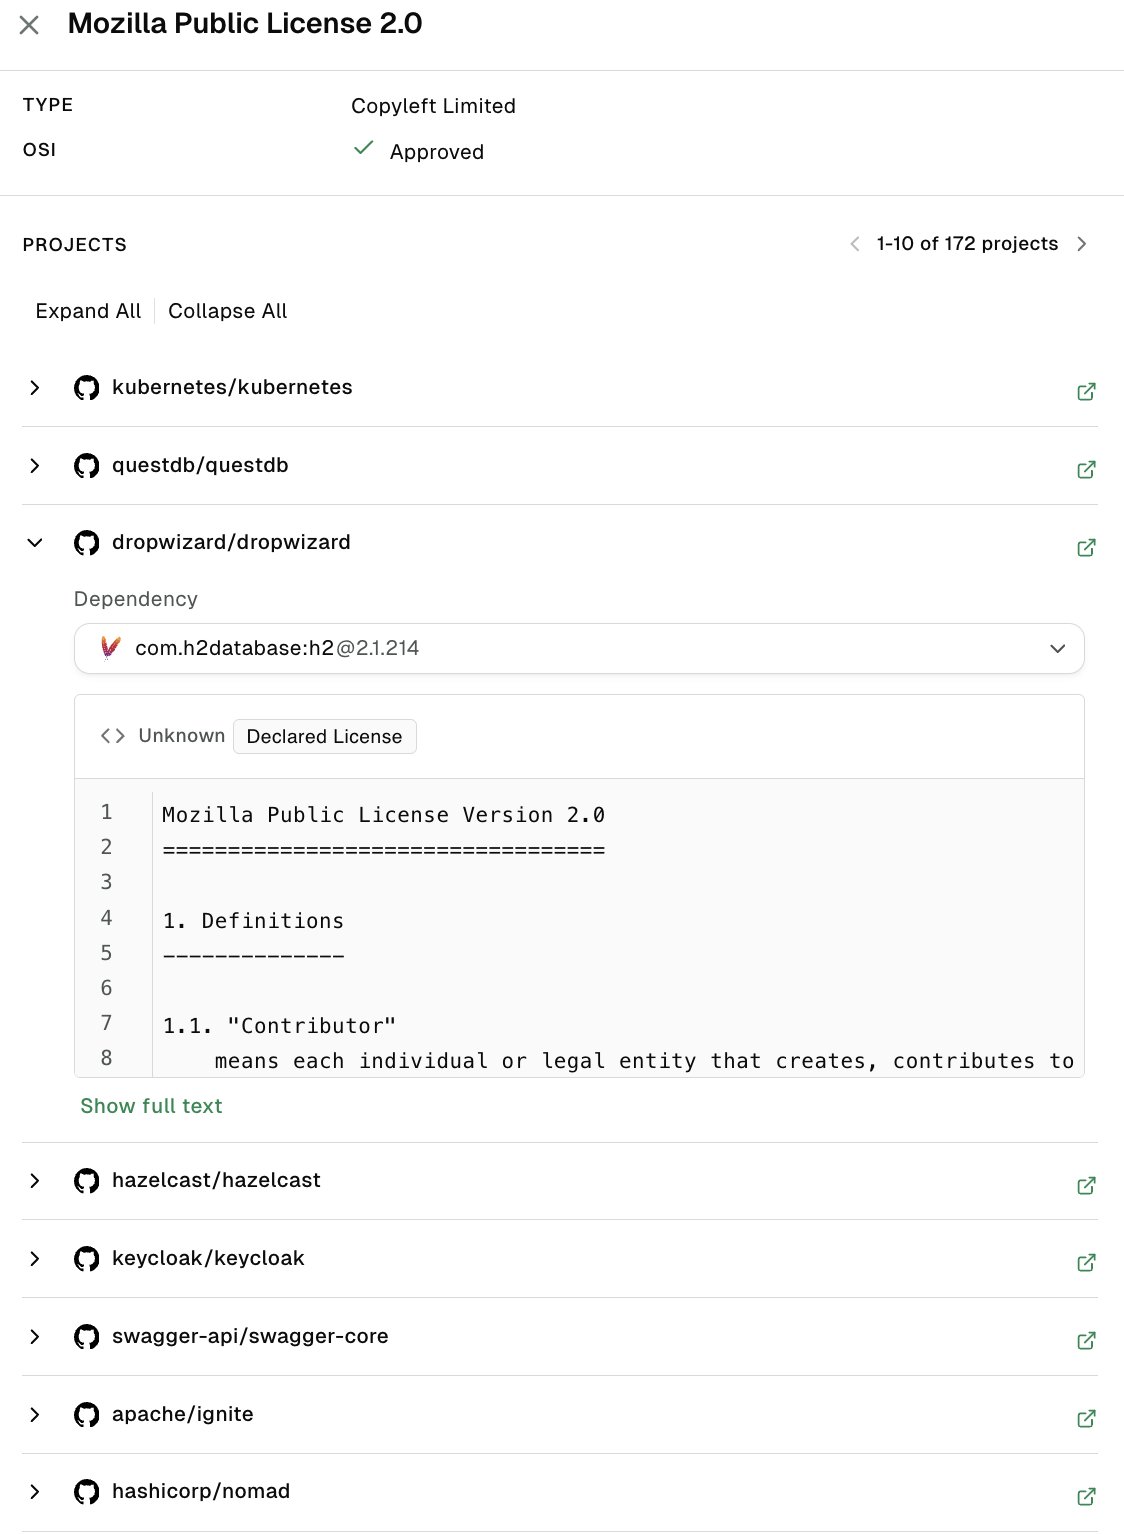
Select a license row to view the following details:
- TYPE: License type for the selected license (for example, Permissive, Copyleft).
- OSI: Whether the license is Open Source Initiative approved.
- PROJECTS: List of projects that use this license. Expand a project to view the license text for each dependency in that project that uses this license.
View licenses associated with a project
To view licenses for a specific project:- Select Projects from the left sidebar and select the project for which you want to view licenses.
-
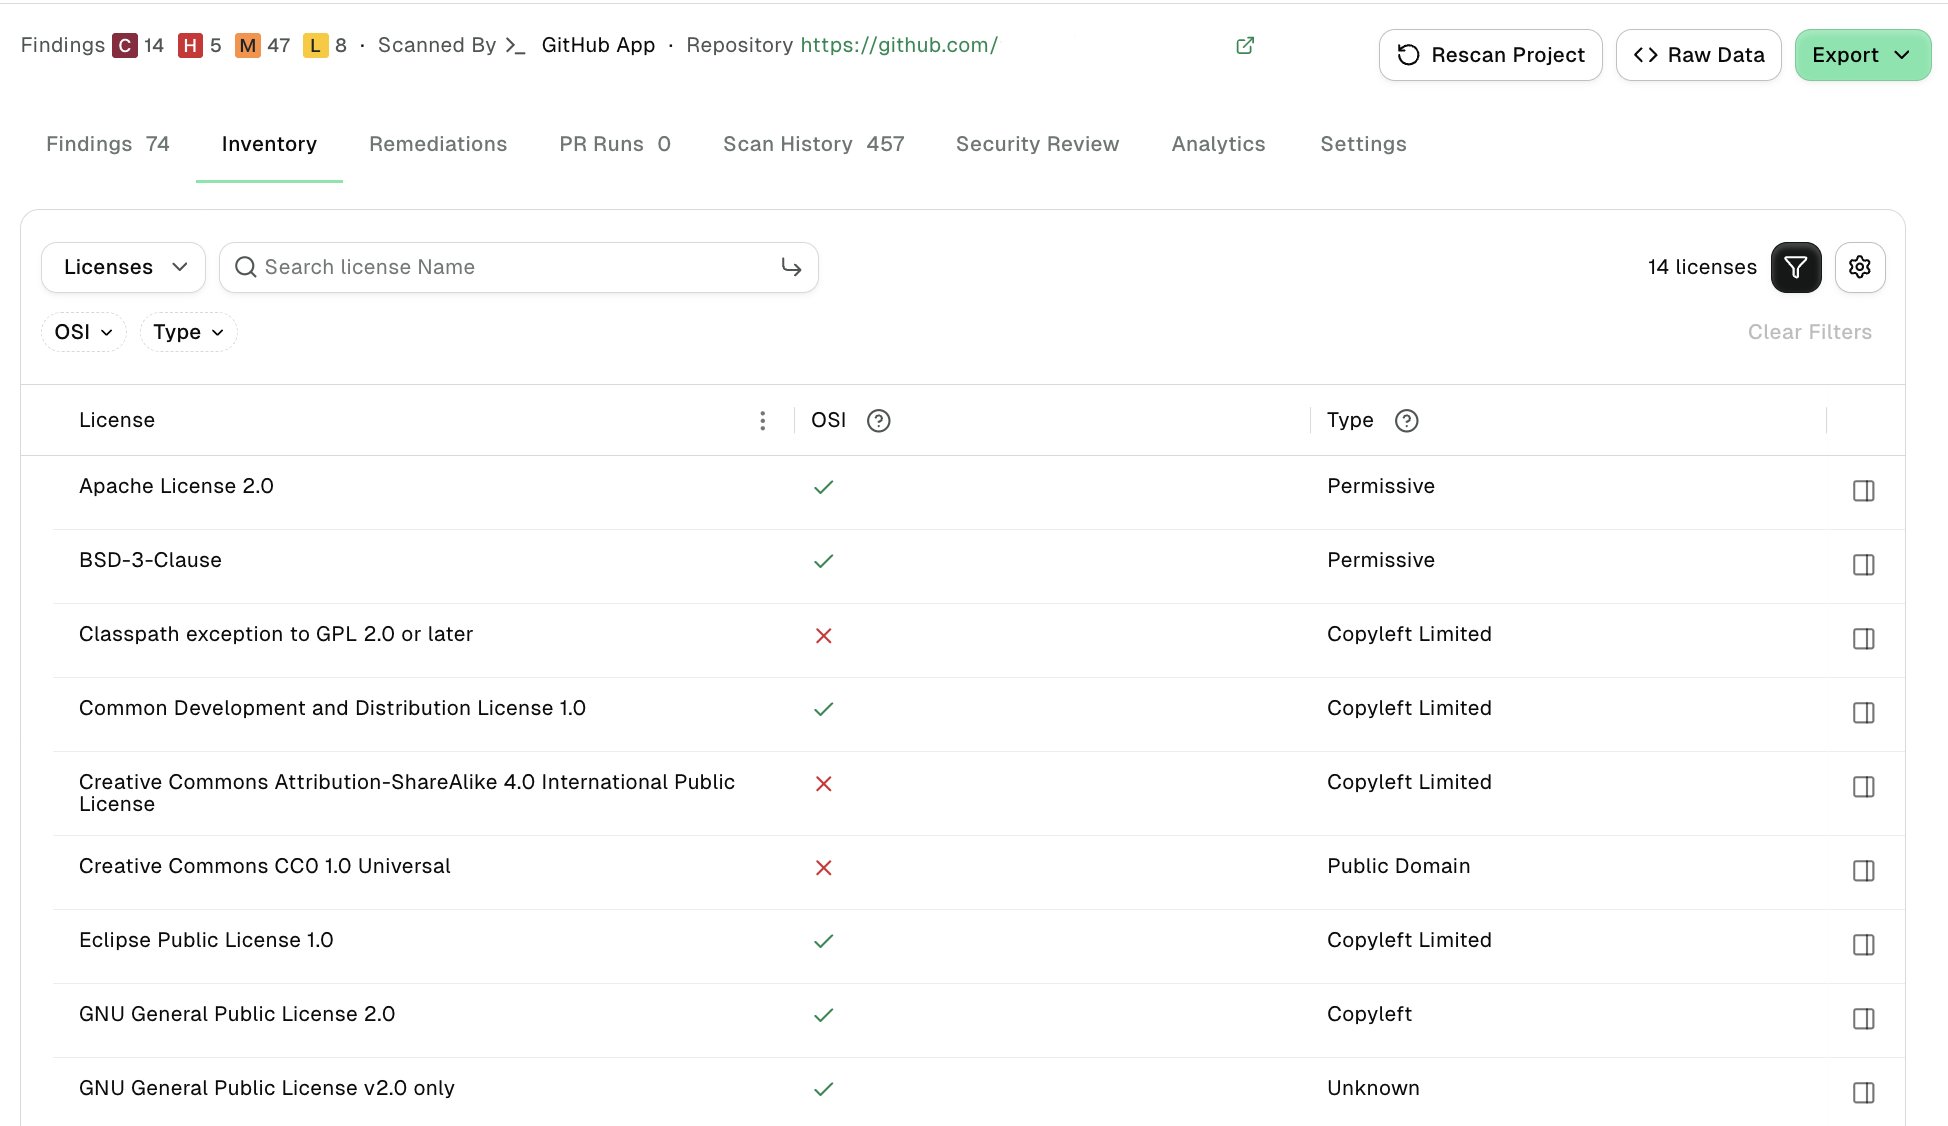
Select Inventory and select Licenses from the dropdown to view the list of licenses for that project.
-
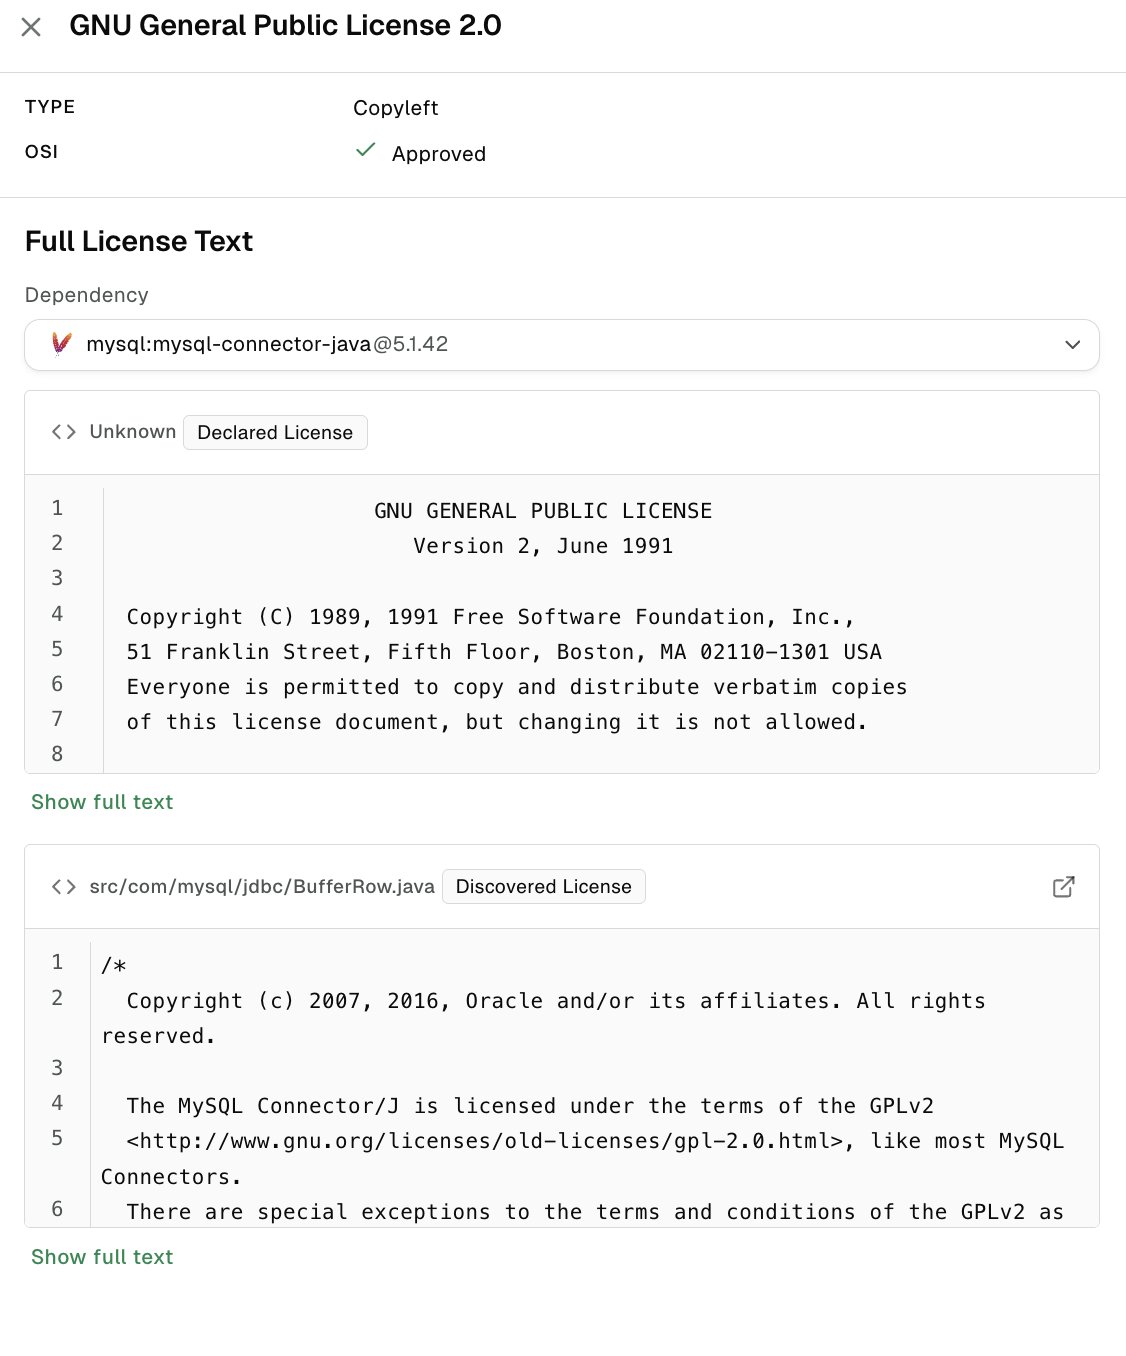
Select a license to view the following information.
- Type: Shows the type of license.
- OSI: Shows whether the license is OSI approved.
-
Full License Text: Shows the license text for the selected dependency version. You can view:
- Declared License: The license declared by the dependency.
- Discovered License: The license detected during scanning.
Edit license information
You require Admin role permissions to edit dependency license data. See authorization roles to learn about the different roles Endor Labs offers.
- Fix misclassified, missing, or unknown licenses so the effective license reflects the expected result.
- Update copyright, notice text, or license expressions used in generated Notices files.
- Standardize SPDX identifiers or expressions across projects.
- Select Projects from the left sidebar and select a project.
- Select Inventory and select Dependencies from the dropdown to view the list of dependencies for that project.
- Select a dependency and click Edit.
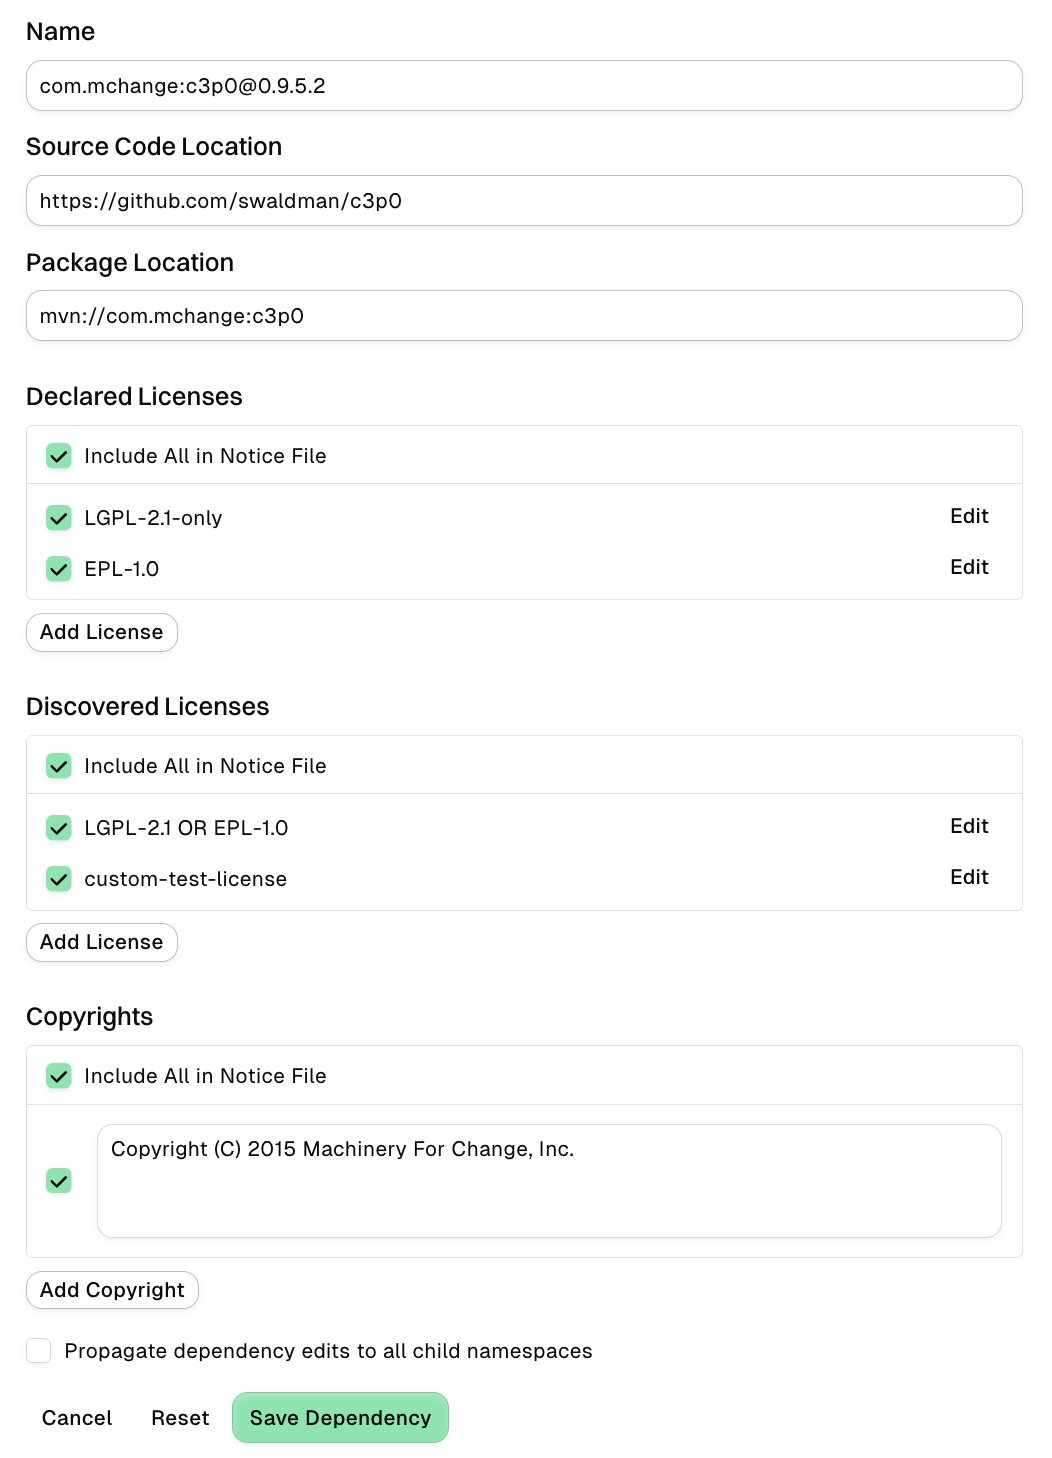
- The Edit Dependency page shows dependency metadata at the top, for example, name, source code location, and package location.
- Under Declared licenses and Discovered licenses, click Add License and search for a license to add. You can also edit existing licenses.
- Under Copyrights, click Add Copyright to add copyright statements.
- Optionally, select Propagate dependency edits to all child namespaces to apply the same changes to related namespaces.
-
Click Save Dependency to save the changes.
Generate a license notice report for a project Beta
A license notice report lists open source dependencies with their license texts, copyright notices, and source code locations. You must include a license notice report when you distribute software that contains open source dependencies. To generate a license notice report:- Select Projects from the left sidebar and select the project for which you want to generate a report.
-
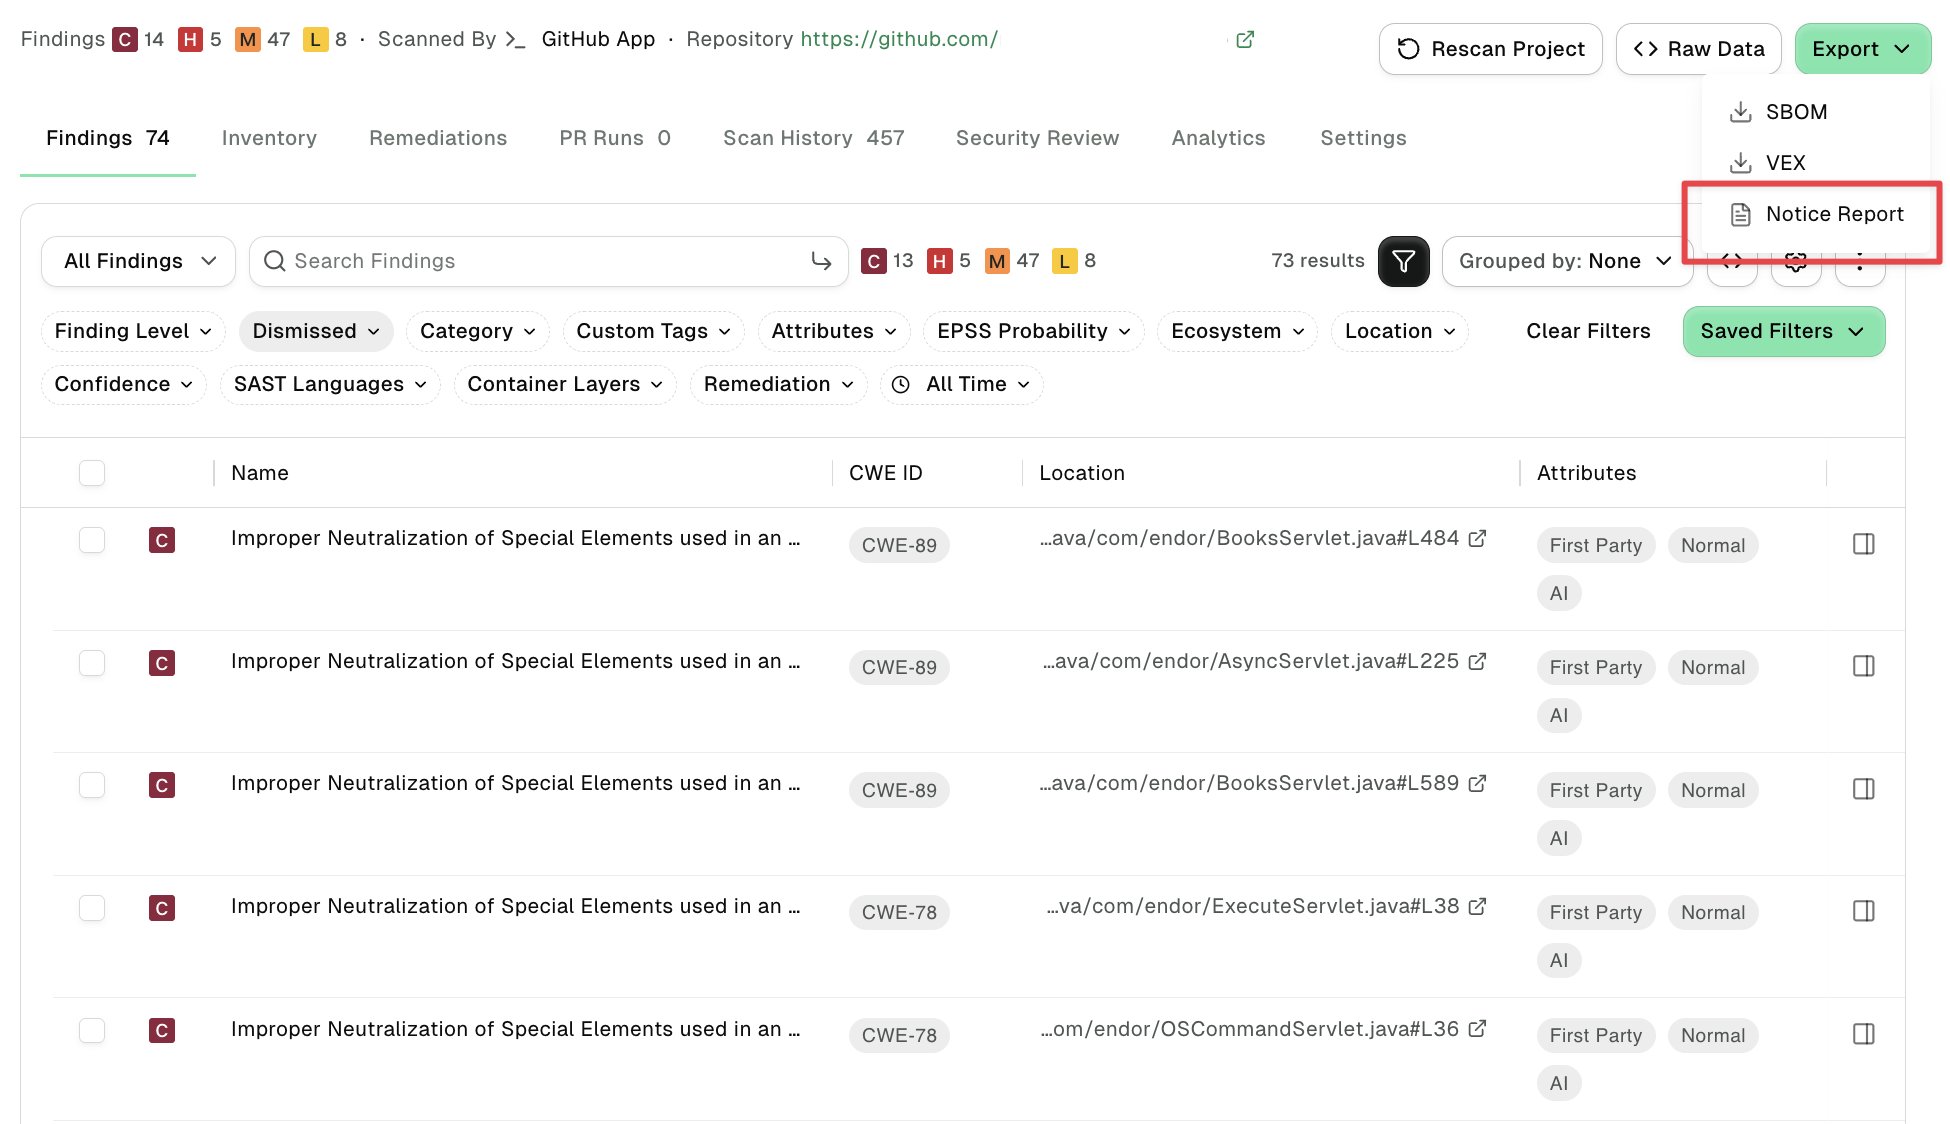
Click Export > Notice Report.
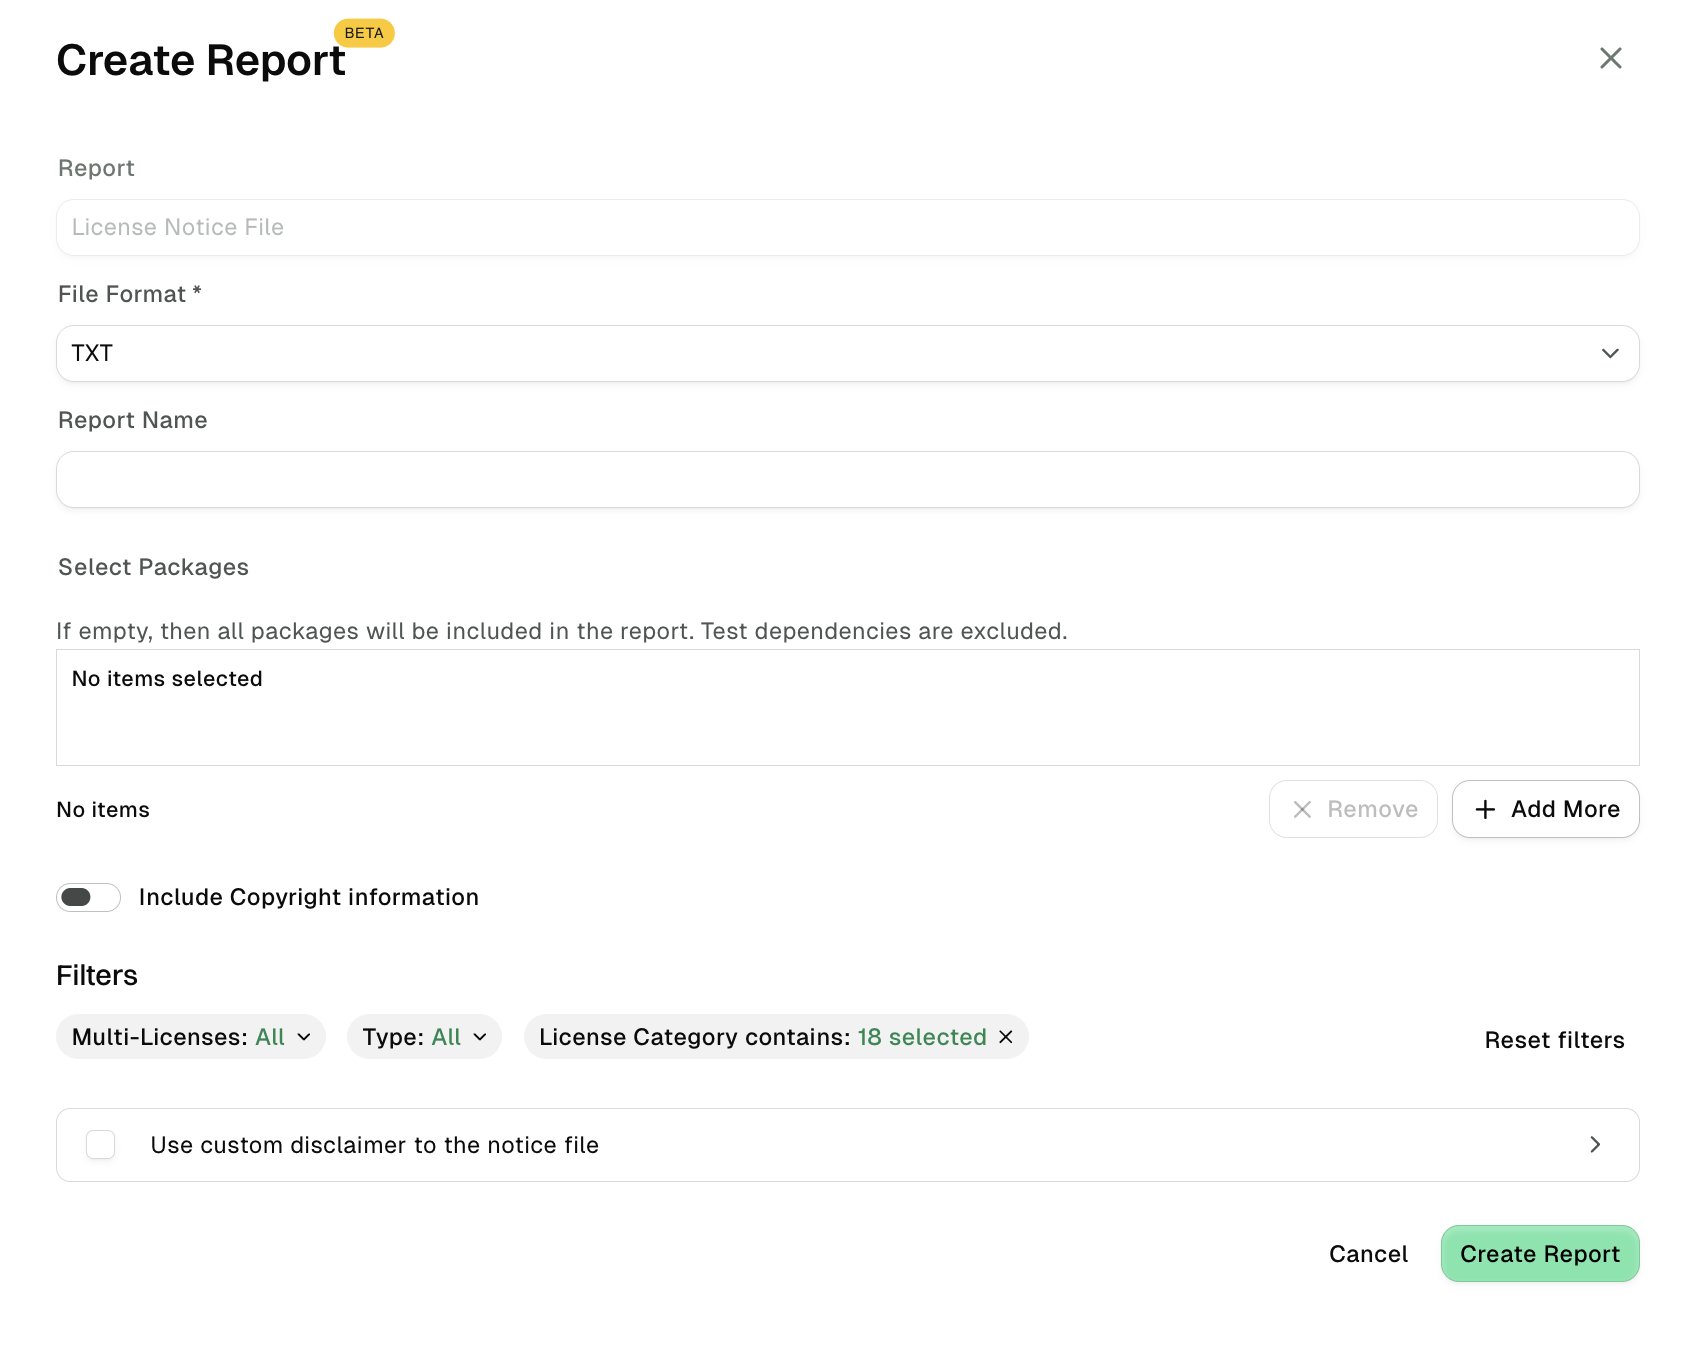
- Choose the output format for the report. Available formats are TXT and Markdown.
- Optionally, enter a Report Name. This sets the title printed inside the generated notice document. It doesn’t change the report’s name on the Reports page, which Endor Labs generates automatically.
- Under Select Packages, choose one or more packages for the report. If you don’t select any packages, the report includes all packages in the project. Test dependencies are excluded. Projects can contain multiple packages with several manifests. Selecting more than one package generates a single combined report.
-
Choose the following filters to refine the data included in the report.
- Multi-Licenses: Filter based on which license to use when a dependency has multiple licenses.
- Select All to include every license associated with the dependency.
- Select Most Permissive to include only the most permissive license.
- Type: Filter based on whether the license was declared by the dependency or discovered during scanning.
- Select All to include both declared and discovered licenses.
- Select Declared Only to include only licenses declared by the dependency.
- Select Discovered Only to include only licenses discovered during scanning.
- License Category: Select one or more license categories, such as Permissive, Copyleft, or Public Domain, to include in the report. By default, all license categories are included.
- Multi-Licenses: Filter based on which license to use when a dependency has multiple licenses.
- Toggle Include Copyright information to include copyright statements in the report. When you include copyright information, the Components section of the report lists the copyright statements found for each dependency, and includes dependencies that have copyright statements but no license information. Otherwise, Endor Labs omits those dependencies so the report contains no empty entries.
- Select Use custom disclaimer to the notice file to enter disclaimer text to show at the top of the notice file. You can enter up to 8,192 characters of disclaimer text.
- Click Create Report to generate the report.
View license notice reports
To view license notice reports:- Select Reports from the left sidebar.
- Select a report to view its details such as file format, license type, multi-license policy, copyrights setting, custom disclaimer, and package scope.
- To download a report, click the three vertical dots and click Download.
- To delete a report, click the three vertical dots and click Delete.