- Exception Policy: Applies during scan execution and suppresses all findings that match the defined criteria across the selected repository versions or projects.
- Snooze: Applies to a single finding instance for a specific target, repository version, and project. It takes effect immediately and applies only to the selected finding instance. You can’t snooze pull request findings, as each pull request represents a new repository version. However, you can dismiss PR findings using incremental PR scans, Exception Policy, or ignore files.
- Ignore File: Applies during scan execution and suppresses all findings matching the ignore file entries. Ignore files are part of the source code and are only applied to the parent repository version.
Dismiss findings using an exception policy
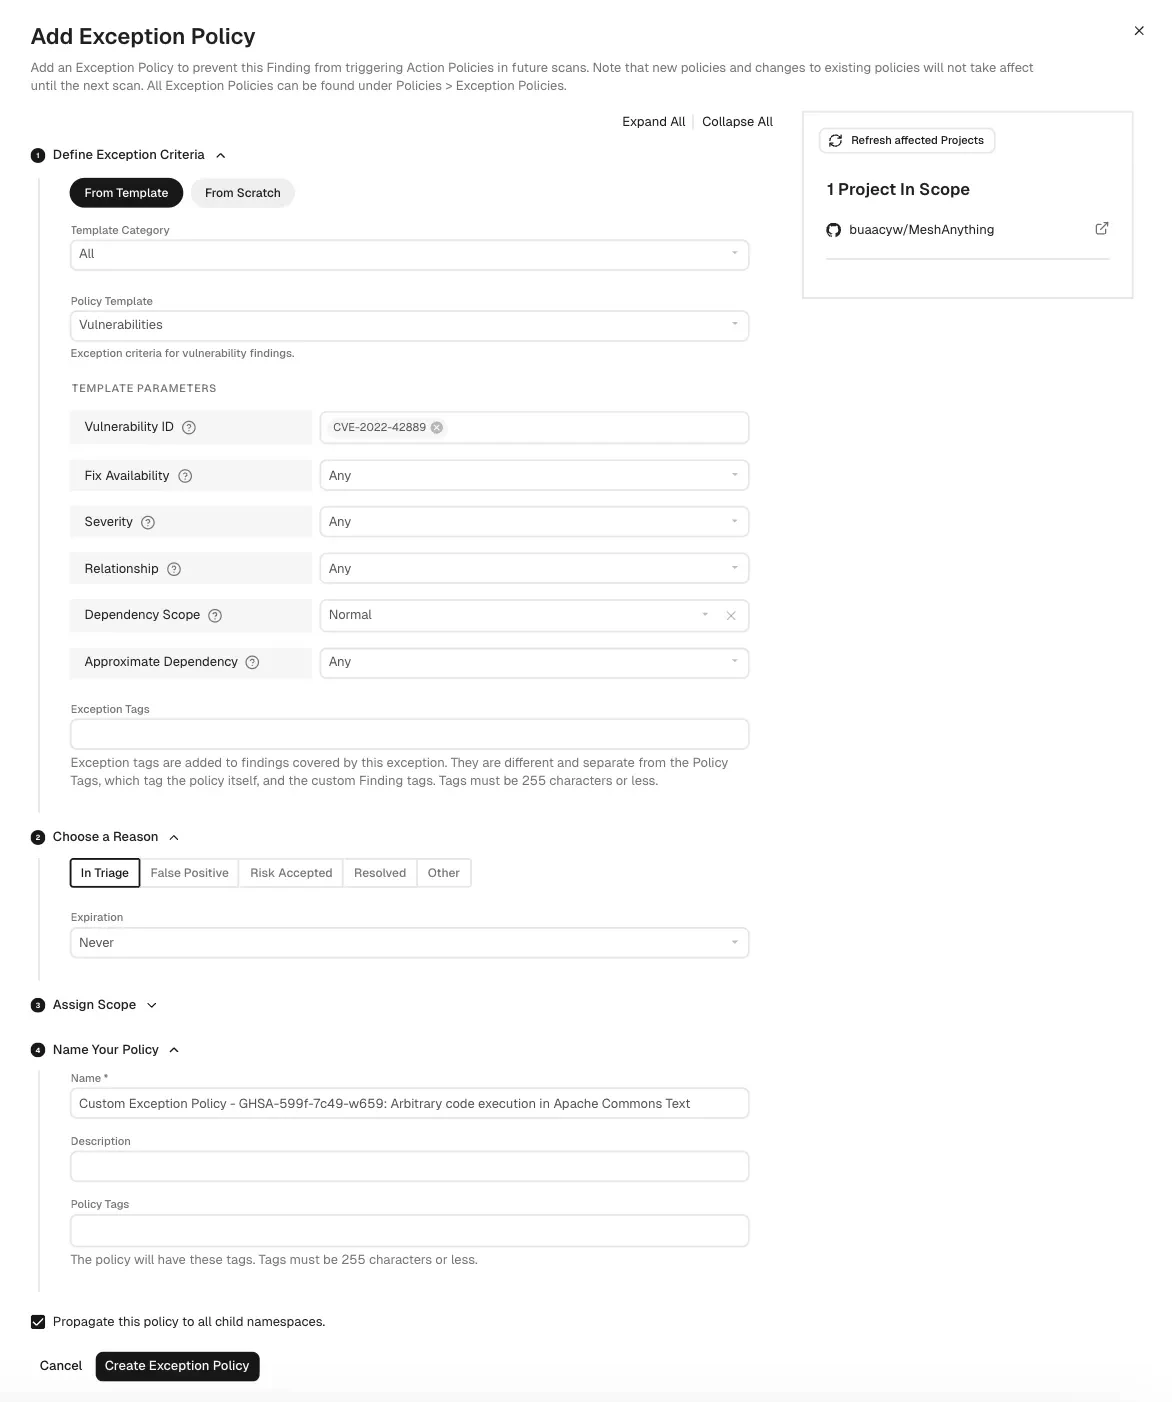
Add an exception policy to prevent a finding from triggering action policies in future scans.- Select Projects from the left sidebar.
- Search for and select a project, and select Findings.
- Search for findings using advanced or basic filters.
- Select findings and click the vertical three dots.
- Select Add Exception.
Snooze findings
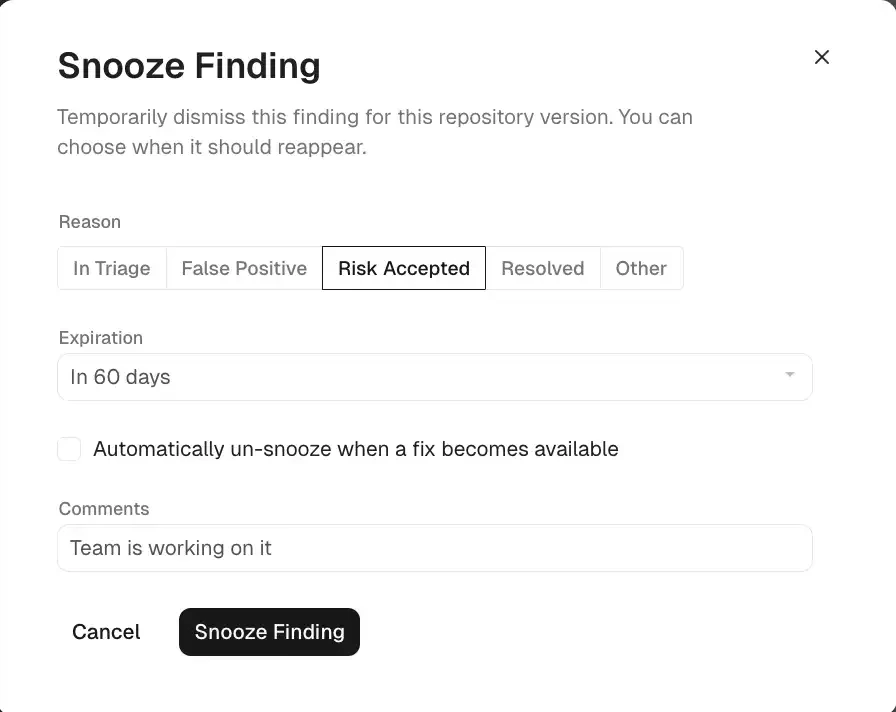
Snooze a finding to temporarily dismiss it and choose when it should reappear for findings that do not require immediate action or a permanent exception policy. To dismiss multiple findings, or a single finding across multiple repository versions or projects, create an exception policy.You require Admin or Code Scanner role permissions to snooze findings and edit snooze parameters. See authorization roles to learn about the different roles Endor Labs offers.
- Open the finding details.
- Click Snooze.
- Select the most appropriate reason to indicate why you’re snoozing the finding.
- Optionally, select Expiration to specify when the finding should reappear. If you set an expiration date, the finding will be automatically un-snoozed by the first scan on the expiration date.
- Optionally, for vulnerability findings, select Automatically un-snooze when a fix becomes available to have the finding reappear after the first scan once a fix becomes available.
- Optionally, add a comment to provide context for the snooze.
- Click Snooze Finding.
View snoozed findings
To view snoozed findings:- Select Findings from the left sidebar.
- Select Dismissed from saved filters and select Yes.
- Select Snoozed to view snoozed findings only.
- Use the filter form to refine results by reason, or expiry range.
- Click on a snoozed finding to view its details.
Un-snooze findings
When you un-snooze a finding, it immediately reappears in your findings list and dashboards. The finding becomes active again, and action policies will process it during the next scan. To un-snooze a finding:- Select Findings from the left sidebar.
- Select Dismissed from saved filters and select Yes to view snoozed findings.
- Click on a snoozed finding to view its details.
- Click Edit snooze and then click Un-snooze.
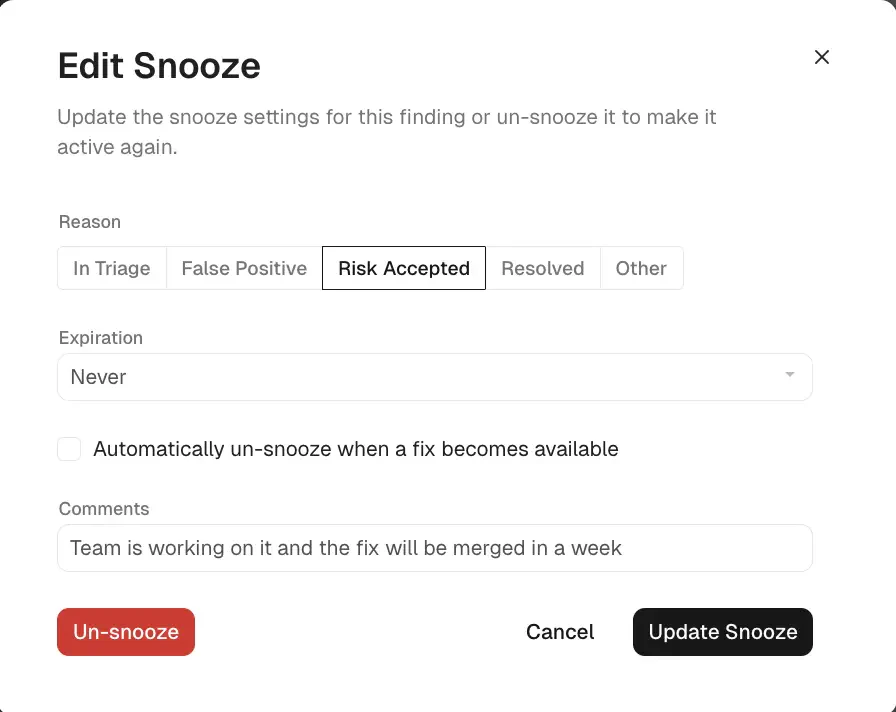
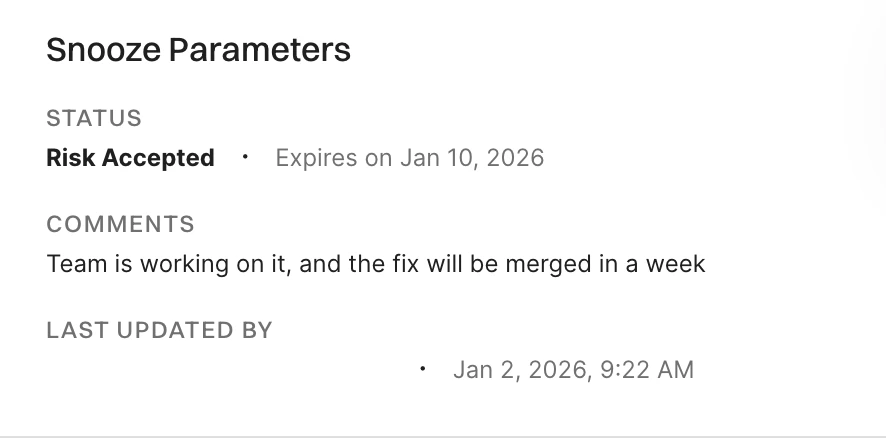
Update snoozed findings
To update snooze settings of a finding:- Select Dismissed from saved filters and select Yes to view snoozed findings.
- Click on a snoozed finding and click Edit snooze.
- Edit snooze settings such as expiration date, reason, or comments, and click Update Snooze to save the changes.
Dismiss findings using an ignore file
Ignore files let you dismiss findings by committing a file in your repository. Endor Labs applies them during scan execution, and they only affect the repository version that contains the file (the parent of the scan). Any finding that matches an entry in the ignore file does not appear in the findings list or trigger action policies.You must allow ignore files to dismiss findings in Settings > SYSTEM SETTINGS > Developer Workflows for scans to process ignore files.
- Yaml format: A list of ignore entries. Each entry specifies the finding by name, dependency, or other fields, plus metadata such as reason, expiration date, and comments.
- Raw vulnerability IDs: A plain list of vulnerability identifiers (for example, CVE or GHSA), one per line, for vulnerability findings only. This format does not require yaml structure.
.endorignore.yaml. Your administrator can configure additional files in Developer Workflows. Set up CODEOWNERS for all supported ignore files so that changes require approval before merge.
Ignore file yaml syntax
The ignore file contains entries that specify the findings to suppress during scans. Use the endorctl ignore command to create the file if needed and format the yaml entries automatically. Use the endorctl validate ignore command to validate the file after changes or branch merges. The file must include a top-levelversion and an ignore key whose value is a list of entries. Each entry supports the following fields.
The following example shows a valid ignore file in yaml format with a version, an ignore list, and entries that use the fields described above.
Ignore file plain text format
You can ignore vulnerability findings by listing the vulnerability IDs in a plain text file.View ignored findings
To view ignored findings:- Select Findings from the left sidebar.
- Select Dismissed from saved filters and select Yes.
- Select Ignored to view ignored findings only.
- Use the filter form to refine results by reason, or expiry range.
- Click on an ignored finding to view its details.
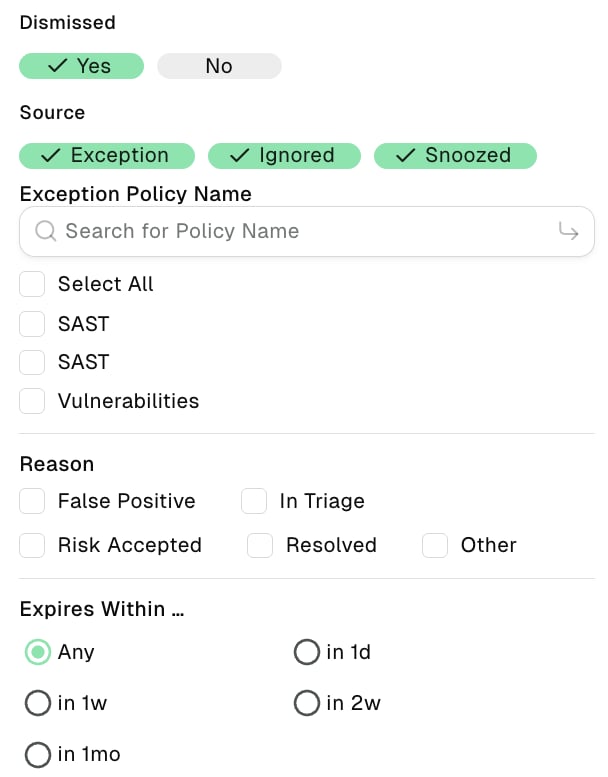
Filter dismissed findings
Use the following options to filter dismissed findings.- Select Yes to view only dismissed findings in the findings table.
- Select No to hide dismissed findings from the findings table.
- Deselect both Yes and No to include dismissed findings in the findings table along with the rest of the findings.
- Select Exception, Ignored, and/or Snoozed, to filter by dismissal method.
- For exception findings, choose from one of the existing exception policies in the list or search for a specific exception using Search for Policy Name.
- Select Reason to filter dismissed findings by reason.
- Select Expires Within to filter dismissed findings by expiration time-frame.