Prerequisites for GitHub Cloud App Pro
Before installing and scanning projects with Endor Labs GitHub Cloud App Pro, make sure you have:- Administrative permissions to your GitHub organization. Installing the Endor Labs GitHub Cloud App Pro in your organization requires approval or permissions from your GitHub organizational administrator. If you don’t have the permissions, use the command line utility,
endorctl, while you wait for the approval. - Endor Labs GitHub Cloud App Pro requires the following permissions:
- Read access to Dependabot alerts, actions, administration, checks, code, commit statuses, issues, metadata, packages, pull requests, repository hooks, and security events.
- Read and write access to checks, contents, and pull requests.
- Write access to code scanning alerts to upload findings to GitHub Advanced Security as SARIF files.
Namespace for GitHub App installation
We recommend installing GitHub Cloud App Pro in a dedicated child namespace rather than your root namespace. Namespace creation is not automatic, so create the child namespace before starting the installation. Endor Labs creates projects that map to the repositories selected during GitHub Cloud App Pro installation in the namespace you choose. Creating a dedicated child namespace for each SCM integration keeps projects isolated, simplifies policy management and access control, and scales more cleanly as your Endor Labs deployment grows.Install GitHub Cloud App Pro
To automatically scan repositories using the GitHub App and create automatic PRs to fix vulnerabilities:- Select Projects from the left sidebar
- Click Add Project.
-
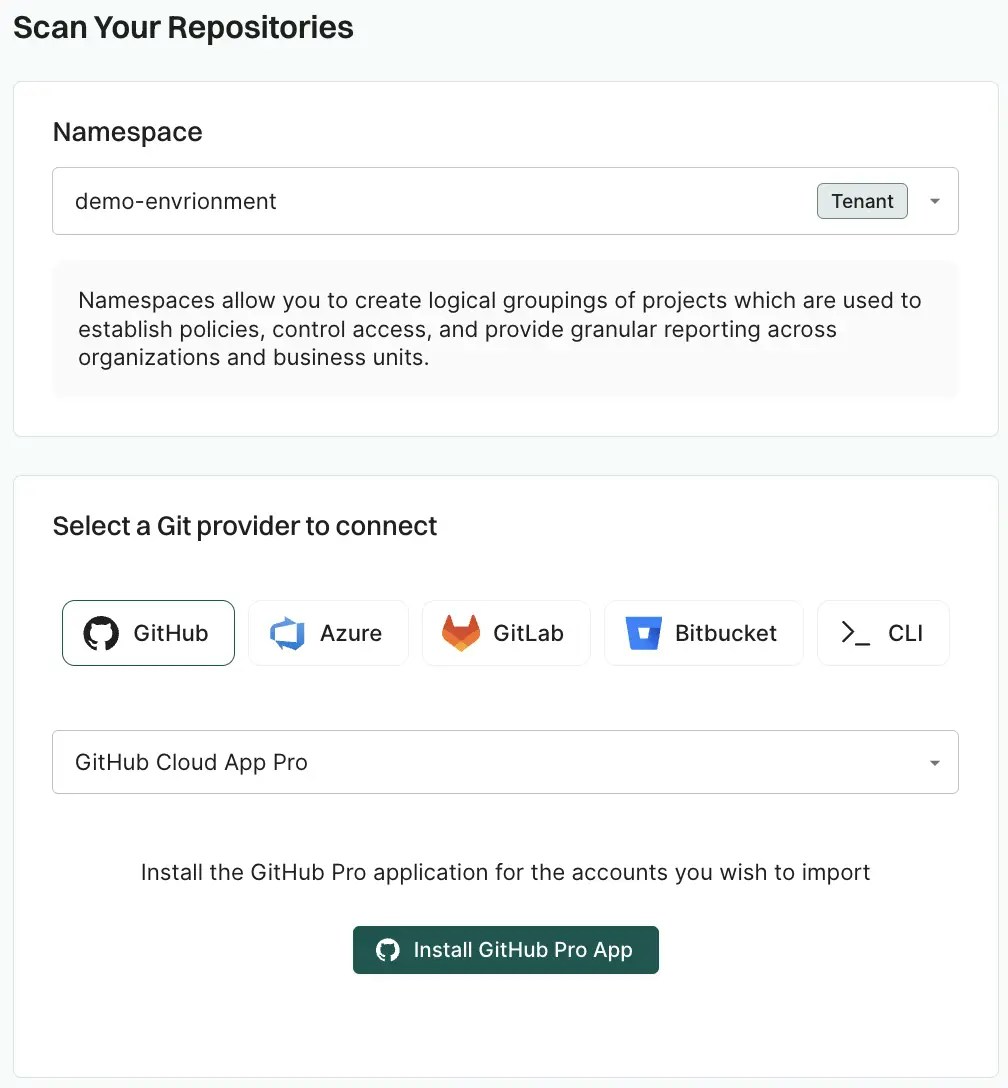
Under Namespace, select the Endor Labs namespace for this installation.
We recommend you use a child namespace for better organization of your projects.
-
From GitHub, choose GitHub Cloud App Pro.
-
Click Install GitHub Pro App.
You will be redirected to GitHub to install the Endor Labs App Pro.

- Click Install.
- Select a user to authorize the app.
- Select the organization in which you want to install the app.
-
You can select to install and authorize Endor Labs to scan either all repositories or a selected subset. If you choose All repositories, Endor Labs immediately scans newly created repositories, without waiting for the next scheduled monitoring run.

-
Review the permissions required for Endor Labs and click Install and Authorize.
If the button to install says Install and Request instead of Install and Authorize, you don’t have permission to install the GitHub App. Use the endorctl command line interface or select Install and Request to notify your organizational administrator of your request to install. If you select Install and Request your installation will not be active unless your organizational administrator approves the request to install GitHub App.
-
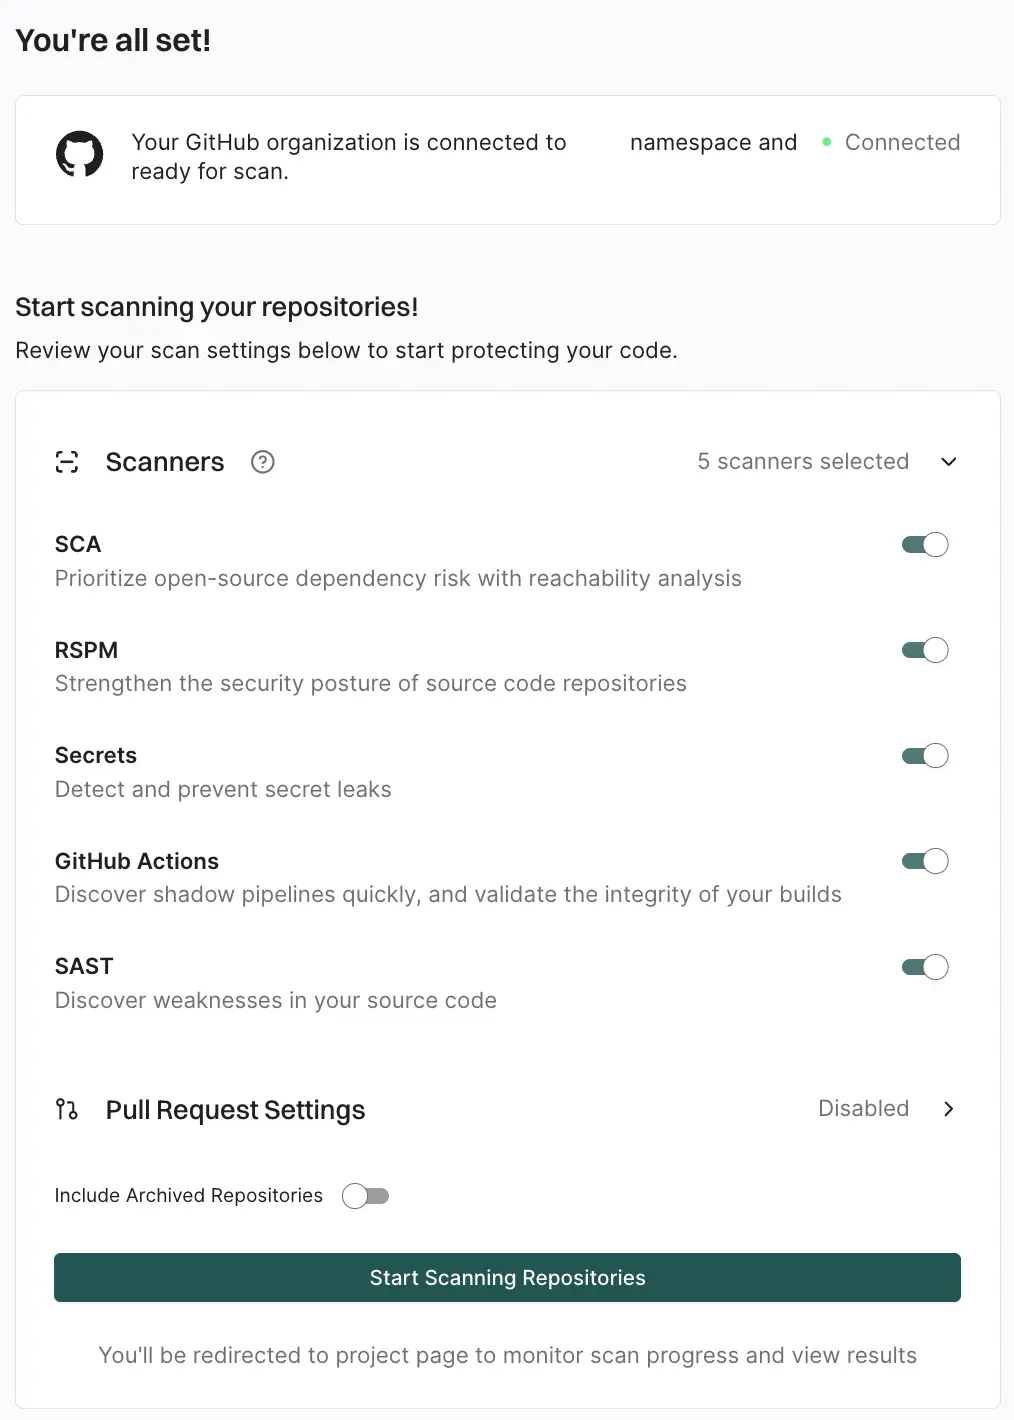
Based on your license, select and enable the scanners.
The following scanners are available:
- SCA: Perform software composition analysis and discover AI models used in your repository.
- RSPM: Scan the repository for misconfigurations. RSPM scans run every week on Sundays.
- Secret: Scan the repository for exposed secrets.
- GitHub Actions: Scan the repository and identify all the GitHub Actions workflows used in the repository.
- SAST: Scan your source code for weakness and generate SAST findings.
- Optionally, you can continue to Configure GitHub App Pro PR scans to scan your pull requests. You can also enable PR scans later by editing the GitHub App Pro integration.
- Select Include Archived Repositories to scan your archived repositories. By default, the GitHub archived repositories aren’t scanned.
- Click Start Scanning Repositories.
Configure PR scans during GitHub App Pro installation
After you complete the initial installation of the GitHub App Pro in Endor Labs, you can configure PR scans. At this point, the GitHub App Pro will be operational. See Pull Request scans for more information about PR scanning. You can also choose to apply PR scans to specific projects rather than all the projects in the organization through a scan profile. See Scan profiles for PR scans for more information.-
Select Pull Request Settings and toggle on Enable Pull Request scans to enable automatic scanning of PRs submitted by users.
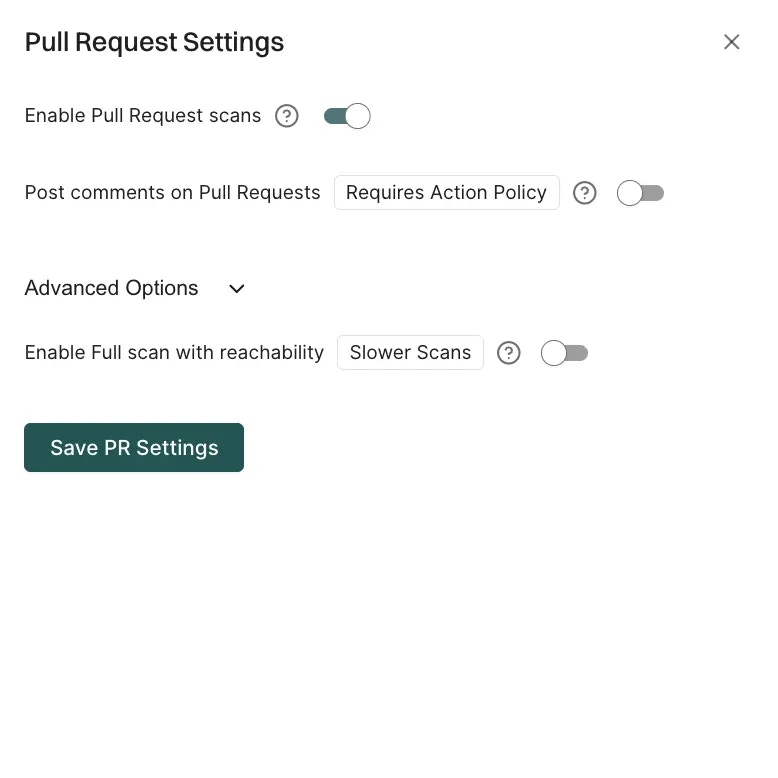
- Optionally, toggle on Post comments on Pull Requests to allow Endor Labs to comment on PRs for policy violations. When you enable PR comments, Endor Labs will post a comment on the pull request if any issues are detected during the PR scan. You need to set up PR comments in Endor Labs to receive the comments. See PR comments for more information.
- By default, PR scans skip reachability analysis for faster results. Under Advanced Options, toggle on Enable Full scan with reachability when you want reachability analysis and call graph generation for supported languages.
- Select Save PR Settings to save the configuration.
Enabling pull request scans does not block merges on its own. To block pull requests on findings, configure an action policy and mark the Endor Labs Automated Scan check as a required status check in GitHub. See Block pull requests on findings.
Configure PR scans for existing GitHub App Pro integrations
You can configure PR scans for an existing GitHub App Pro integration, or enable them after installation, from the integration settings.- Select User menu > Integrations from the left sidebar.
- Click Manage next to GitHub under Source Control Managers.
- Click the vertical three dots next to the GitHub App integration that you want to update.
- Select Edit Configuration.
-
Select Pull Request Settings.
- Toggle on Enable Pull Request Scans to enable PR scans.
- Optionally, toggle on Post comments on Pull Requests to allow Endor Labs to comment on PRs for policy violations.
- Optionally toggle on Enable Full scan with reachability when you want reachability analysis and call graph generation for supported languages.
- Click Save PR Settings to save the PR settings.
- Click Update Configuration to save the changes.
Click Rescan Org after editing the integration to apply changes immediately instead of waiting for the next scheduled scan.
Default branch detection
When Endor Labs scans a repository for the first time, it detects the default branch of the repository. The findings that are created in the scan are associated with the default branch.Changing the default branch
When you change the default branch in your source control system (for example, frommain to dev):
- Endor Labs automatically detects the new default branch and sets that as the default reference
- The previous default branch becomes a reference branch
- Scans continue on the new default branch and the reference branch
Renaming the default branch
When you rename the default branch in your source control system:- Endor Labs automatically switches to the renamed branch
- Scans continue without disruption
Adding repository versions
When you add a new repository version (for example, adev branch), both the default branch and the new version are scanned by the Endor Labs App.
Control default branch detection
You can control the default branch detection by setting theENDOR_SCAN_TRACK_DEFAULT_BRANCH environment variable in a scan profile. You need to configure the project to use the scan profile. See Configure scan profiles for more information.
By default, the environment variable is set to true. When set to true, the default branch detection is enabled, and the first branch you scan is automatically considered as the default branch.