endorctl scan --secrets to scan for leaked secrets in your source code. You can also scan for secrets with monitoring scans and CI scans. Ensure that you select Secrets as a scan type when you install the Endor Labs App for your SCM to scan for secrets during monitoring scans.
The following table lists the options available with endorctl for secrets scan.
Scan methods
You can perform the following types of scans to detect secrets:- Scan a specific code reference - Scan for secrets only on a defined path in the context of a checked-out branch, commit SHA or tag to identify secrets and raise findings. This helps you to identify secrets that are leaked in the context of what you are working on right now.
- Scan complete history - Scan for secrets in all existing branches or tags to identify if a secret has ever been leaked in the history of the project and raise findings. This helps you to identify if any secret has ever been leaked even if it was not leaked in the context of what you are working on right now.
- Scan pre-commits - Scan for secrets in the code before committing the code to your repository during the automated pre-commit checks. This helps you identify and remove sensitive information from your code files early in the development life cycle.
Scan a specific code reference
When starting a secrets scan, this default choice utilizes specified rules to search for patterns on the files located in the path where the scan is initiated. Run the following command in the directory of the code reference to scan for secrets.--dependencies option in the secrets scan to perform a regular scan that also scans the dependencies.
Scan complete history
You can scan the Git logs by using the complete history scan. The repository should be present in the scanned path. Endor Labs examines the entire repository history to search for secrets. To perform a complete scan, include the--git-logs option in the command line.
--dependencies option in the secrets scan to perform a regular dependency scan along with secret scanning.
--git-logs option scans the repository’s Git logs using the following logic:
- Perform a full scan if it is the first time the repository’s Git log history is scanned.
- Perform a full rescan if a change has been detected to any of the rules in the namespace.
- Perform an incremental scan based on the last time a scan was performed in all the other cases.
--dependencies option in the secrets scan to perform a regular scan that also scans the dependencies.
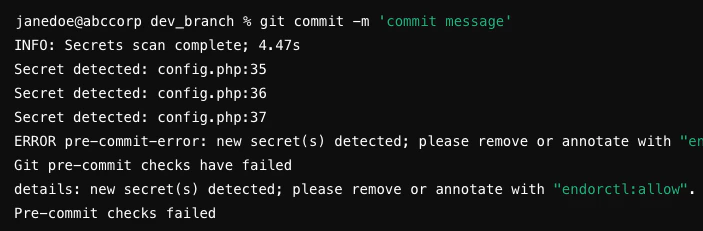
Scan pre-commits
You can check for secrets before committing the code to the repository as part of pre-commit hooks. You must install and initialize endorctl before scanning the pre-commits.-
Create a
.git/hooks/pre-commitfile at the root of your Git repository to configure the pre-commit hook. It runs automatically when you make a commit and looks for secrets in your commit. -
Edit the
.git/hooks/pre-commitand include:--pre-commit-checksperforms a pre-commit scan and will scan only the current changes that you are committing to the repository. -
Set the file permissions to make it executable.
You can’t push the
.git/hooks/folder to the Git repository because it’s only recognized locally on your system. To include the pre-commit code in the Git repository, save it in a different location, like ahooks/directory, and then copy it into.git/hooks/. This way, you can easily push the hook code to your Git repository. -
You can set up this hook on other systems in your organization by creating a script and running it on each system.
Endor Labs secret rules come packaged with the
endorctl binary, so a local secrets scan using the --pre-commit flag does not need to connect to Endor Labs services over the internet, making the scan extremely fast. However, this also means the pre-commit scan does not include any custom secret rules added to your namespace.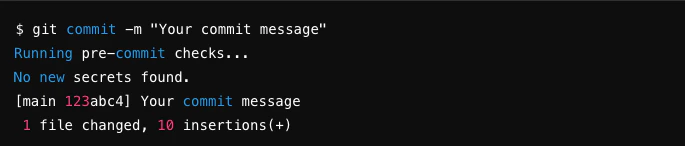
Exclude false positives from secret scan
There might be cases where certain lines of code or specific patterns are mistakenly flagged as potential secrets but are safe to include such as test values or non-sensitive information. To handle such false positives, you can annotate the non-sensitive lines in your source code withendorctl:allow.