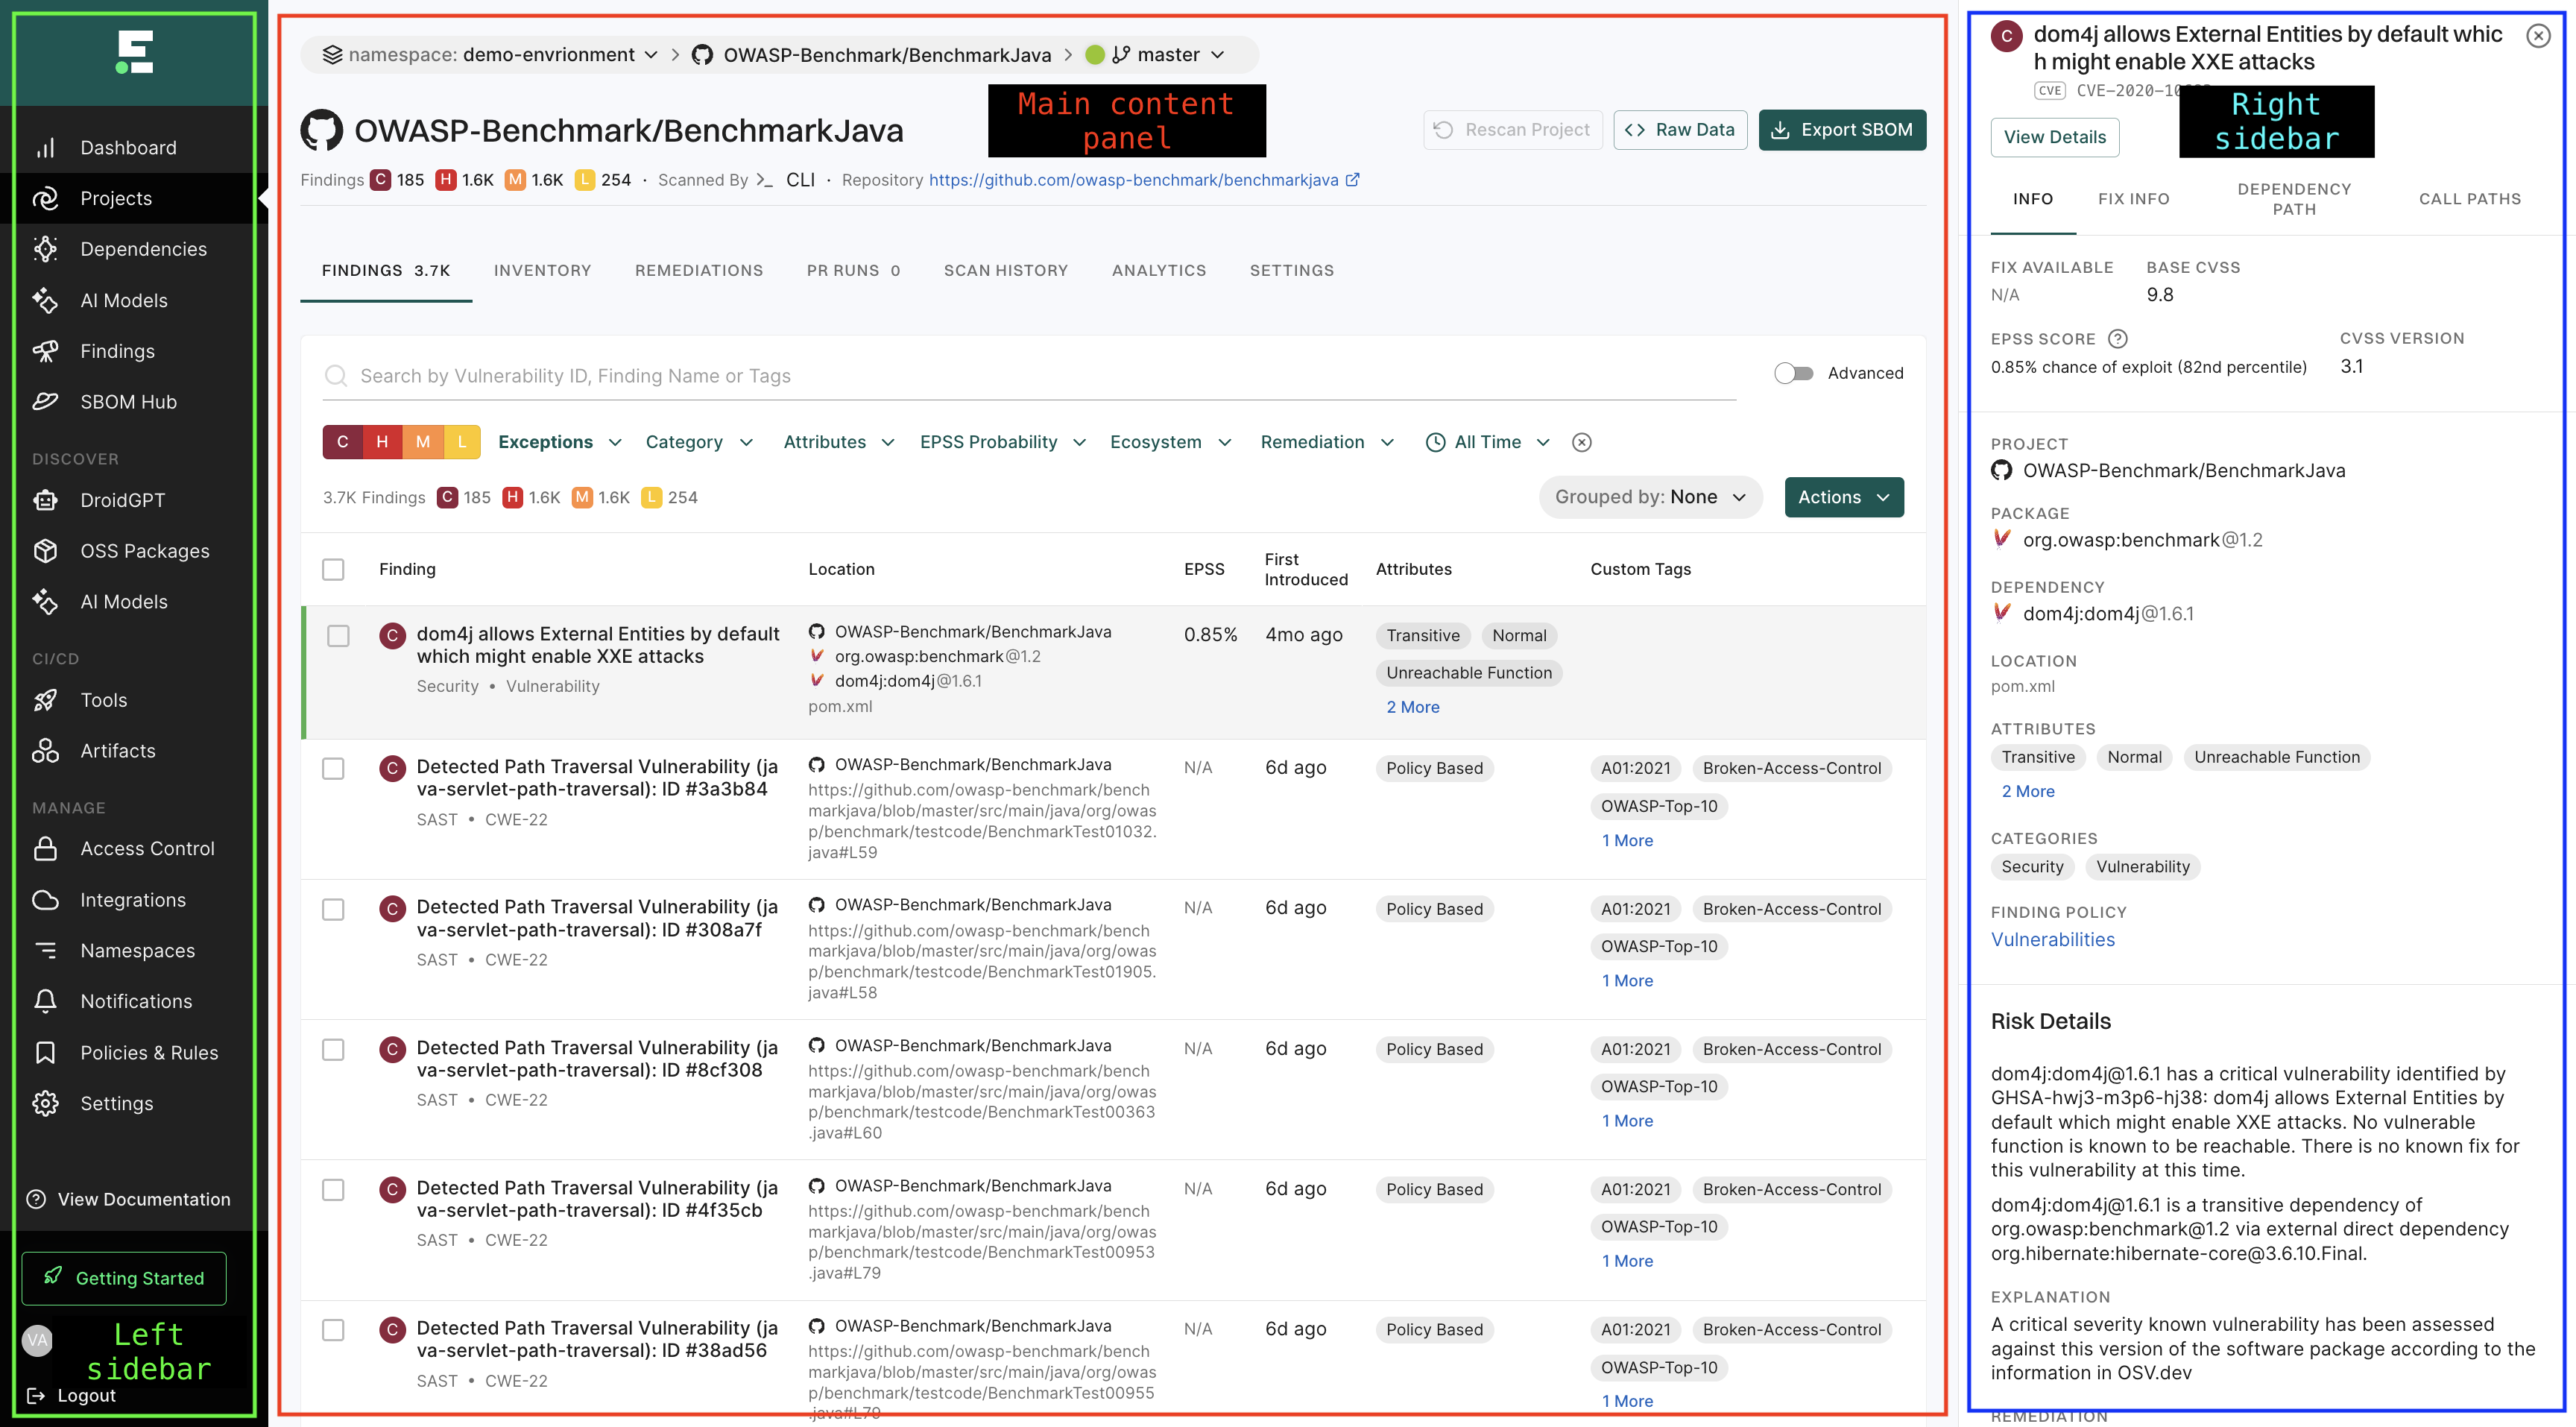
The Endor Labs user interface is designed for efficient navigation, with the primary menu located in the left sidebar.
To access the Endor Labs user interface, sign into Endor Labs with your credentials.
The Endor Labs user interface page is structured into three main sections:
- Left sidebar: The left sidebar provides quick access to different modules and features of the platform.
- Main content panel: This section displays the primary information and data relevant to the selected module.
- Right sidebar: This section provides the detail drawers of the selected view in the main content area offering quick access to supplementary data.
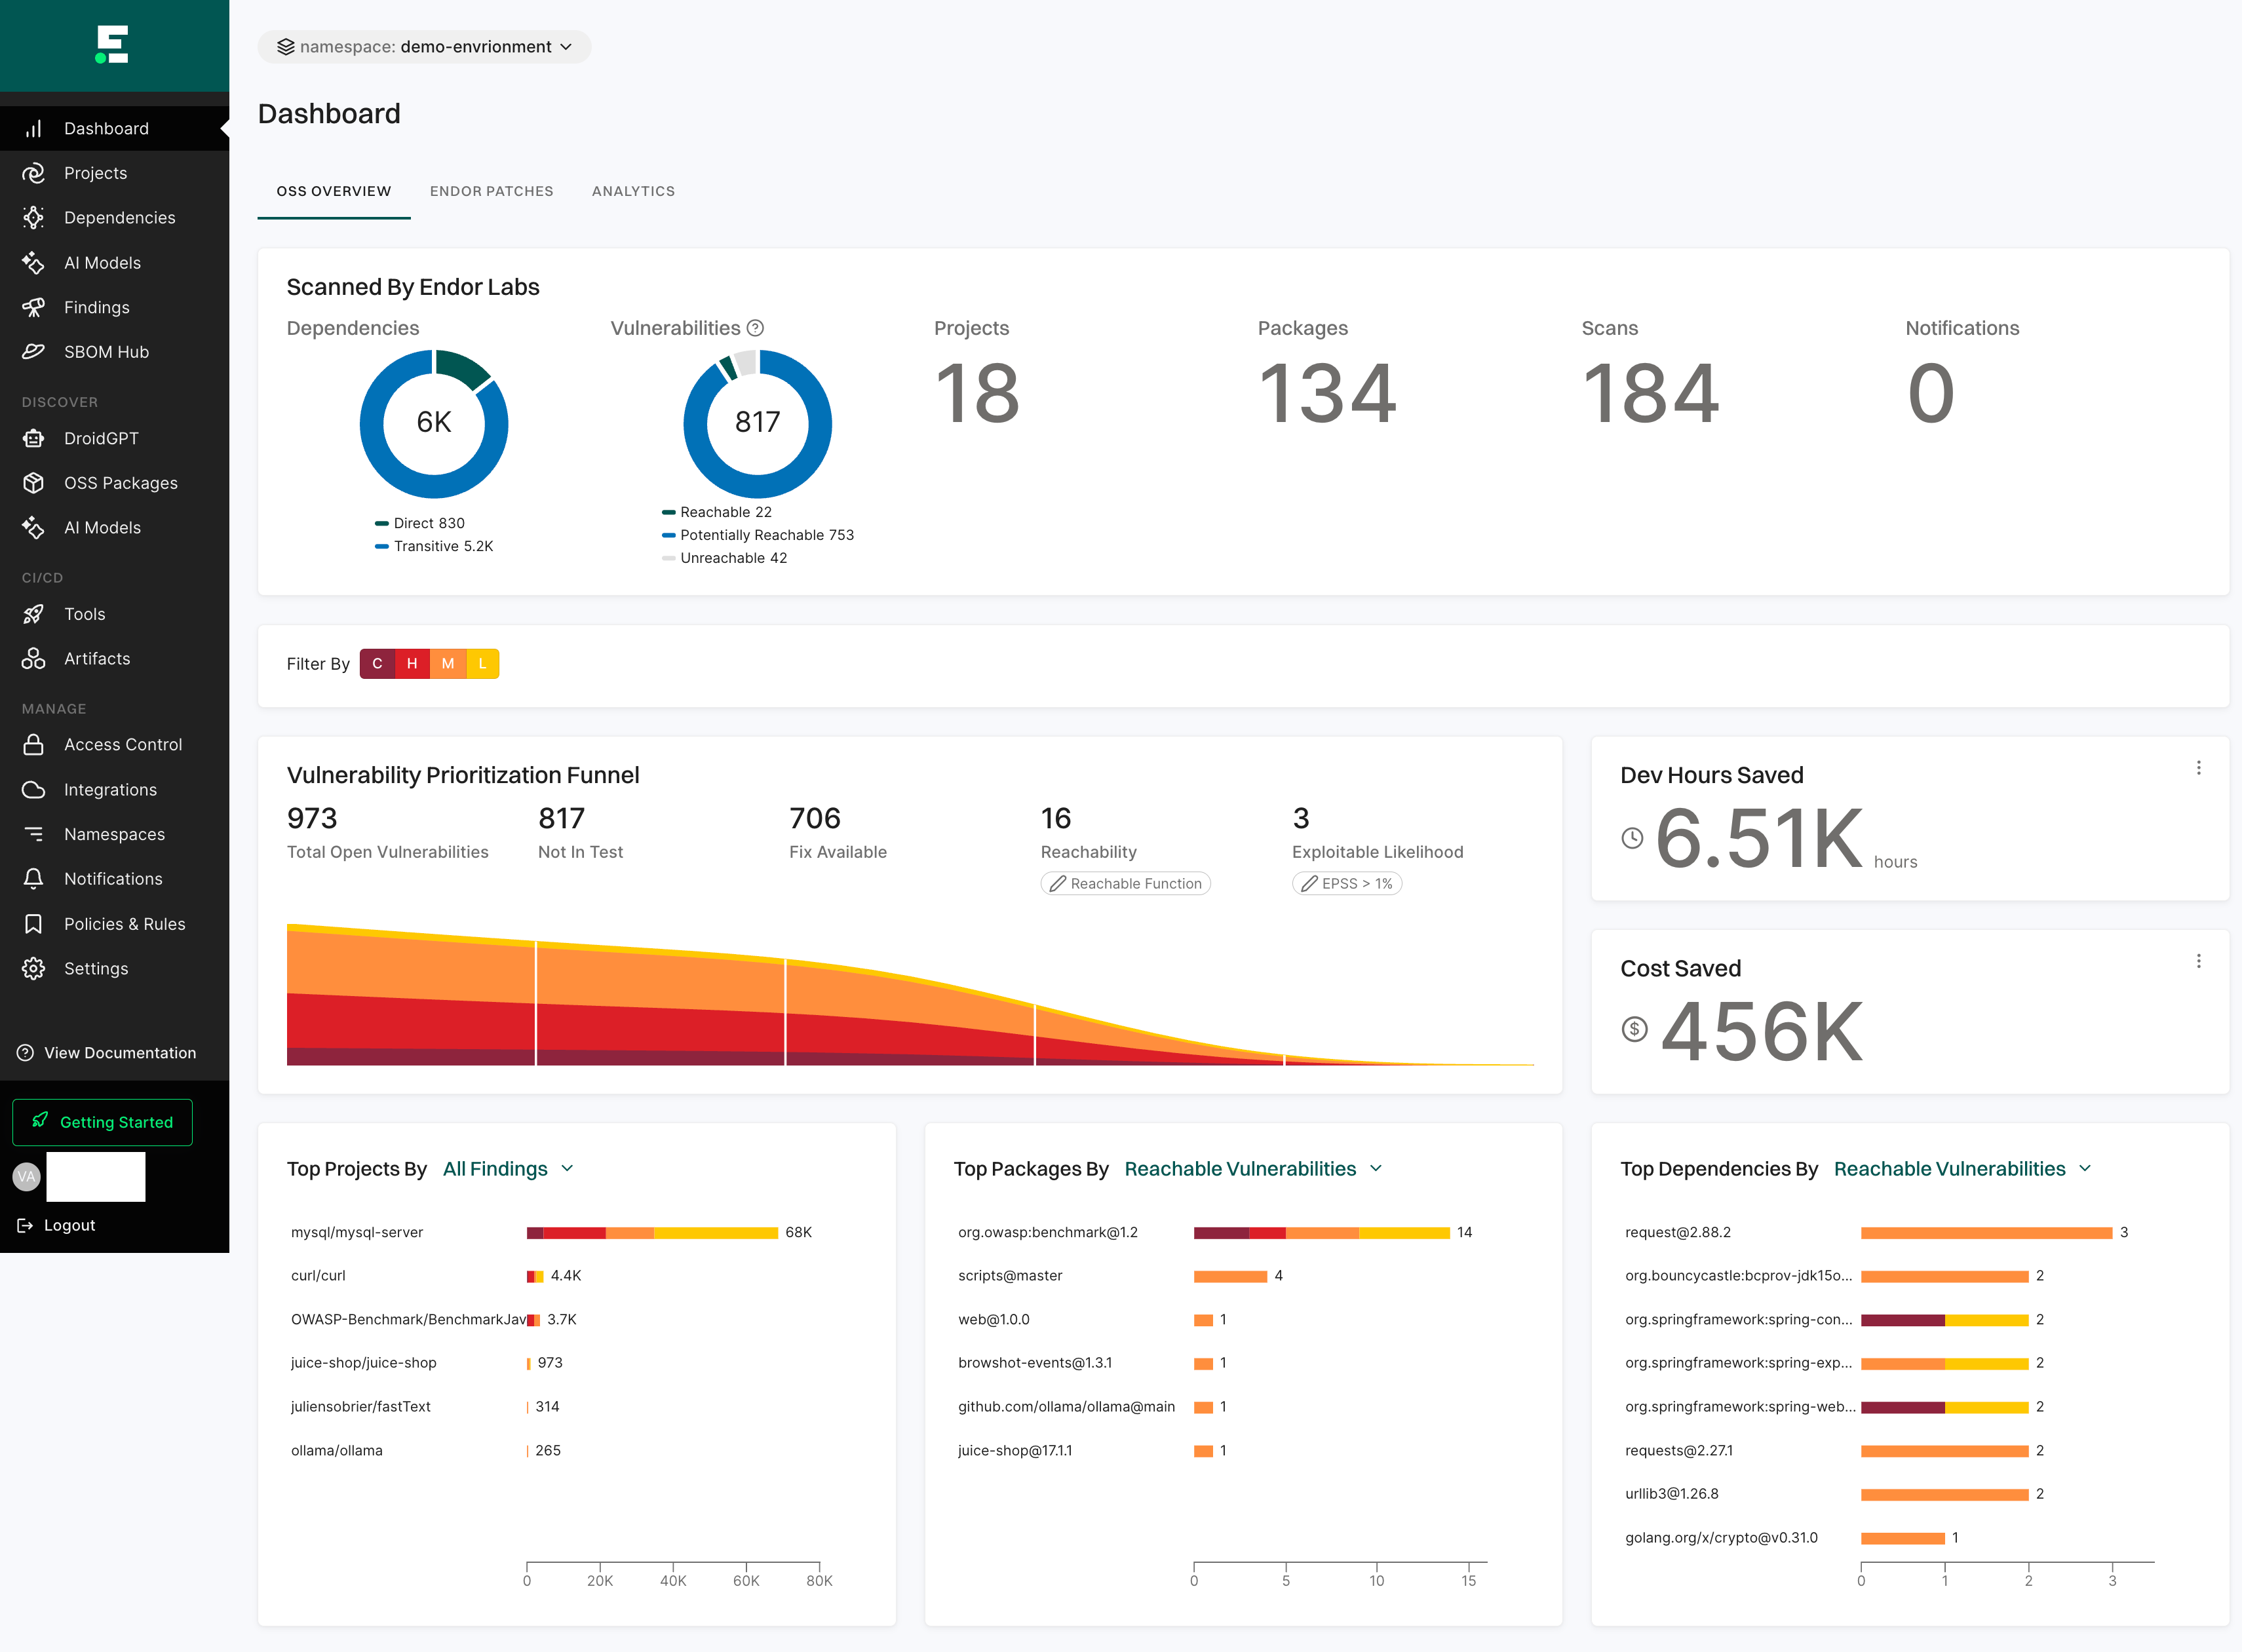
Dashboard
The Dashboard gives a quick and clear view of your project’s security status.
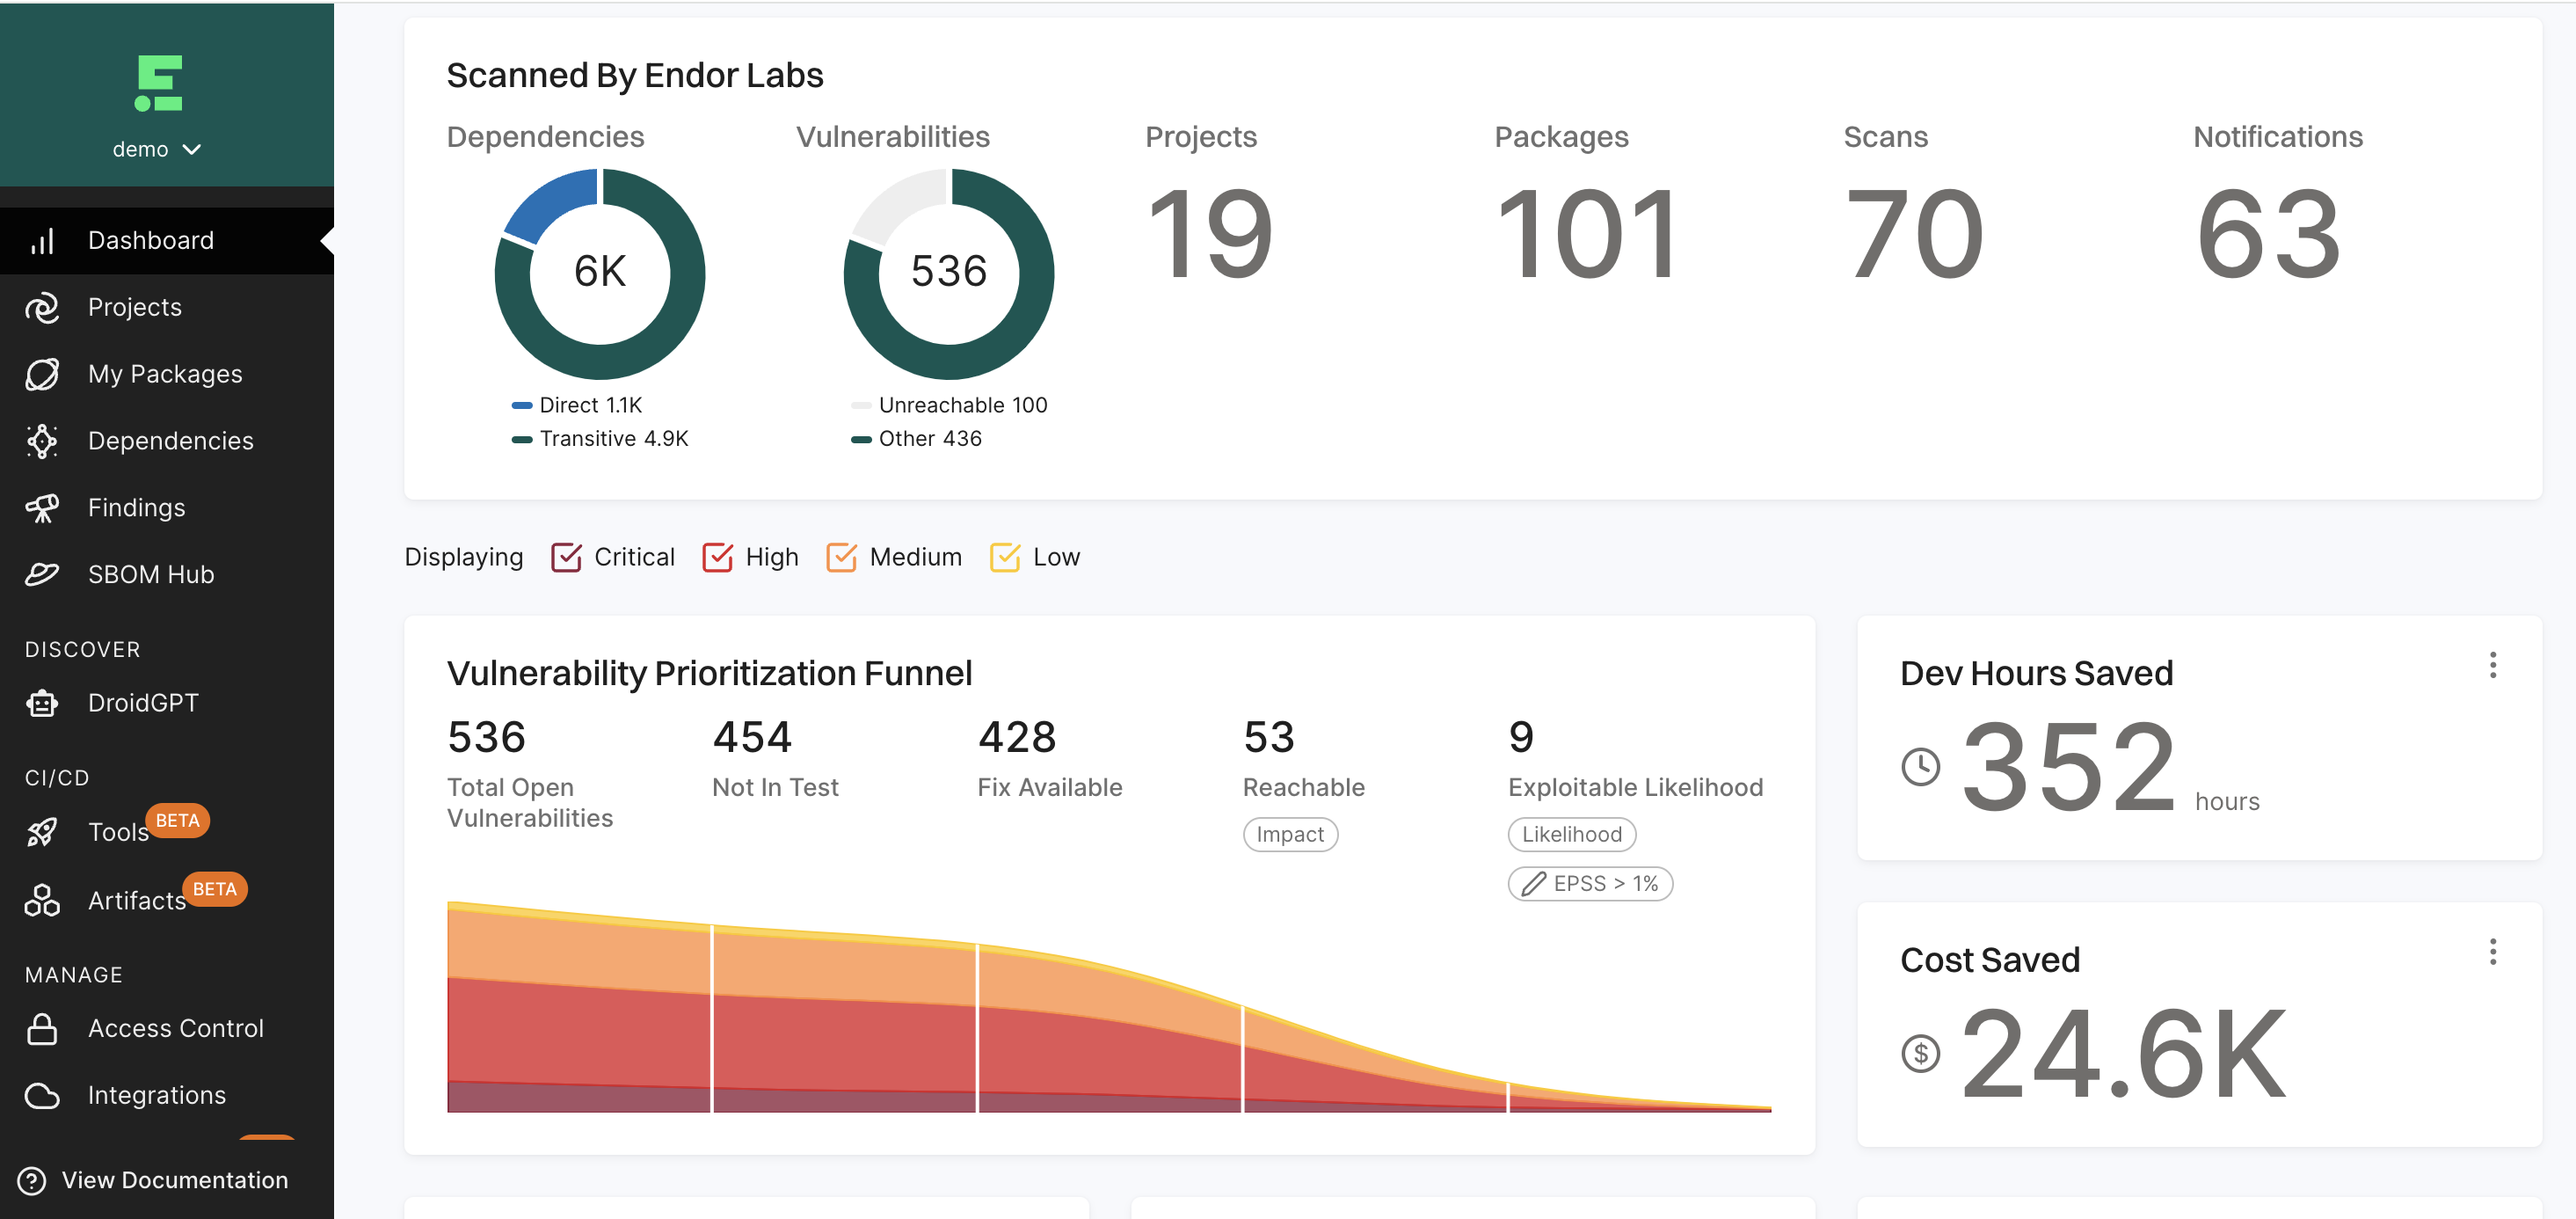
See Dashboard Documentation for more information.
Projects
The Projects page helps you manage and track your software packages and dependencies.
You can:
- Search and filter projects across different namespaces.
- View findings associated with each project to assess security risks.
- Add new projects to your workspace by clicking the Add Project option.
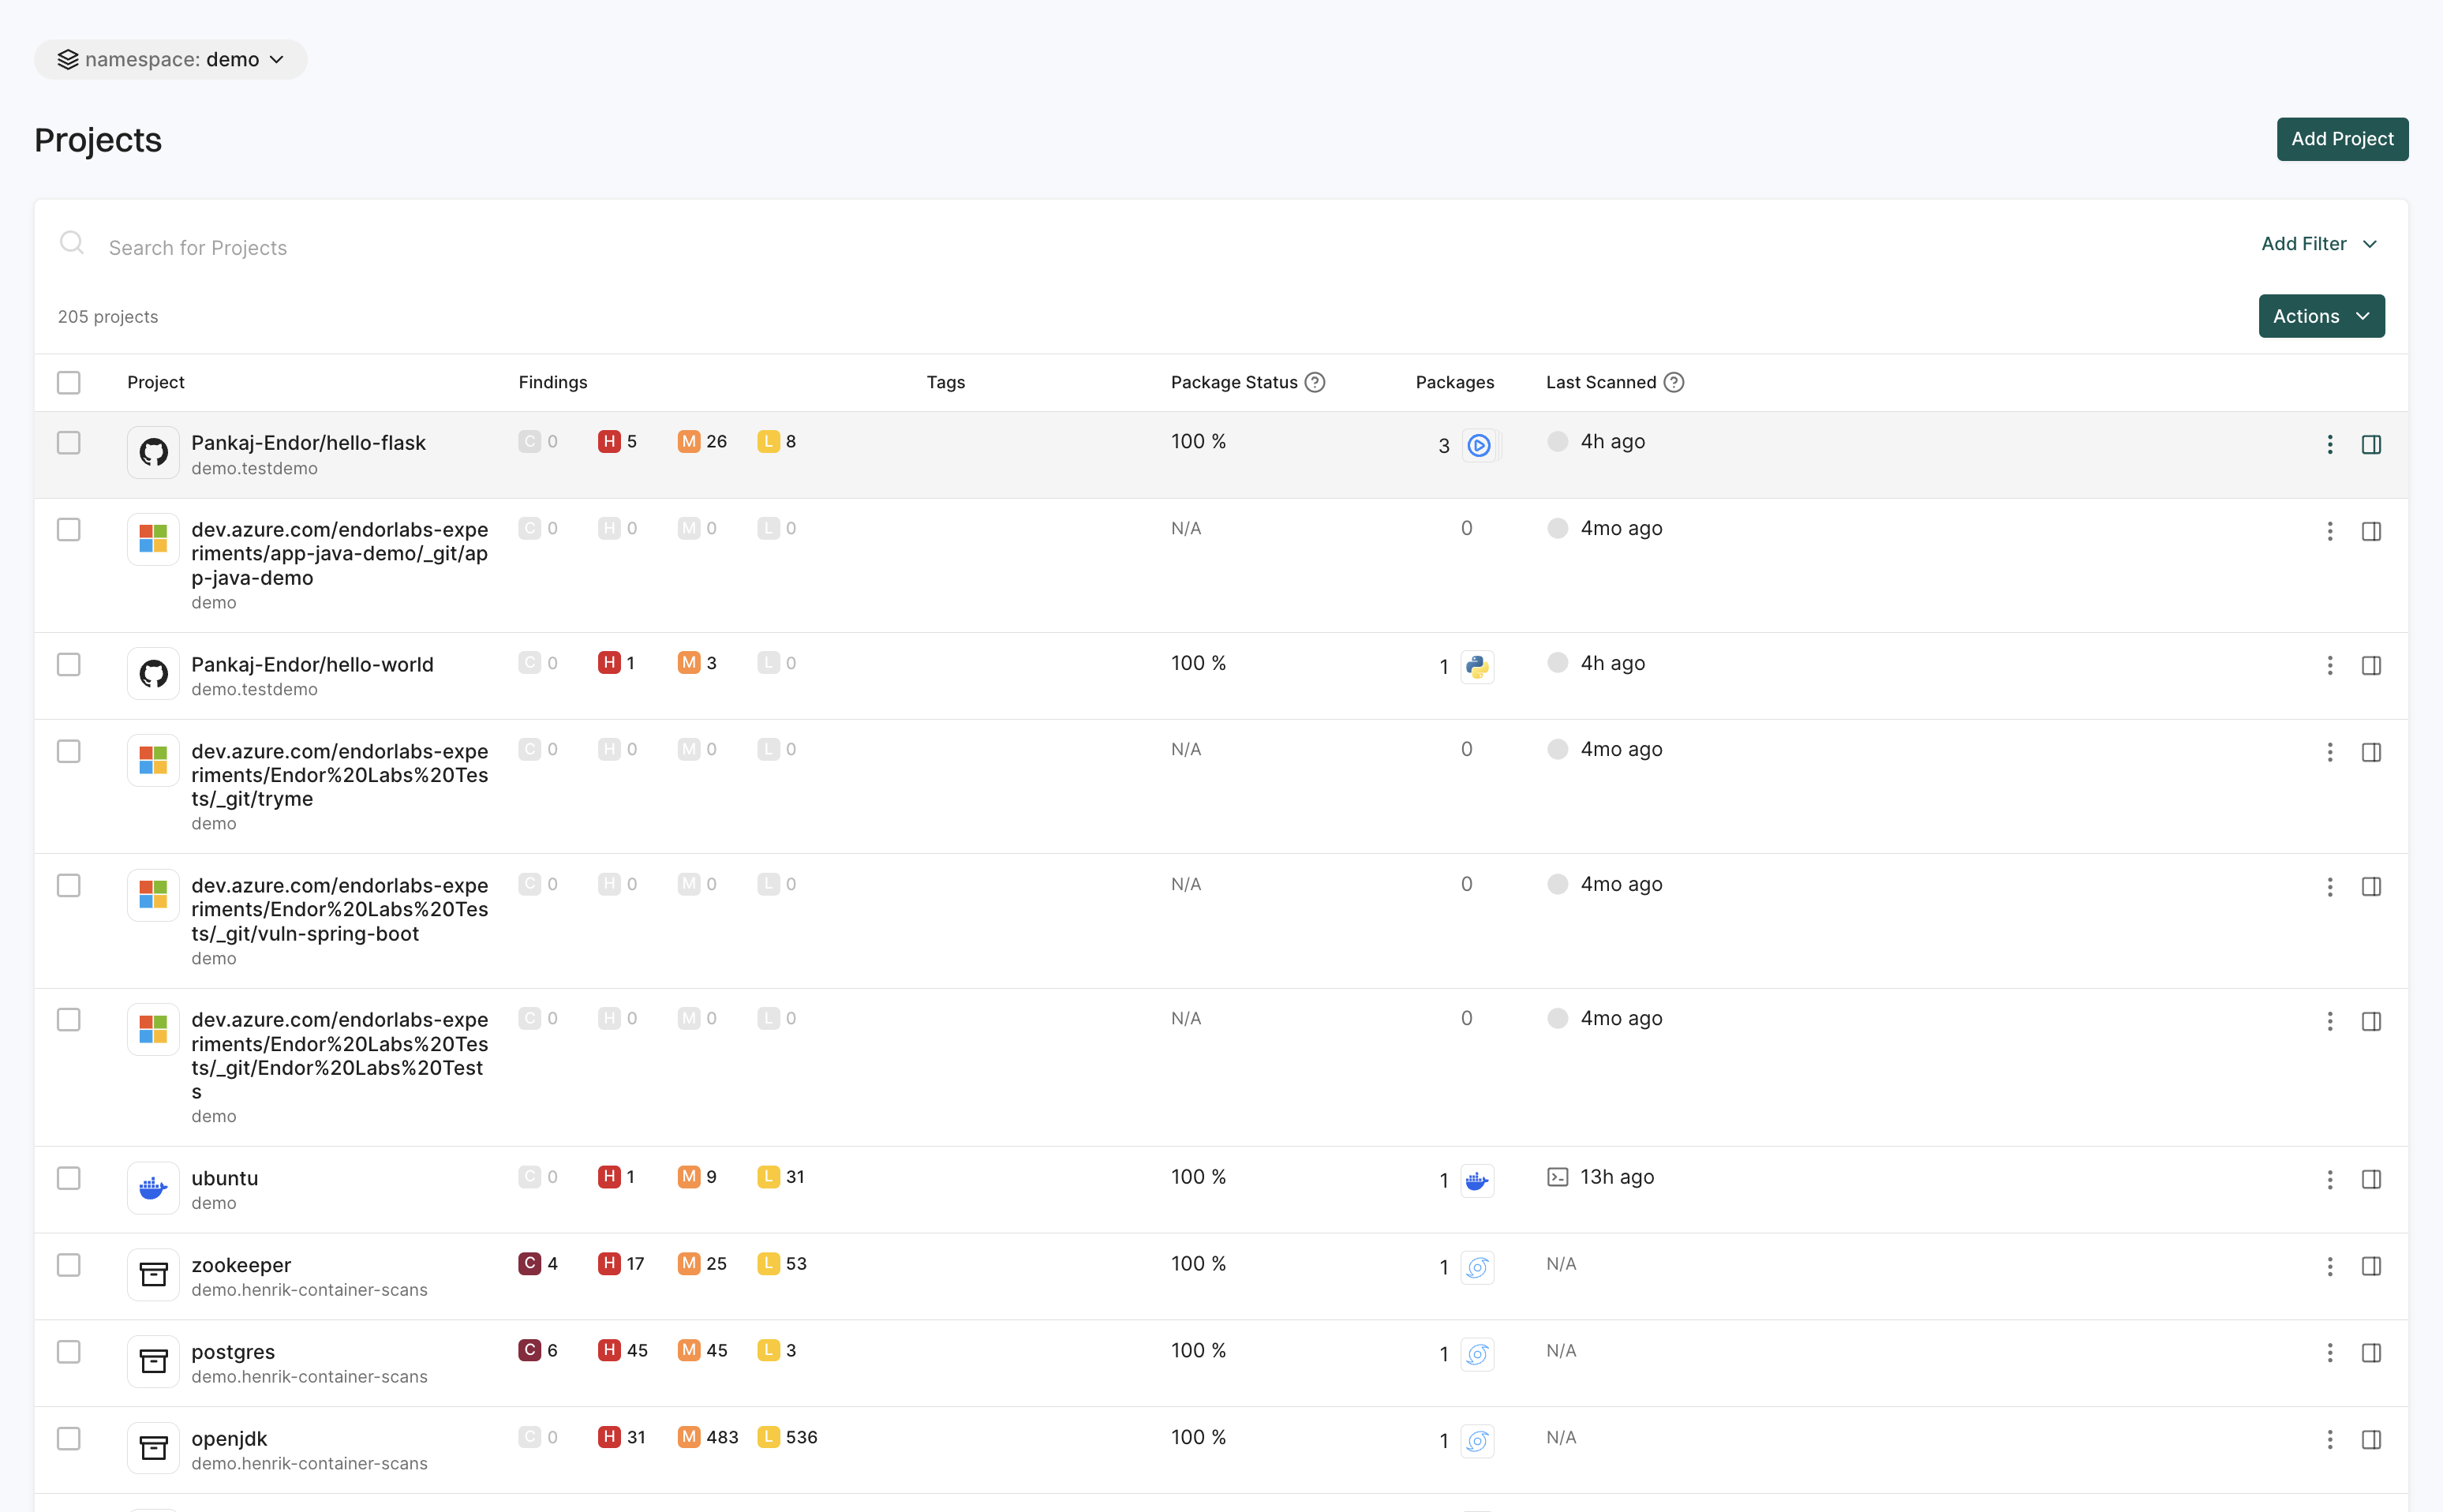
See Manage Projects for more information.
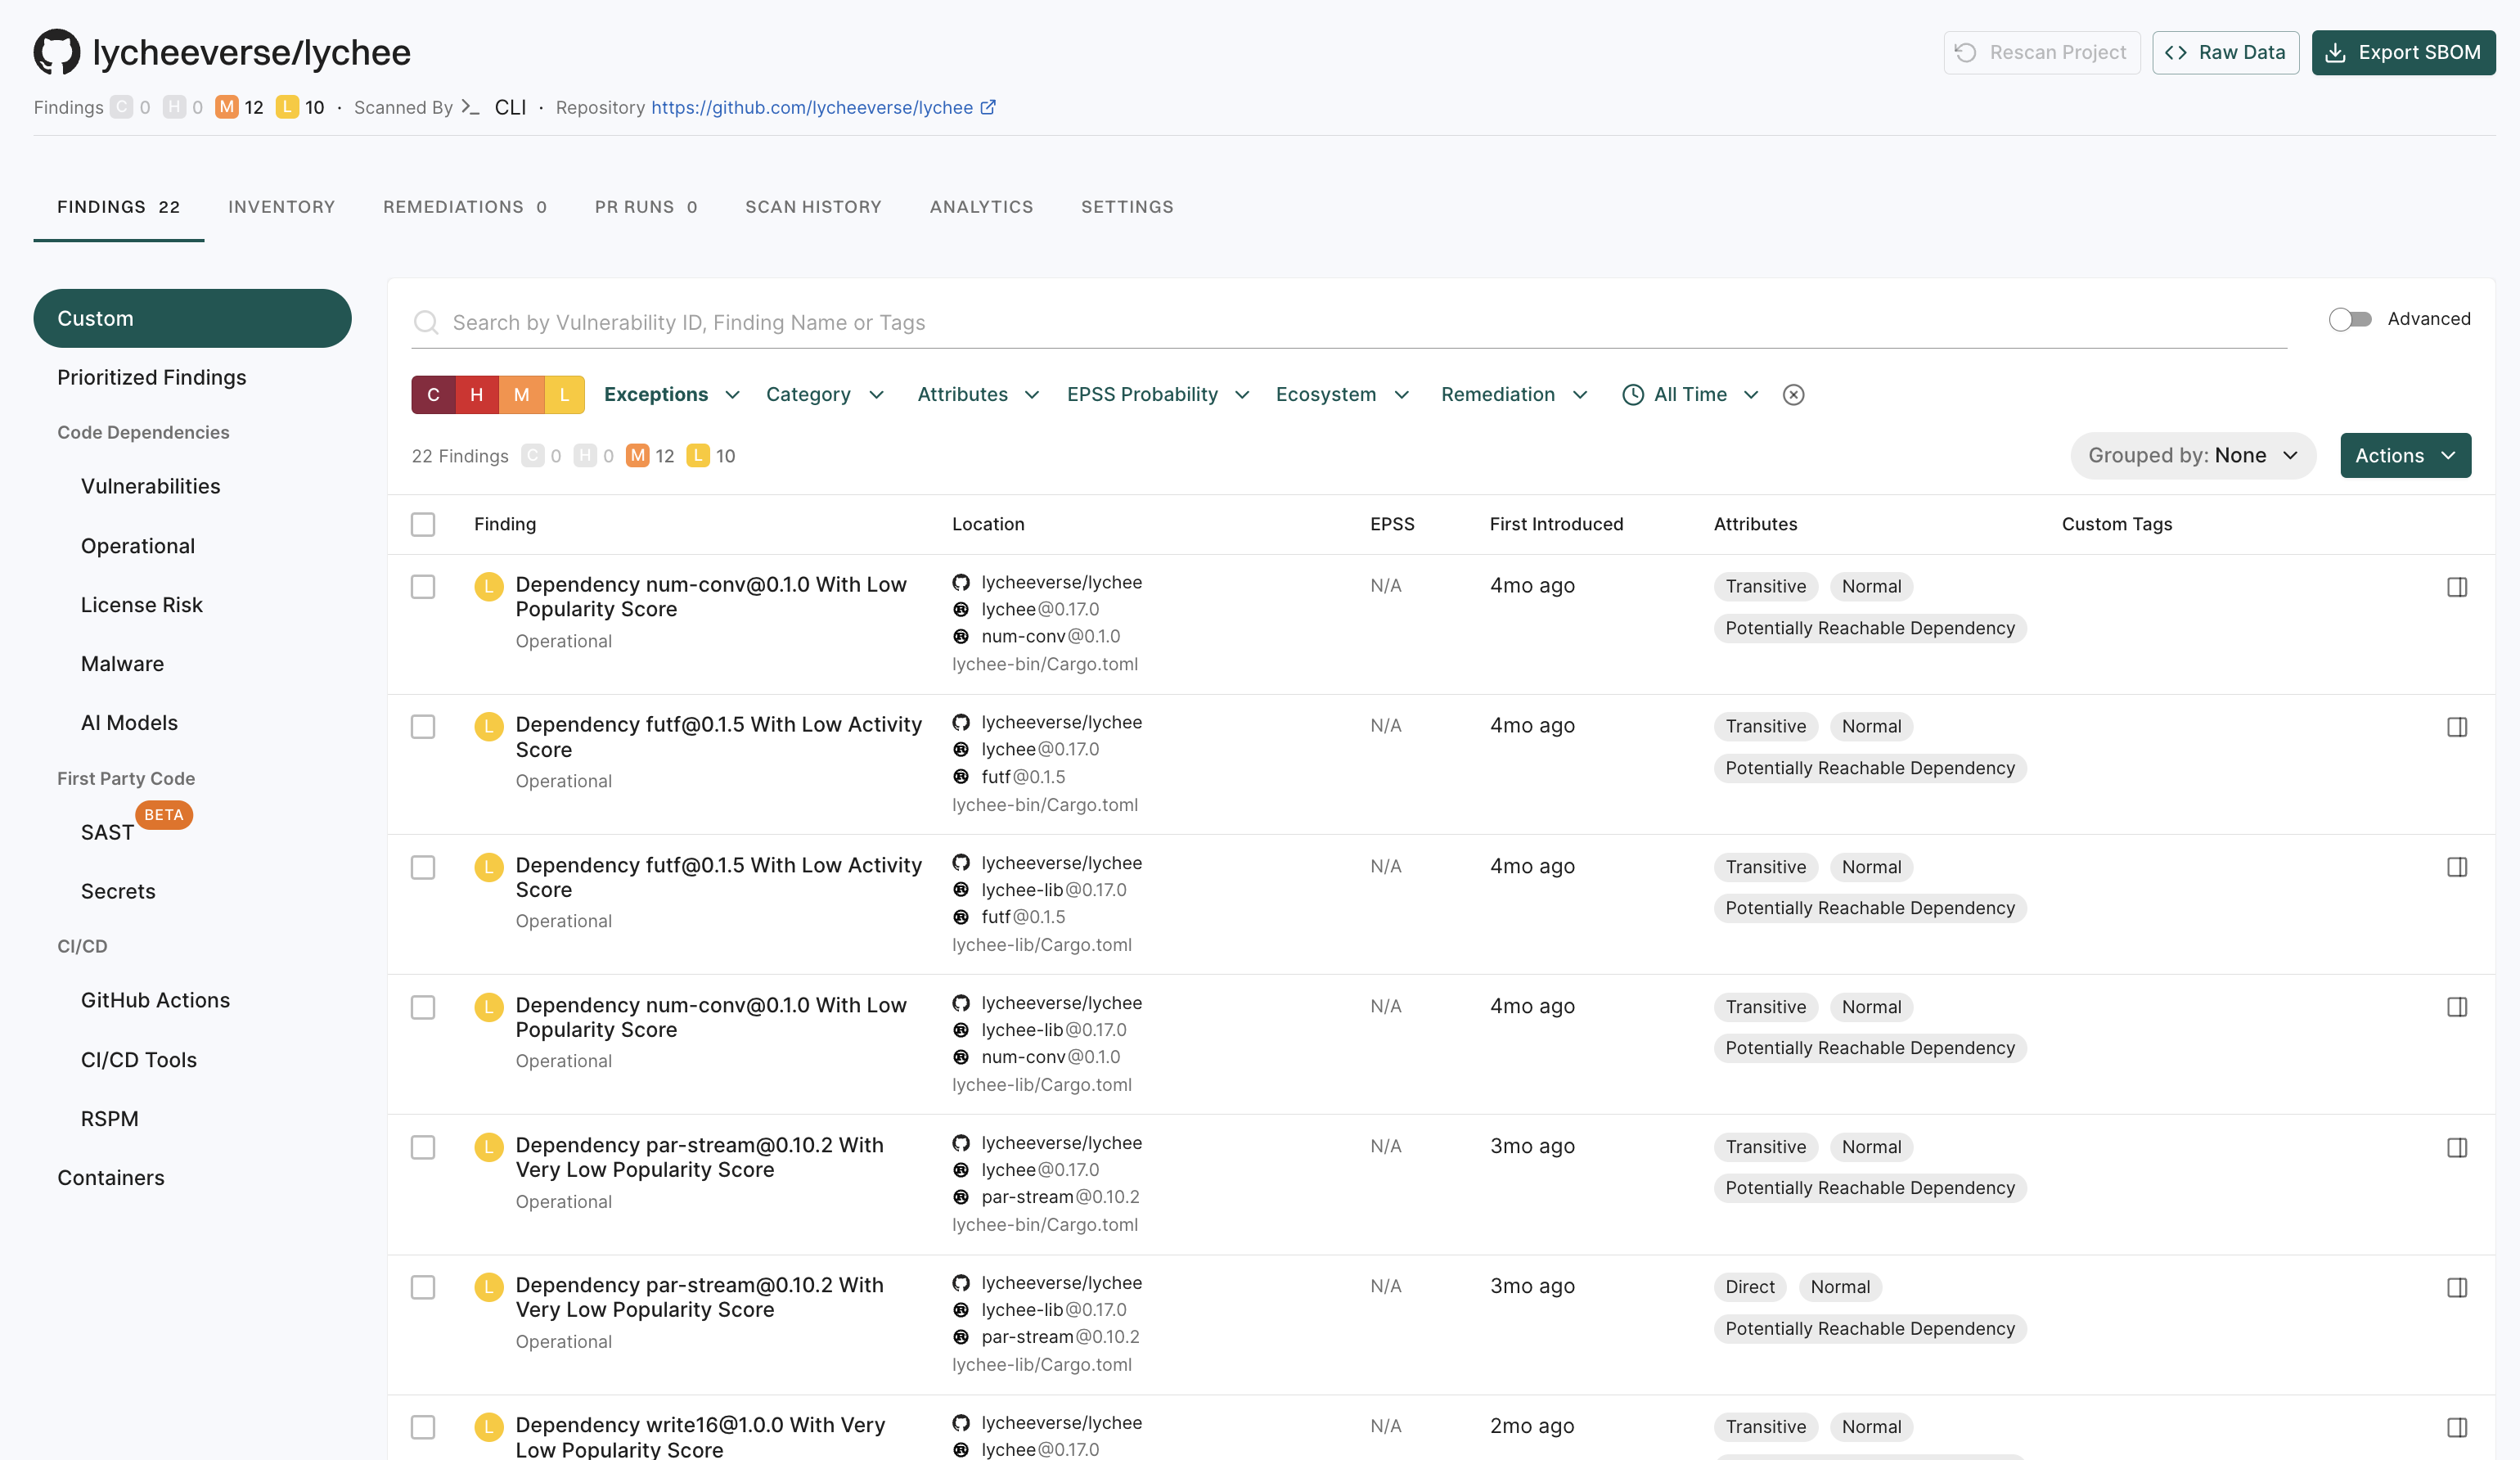
Dependencies
The Dependencies page gives detailed insights into package dependencies.
You can:
- Search and filter dependencies based on specific criteria.
- Export filtered dependency data as a CSV file for further analysis.
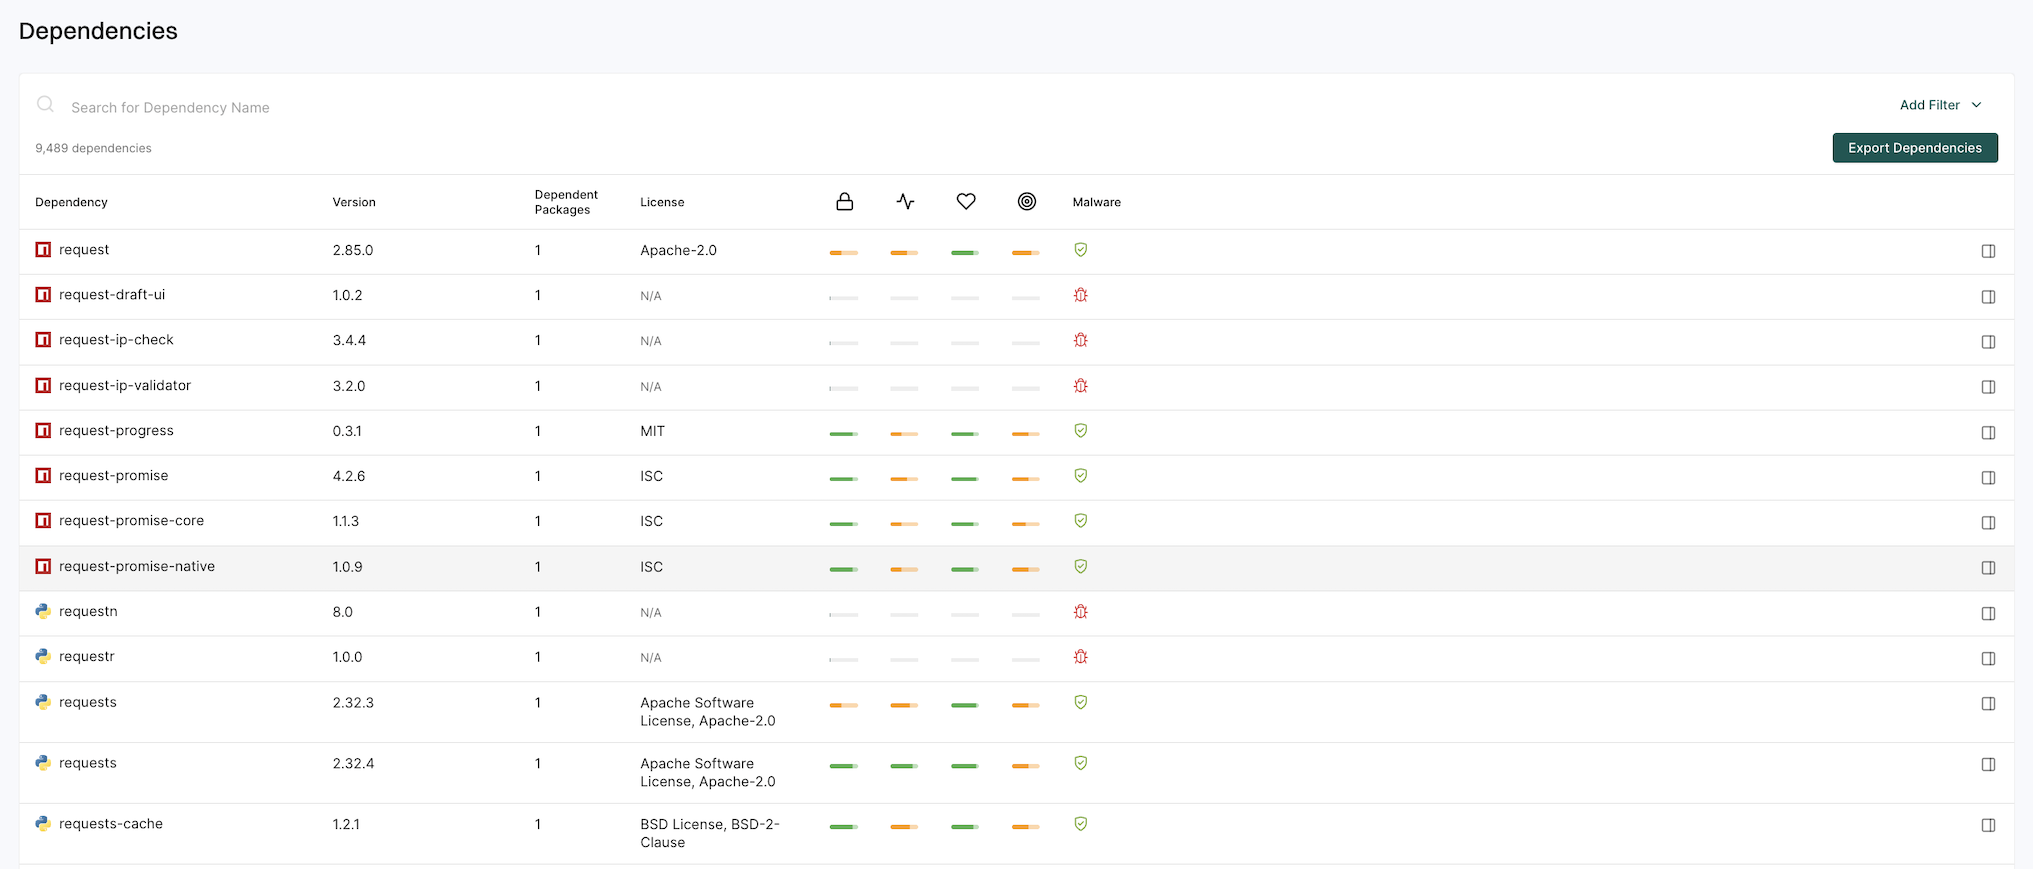
See Dependencies for more information.
AI inventory
The AI Inventory page helps you find and evaluate AI models used in your projects, providing insights into their usage, status, and impact. These models are flagged during scans and are evaluated for risks and operational security.
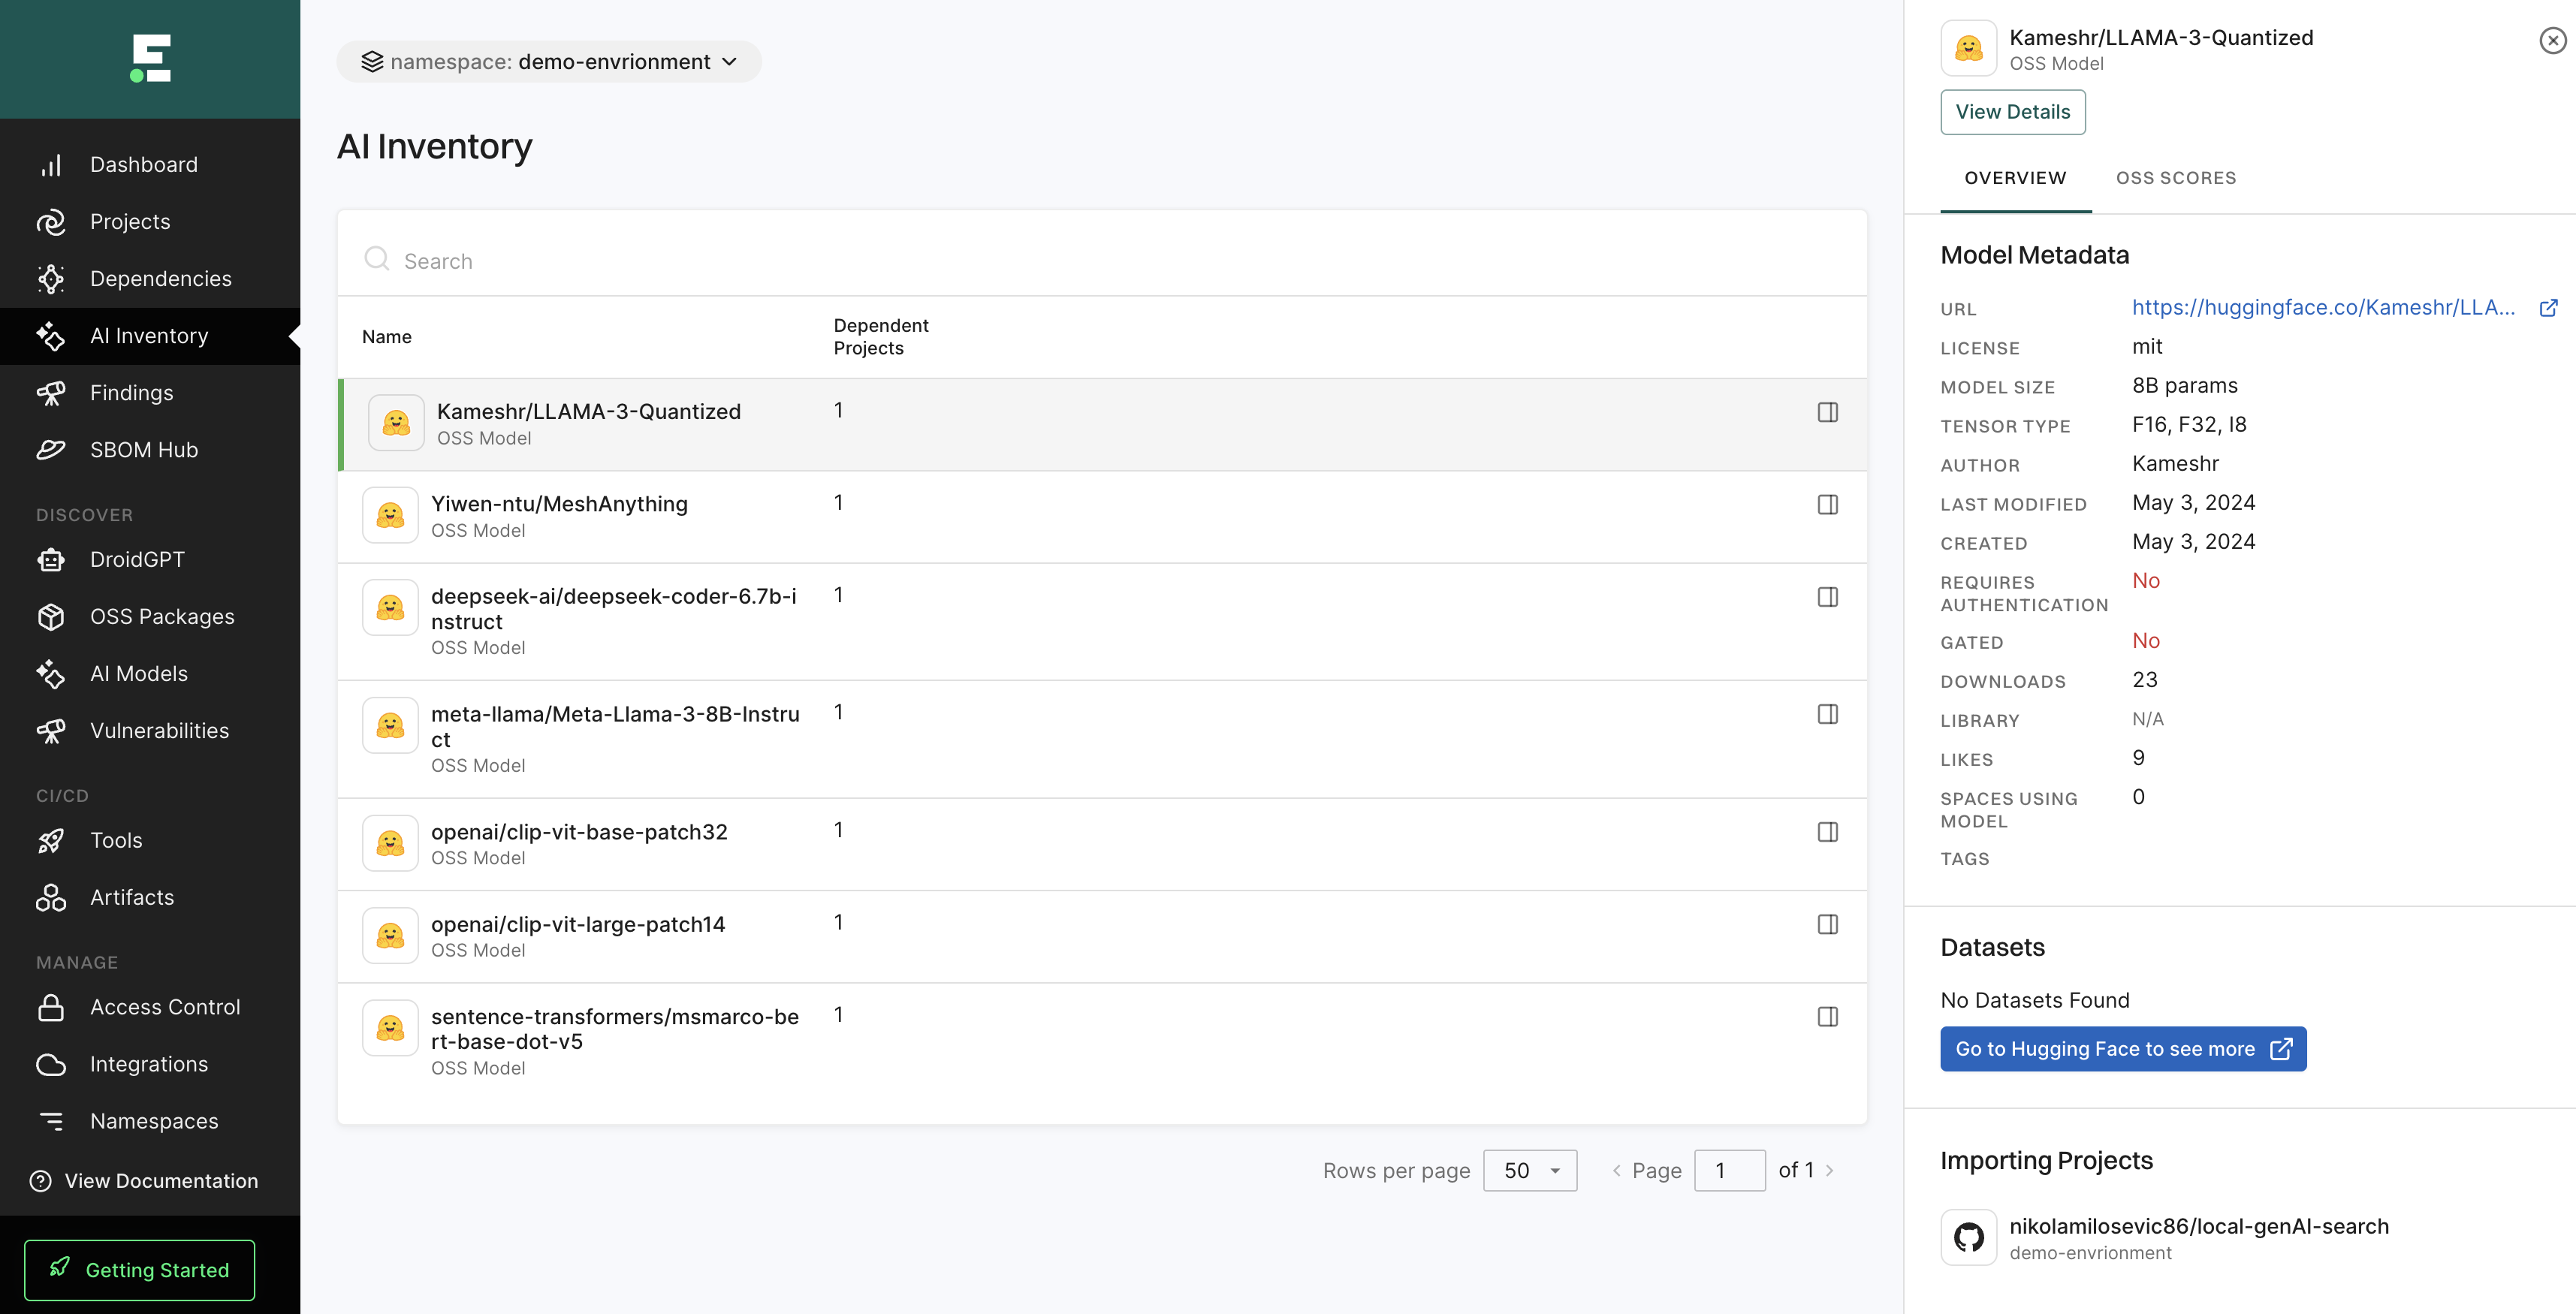
See AI model findings for more information.
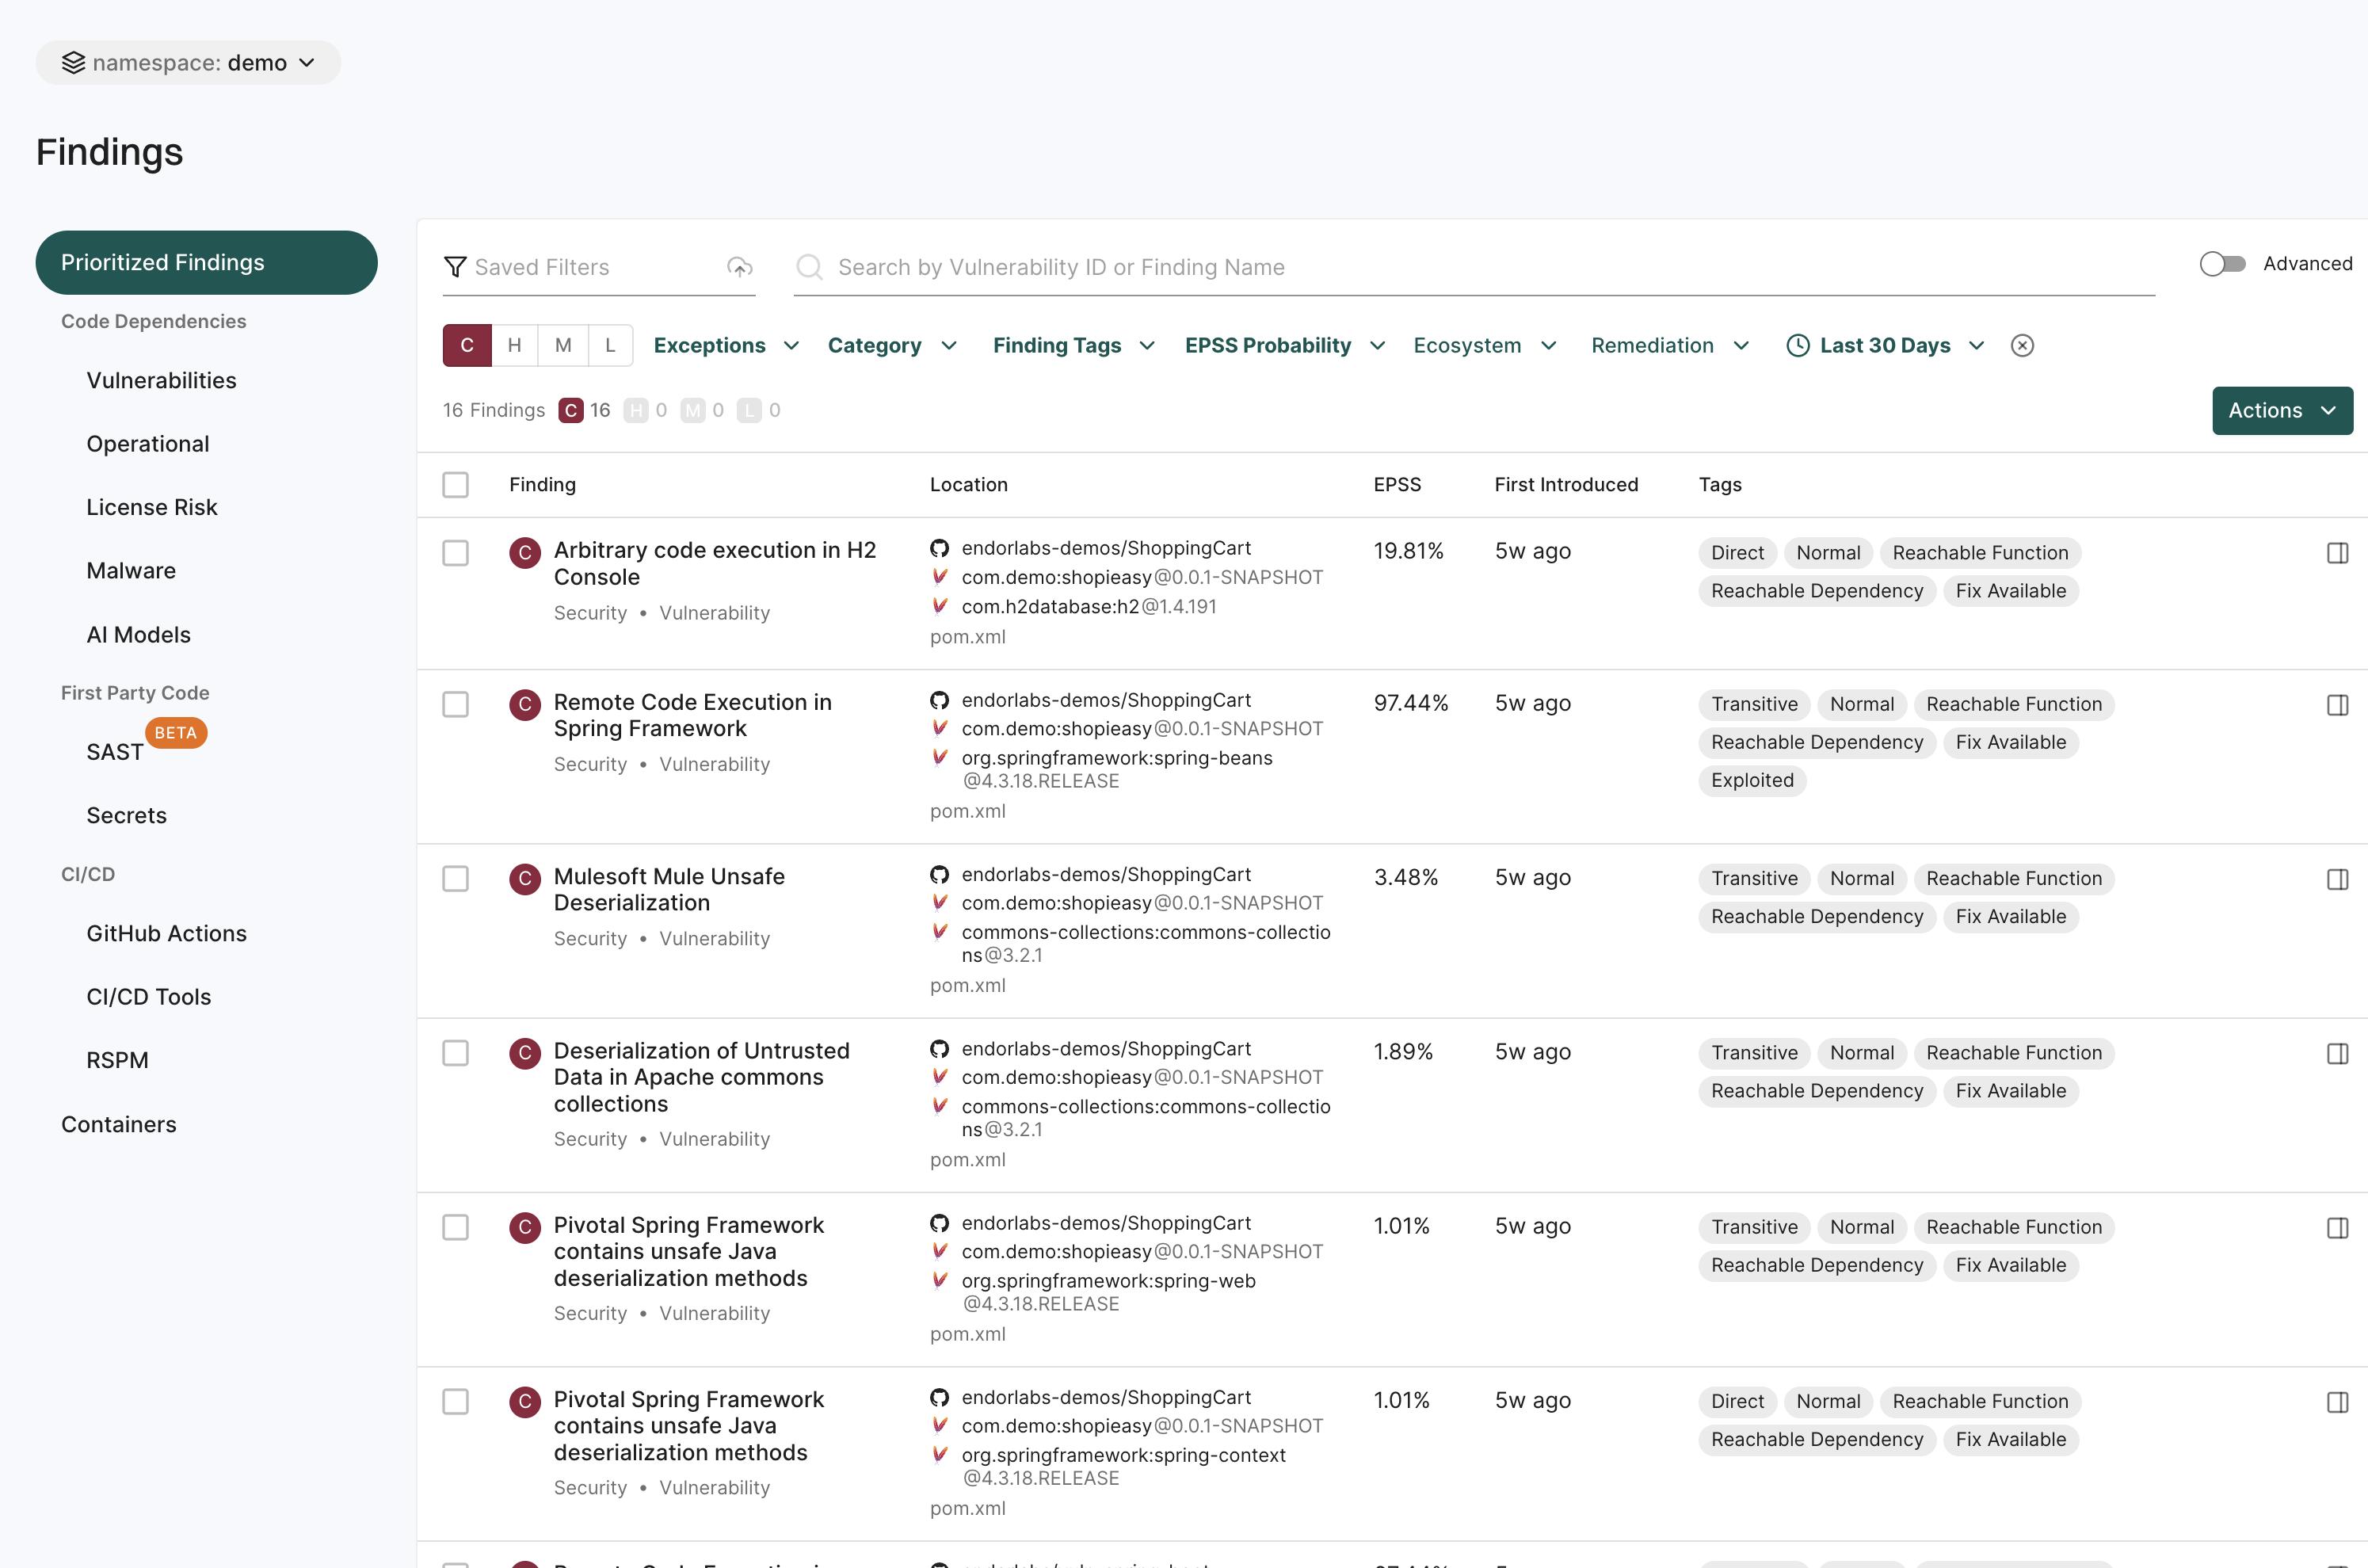
Findings
The Findings page helps you to identify and analyze security risks across different areas.
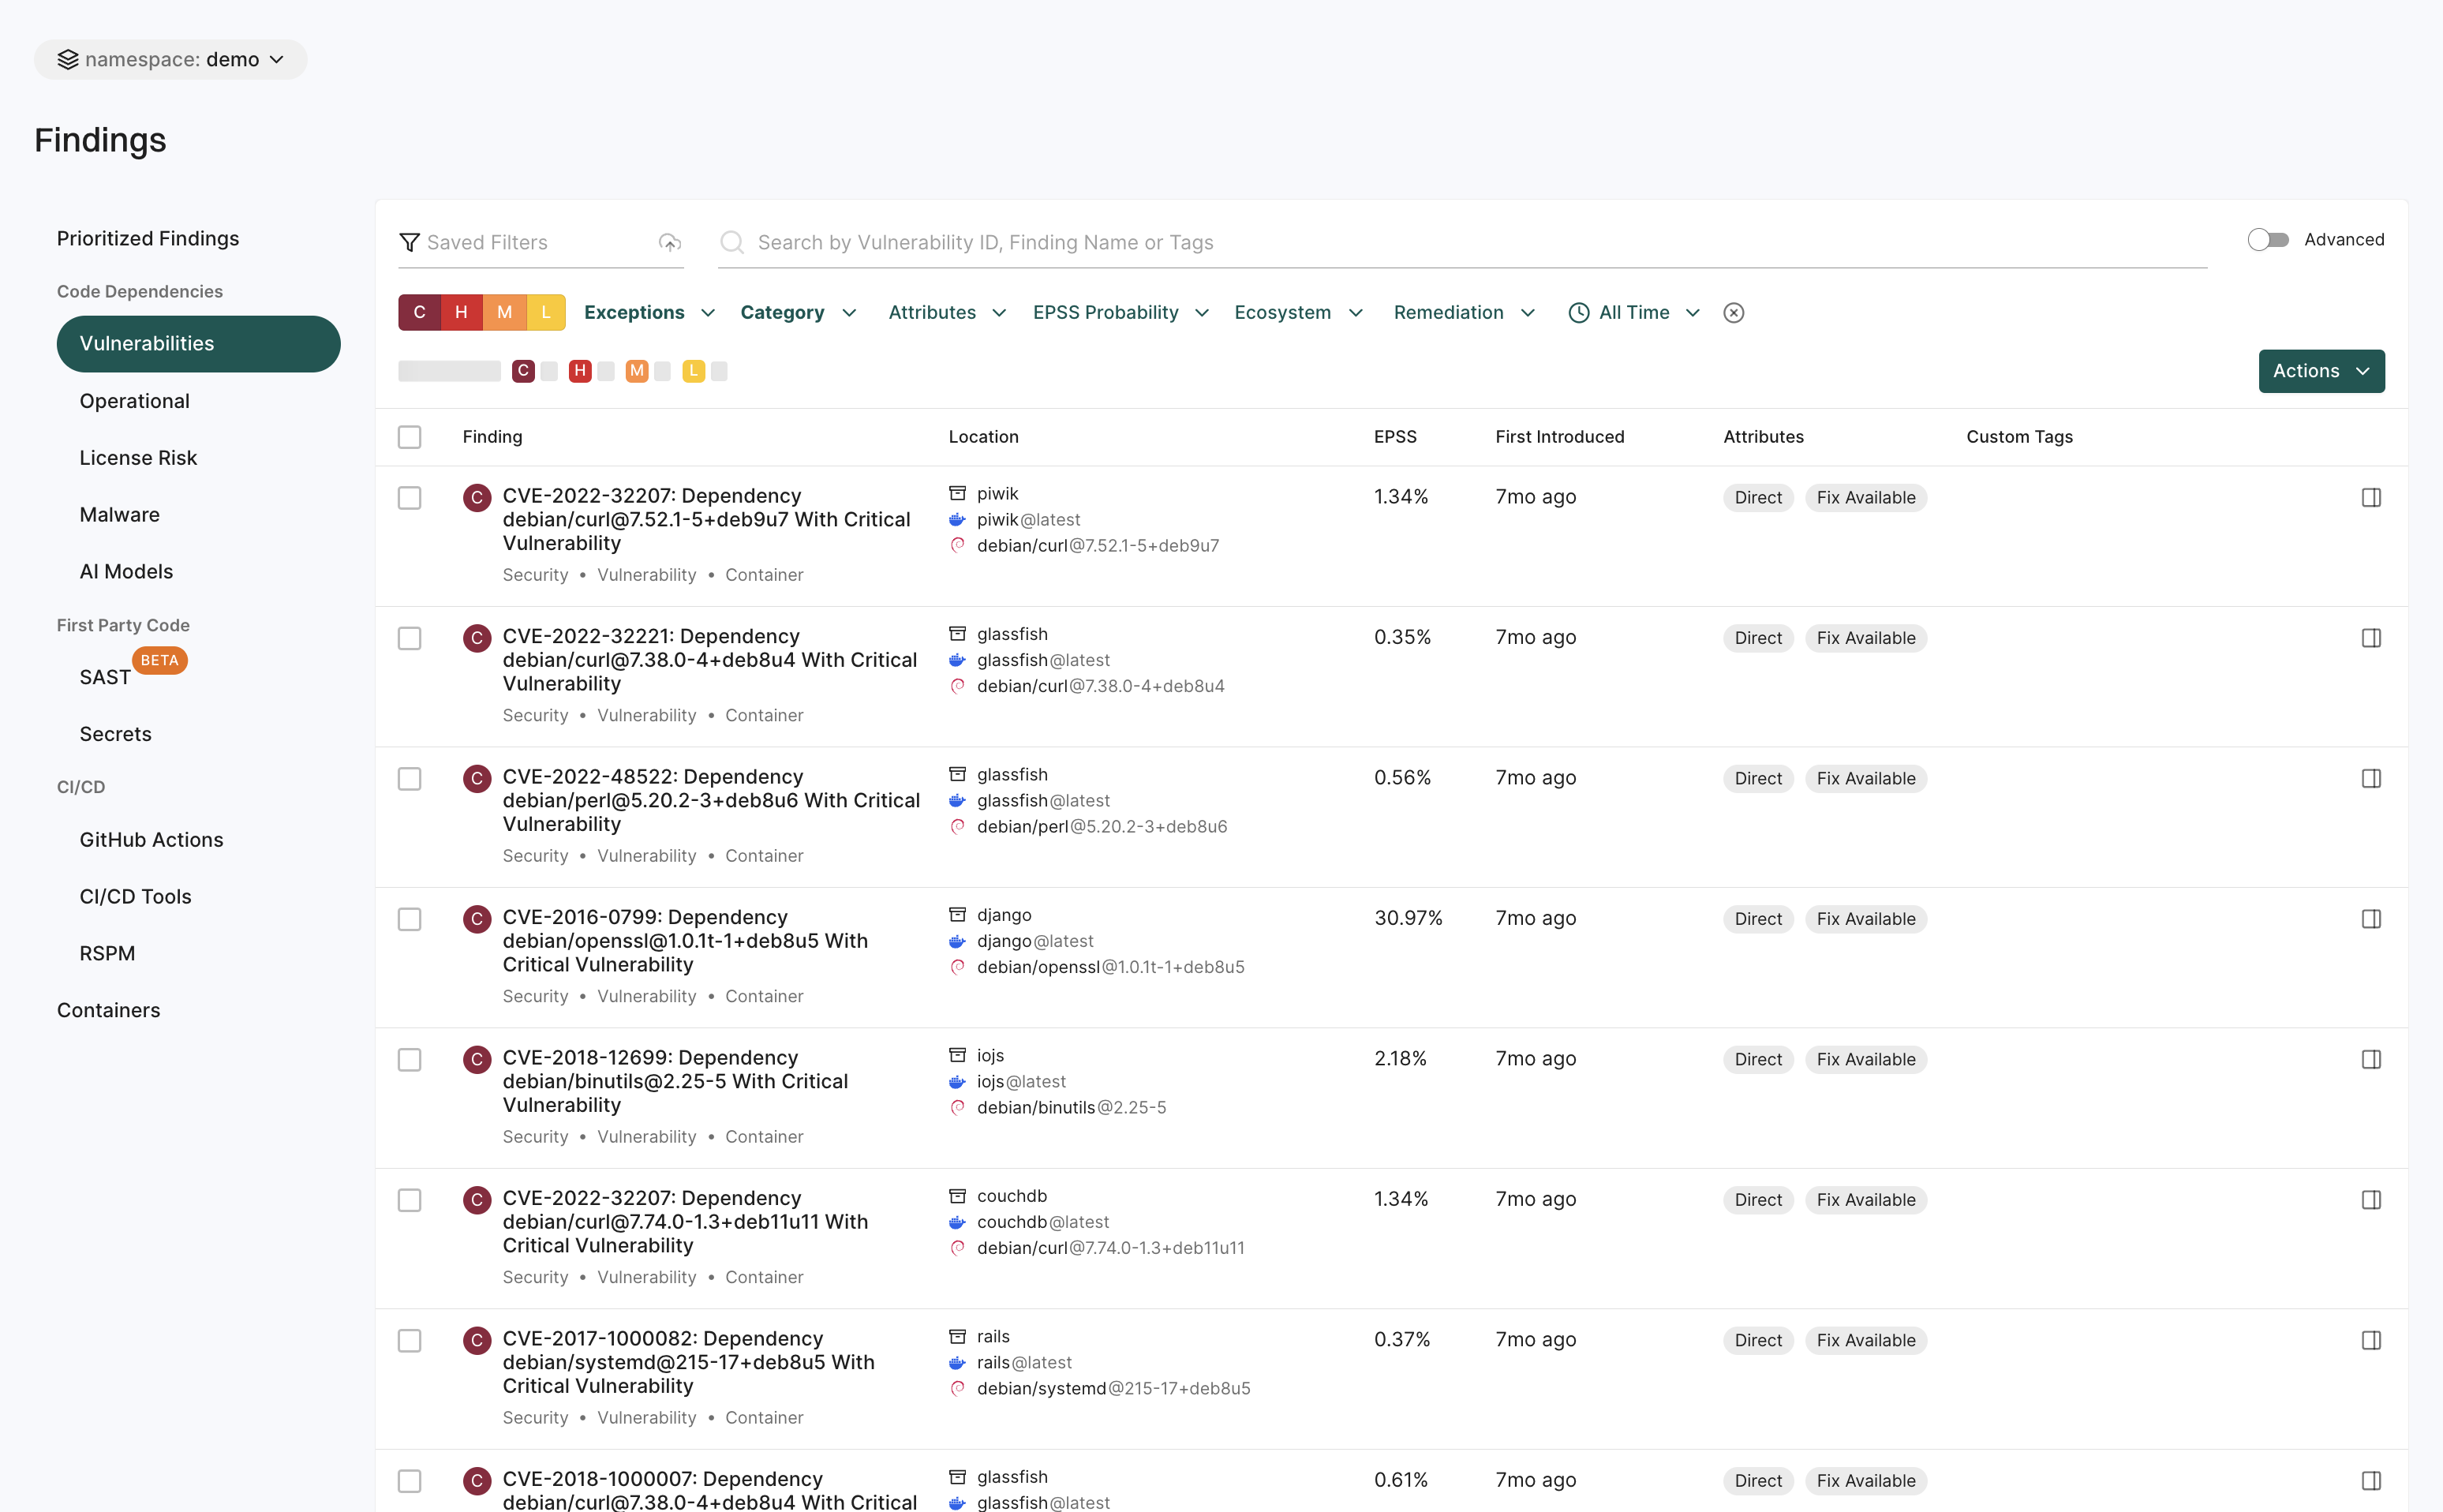
See View Findings for more information.
SBOM hub
The SBOM Hub helps you manage and track Software Bill of Materials (SBOMs) in one place.
You can:
- Import SBOMs easily using the Import SBOM button.
- Use filters to narrow down searches and find specific SBOMs quickly.
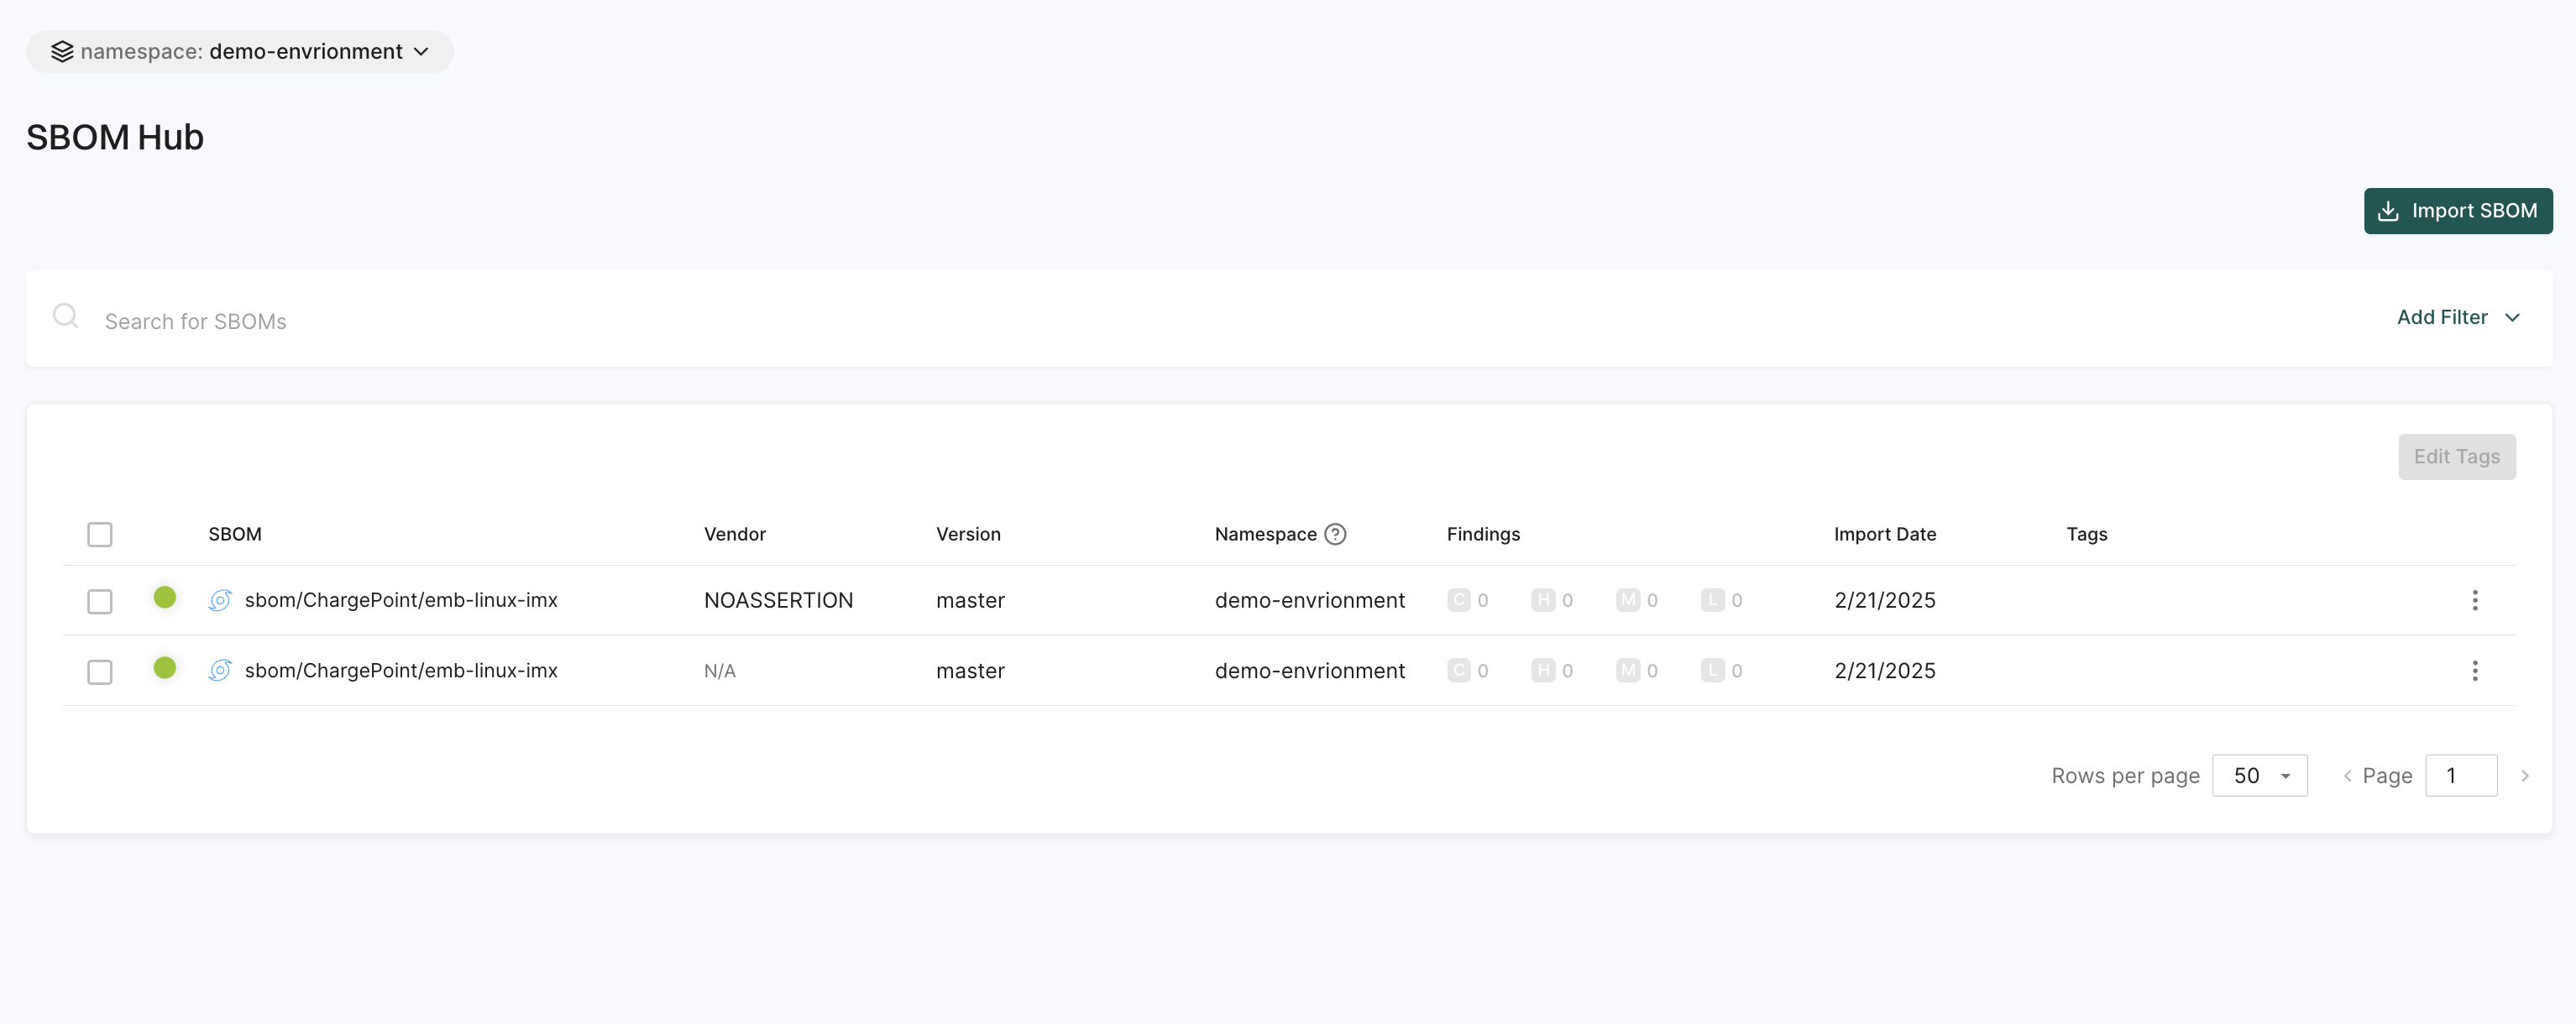
Select an SBOM to view the list of dependencies, their visibility, source availability, Endor scores, and whether each package version is classified as malware.

Navigate to Findings > Dependencies and select a malicious dependency to view its malware metadata and reasoning from the proprietary feed.

See Manage SBOMs for more information.
DroidGPT
DroidGPT is an AI-powered assistant that helps developers find and evaluate open-source software components with minimal risk.
Users can:
- Search for relevant OSS components based on your project needs.
- Get AI-driven insights and recommendations on security, dependencies, and best practices.
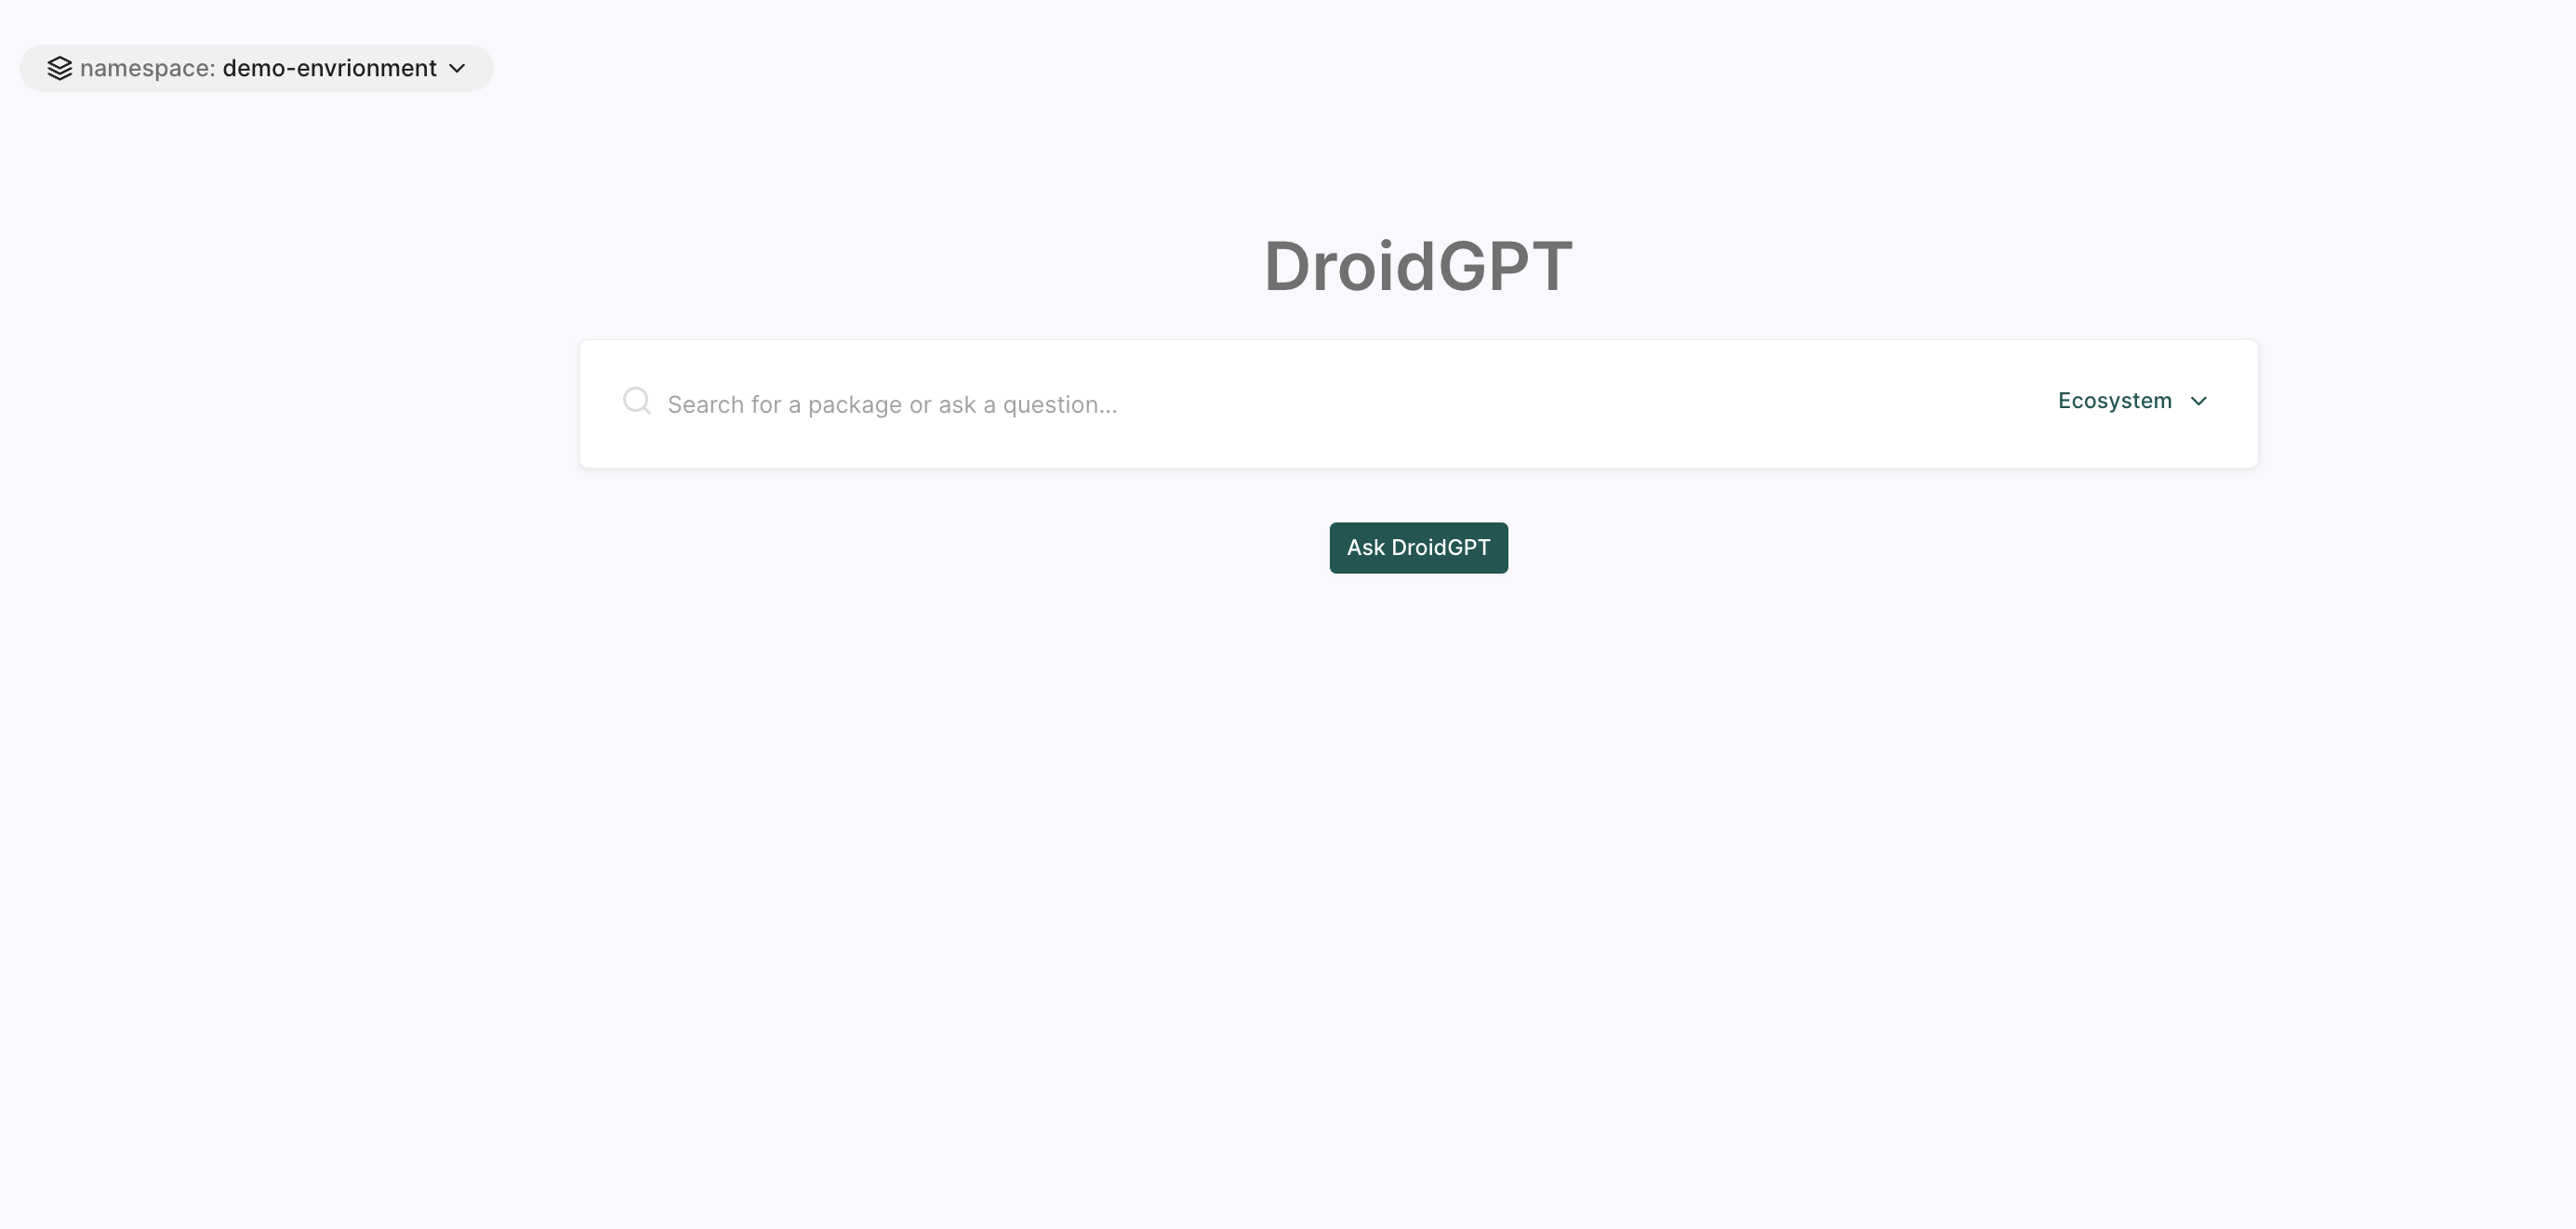
See DroidGPT Documentation for more information.
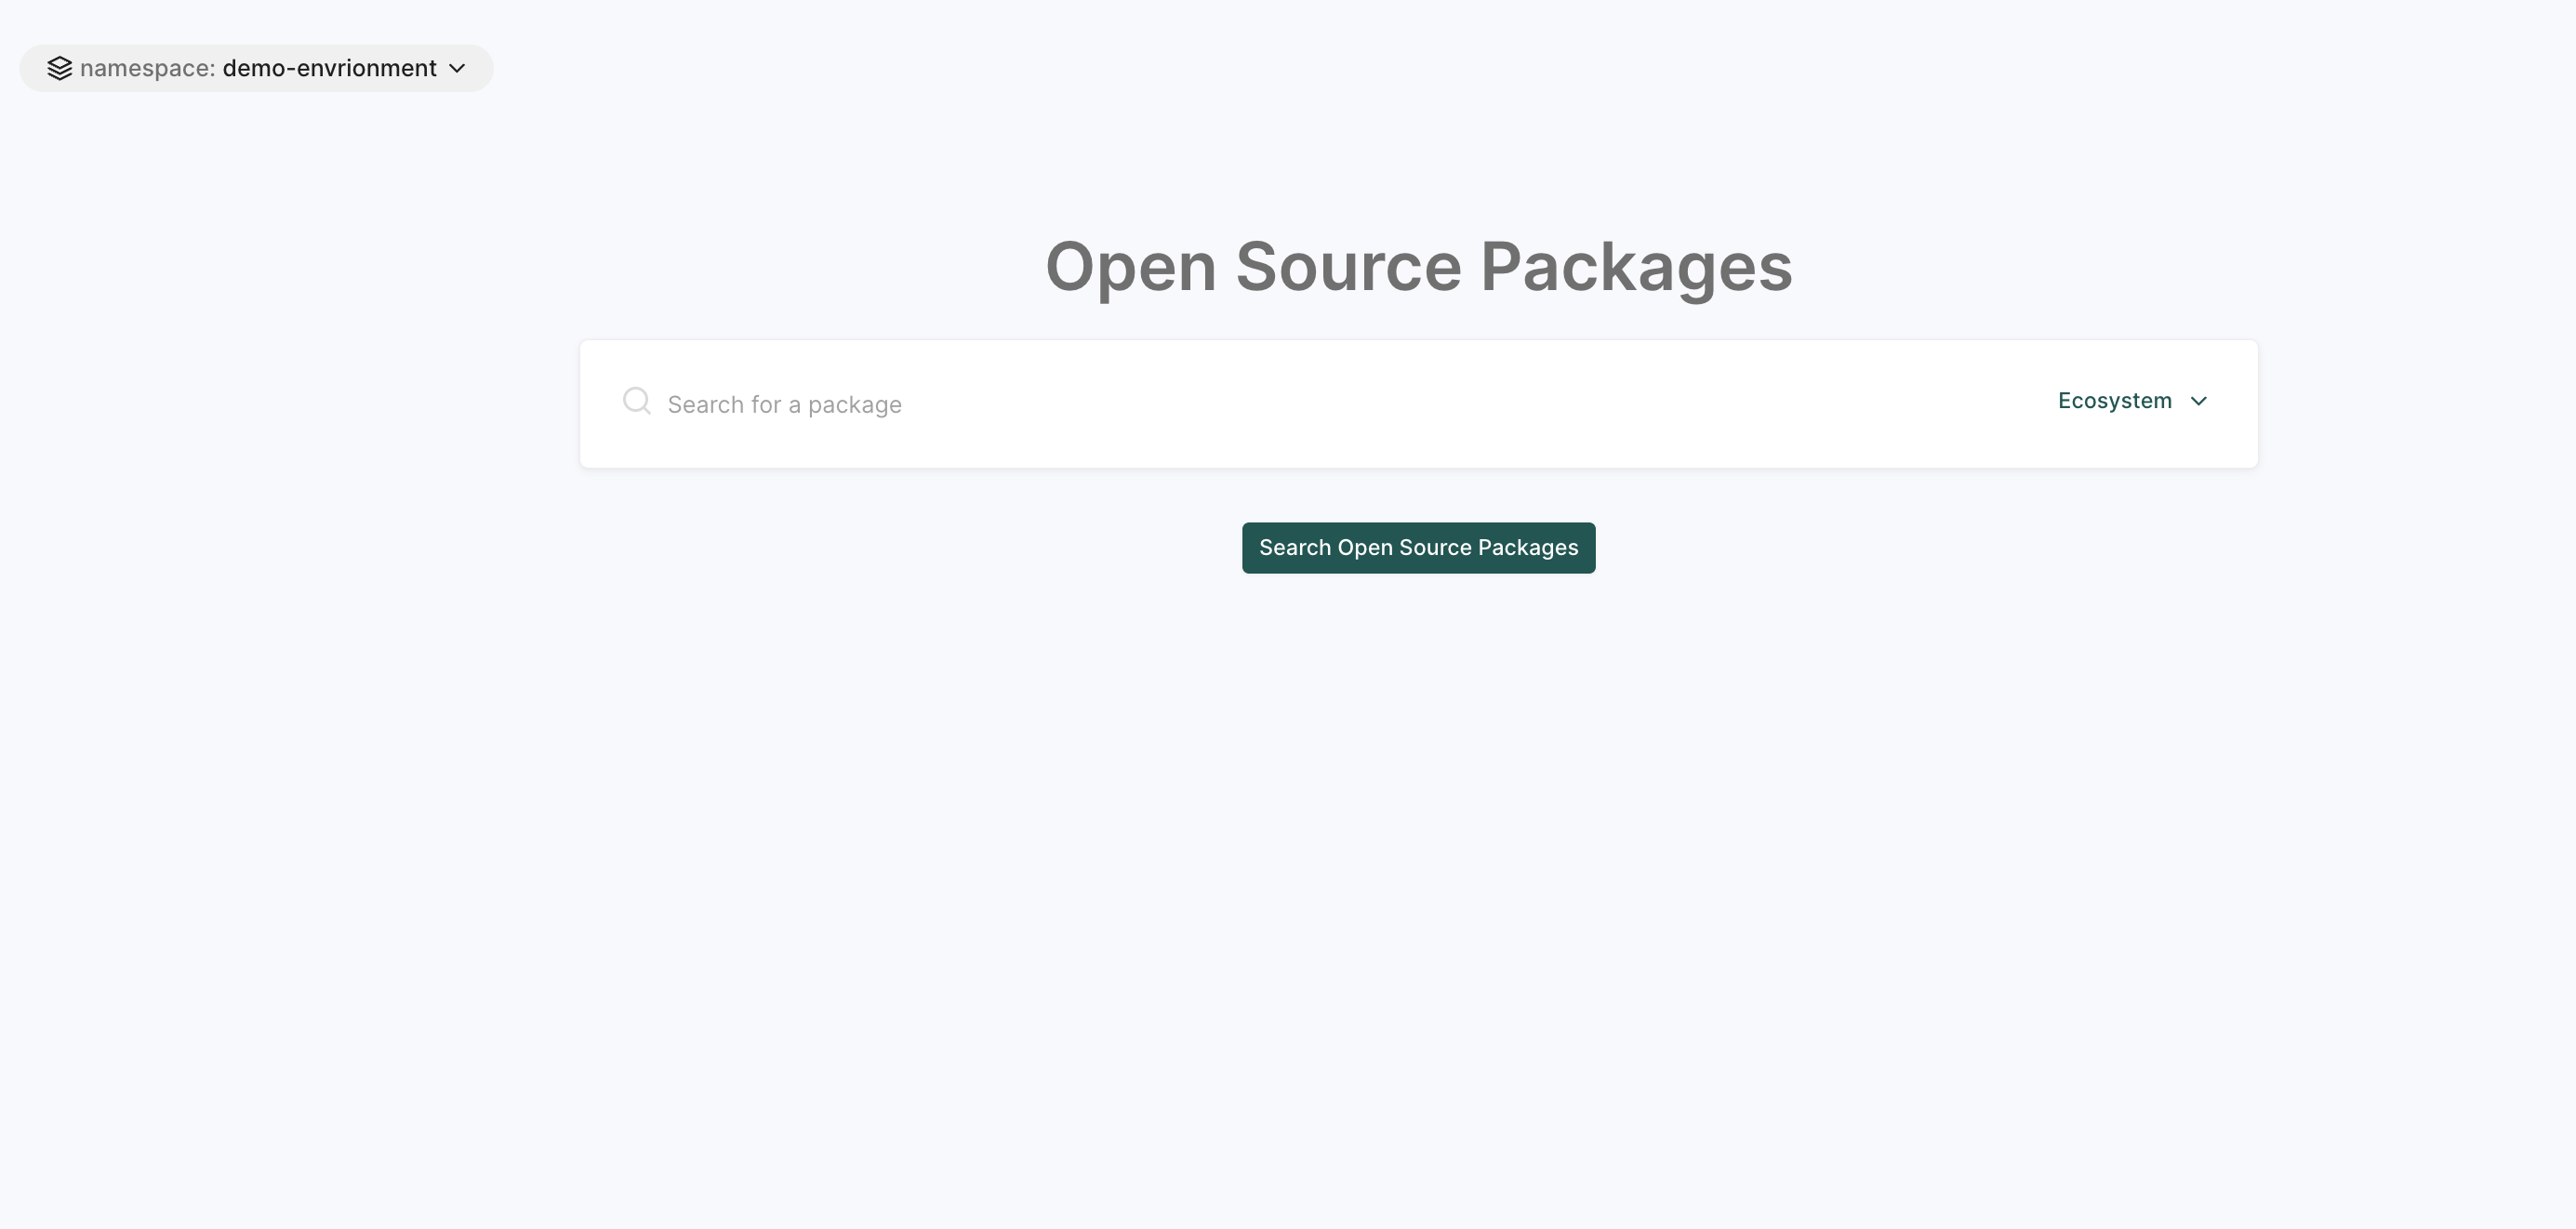
OSS packages
The OSS Packages page allows users to find and track open-source dependencies, identifying security risks and licensing concerns.
See Open Source Packages for more information.
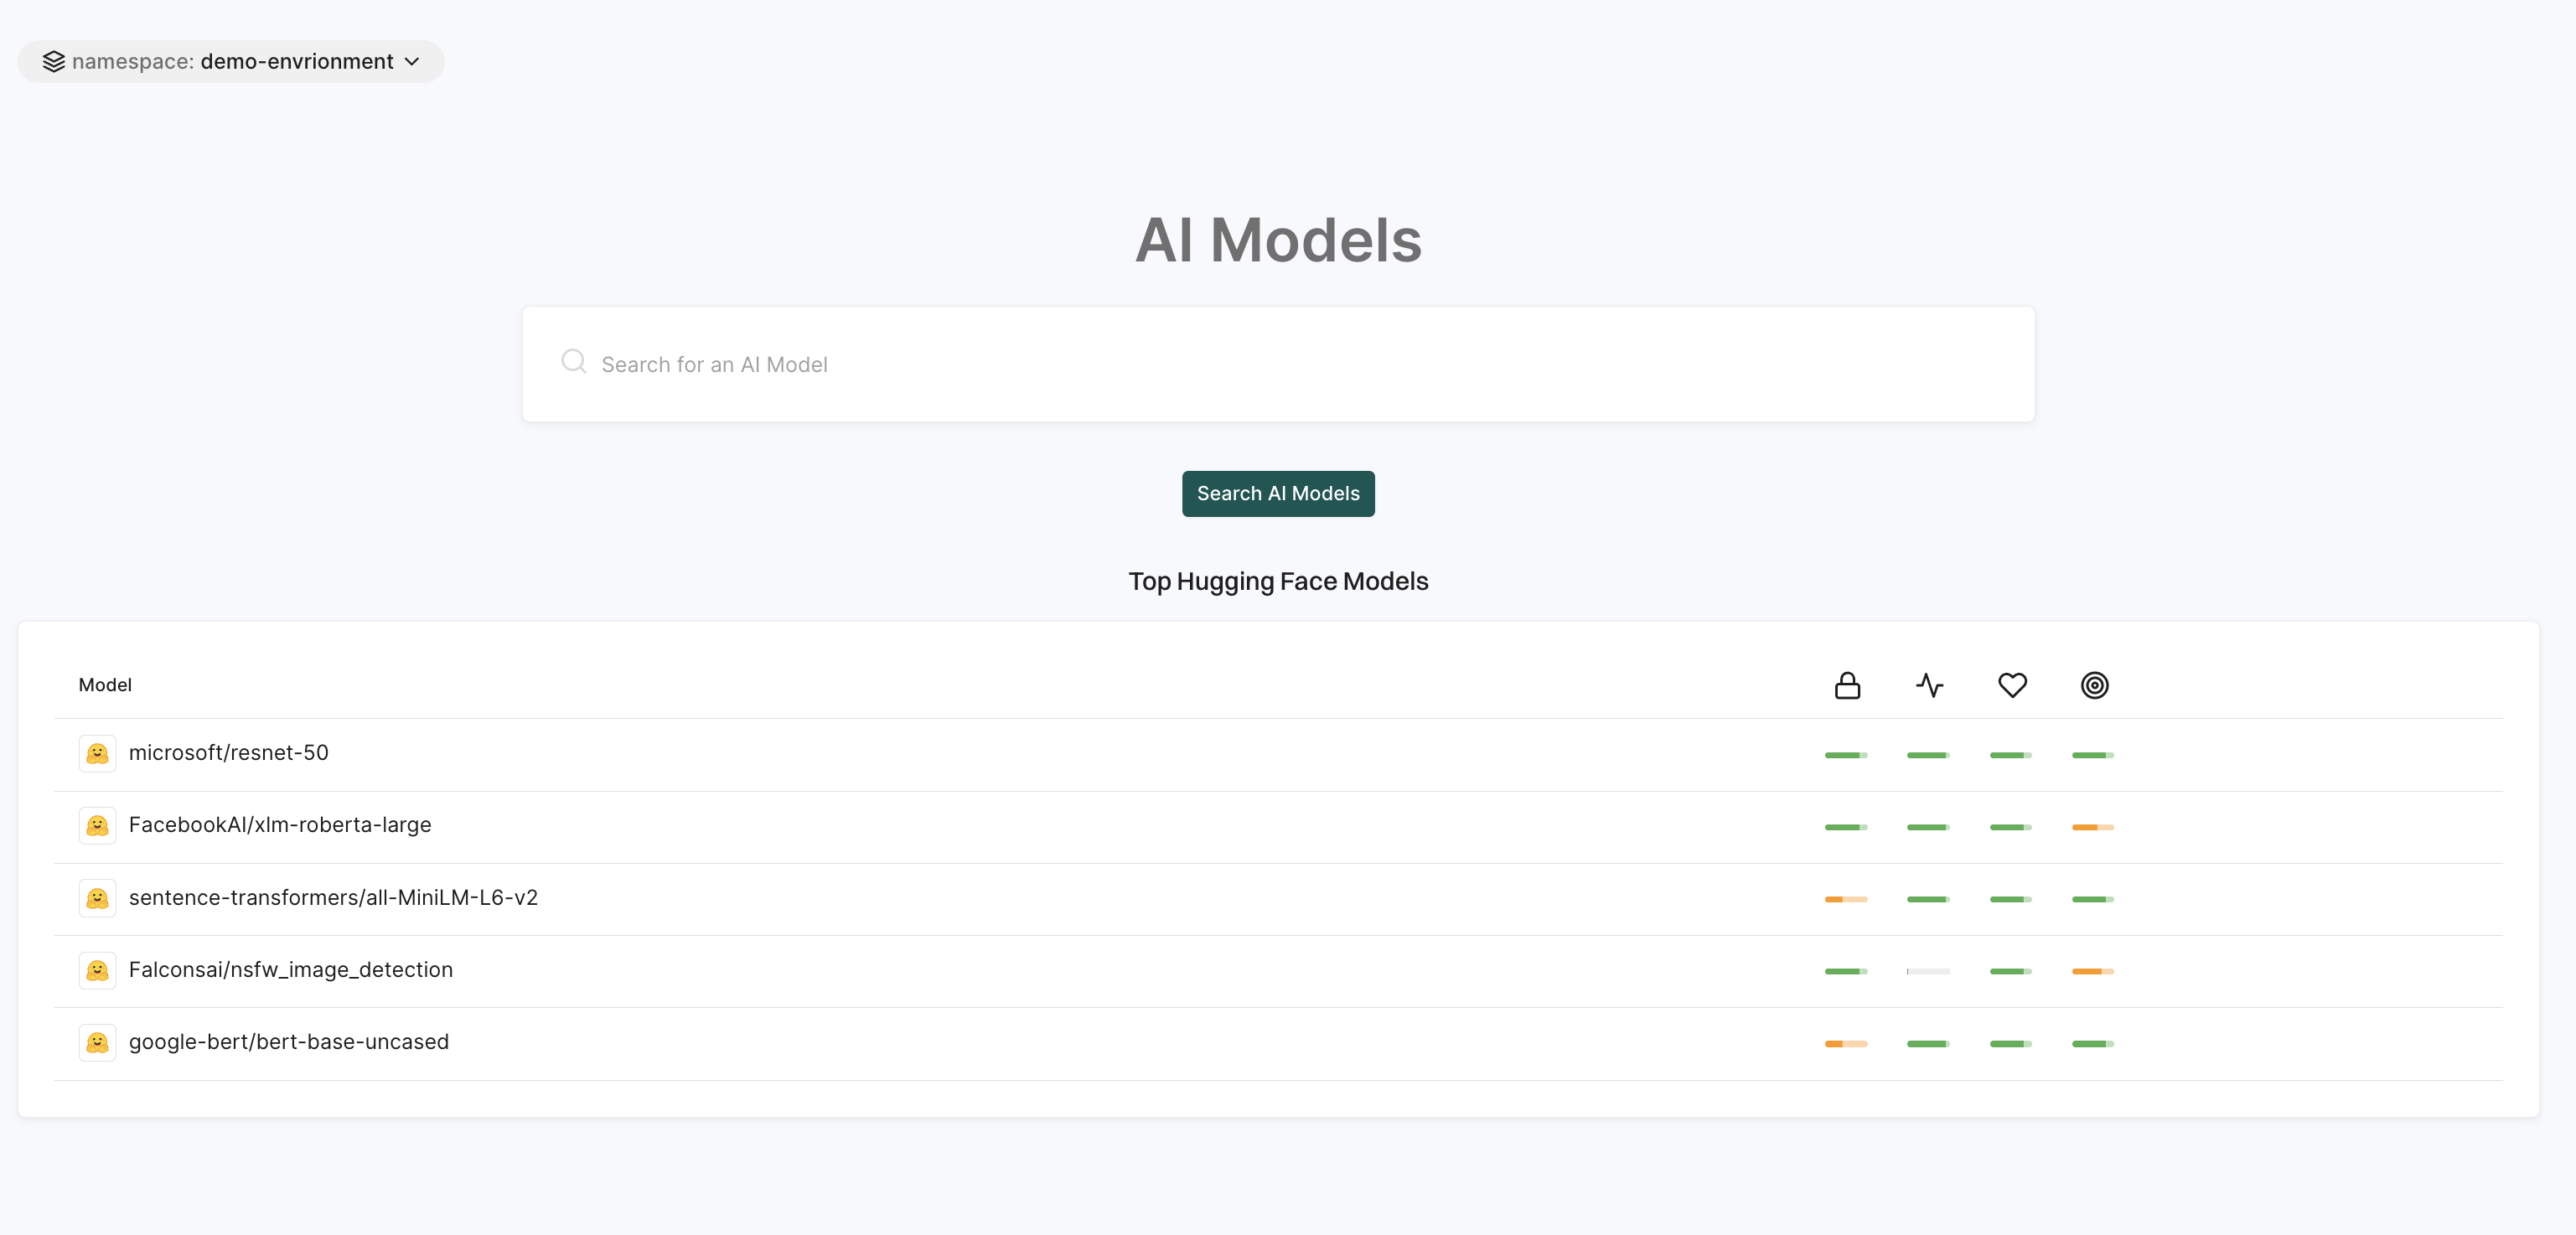
AI models
The AI Models page is a search tool to find and explore AI models available within the platform.
This page displays the top AI models from Hugging Face with information like model name, security score, activity score, operational score, and more.
See AI Models for more information.
Vulnerabilities
Vulnerabilities are known weaknesses in software components that can be exploited to compromise the confidentiality, integrity, or availability of an application.
The Endor Vulnerability Database provides a centralized view of known security issues across open-source ecosystems. It supports searching by standard identifiers like CVE, GHSA, MAL, and PySEC, and surfaces key metadata such as severity, affected versions, malware reasoning, and fix information to help teams assess risk before introducing a dependency into a project.
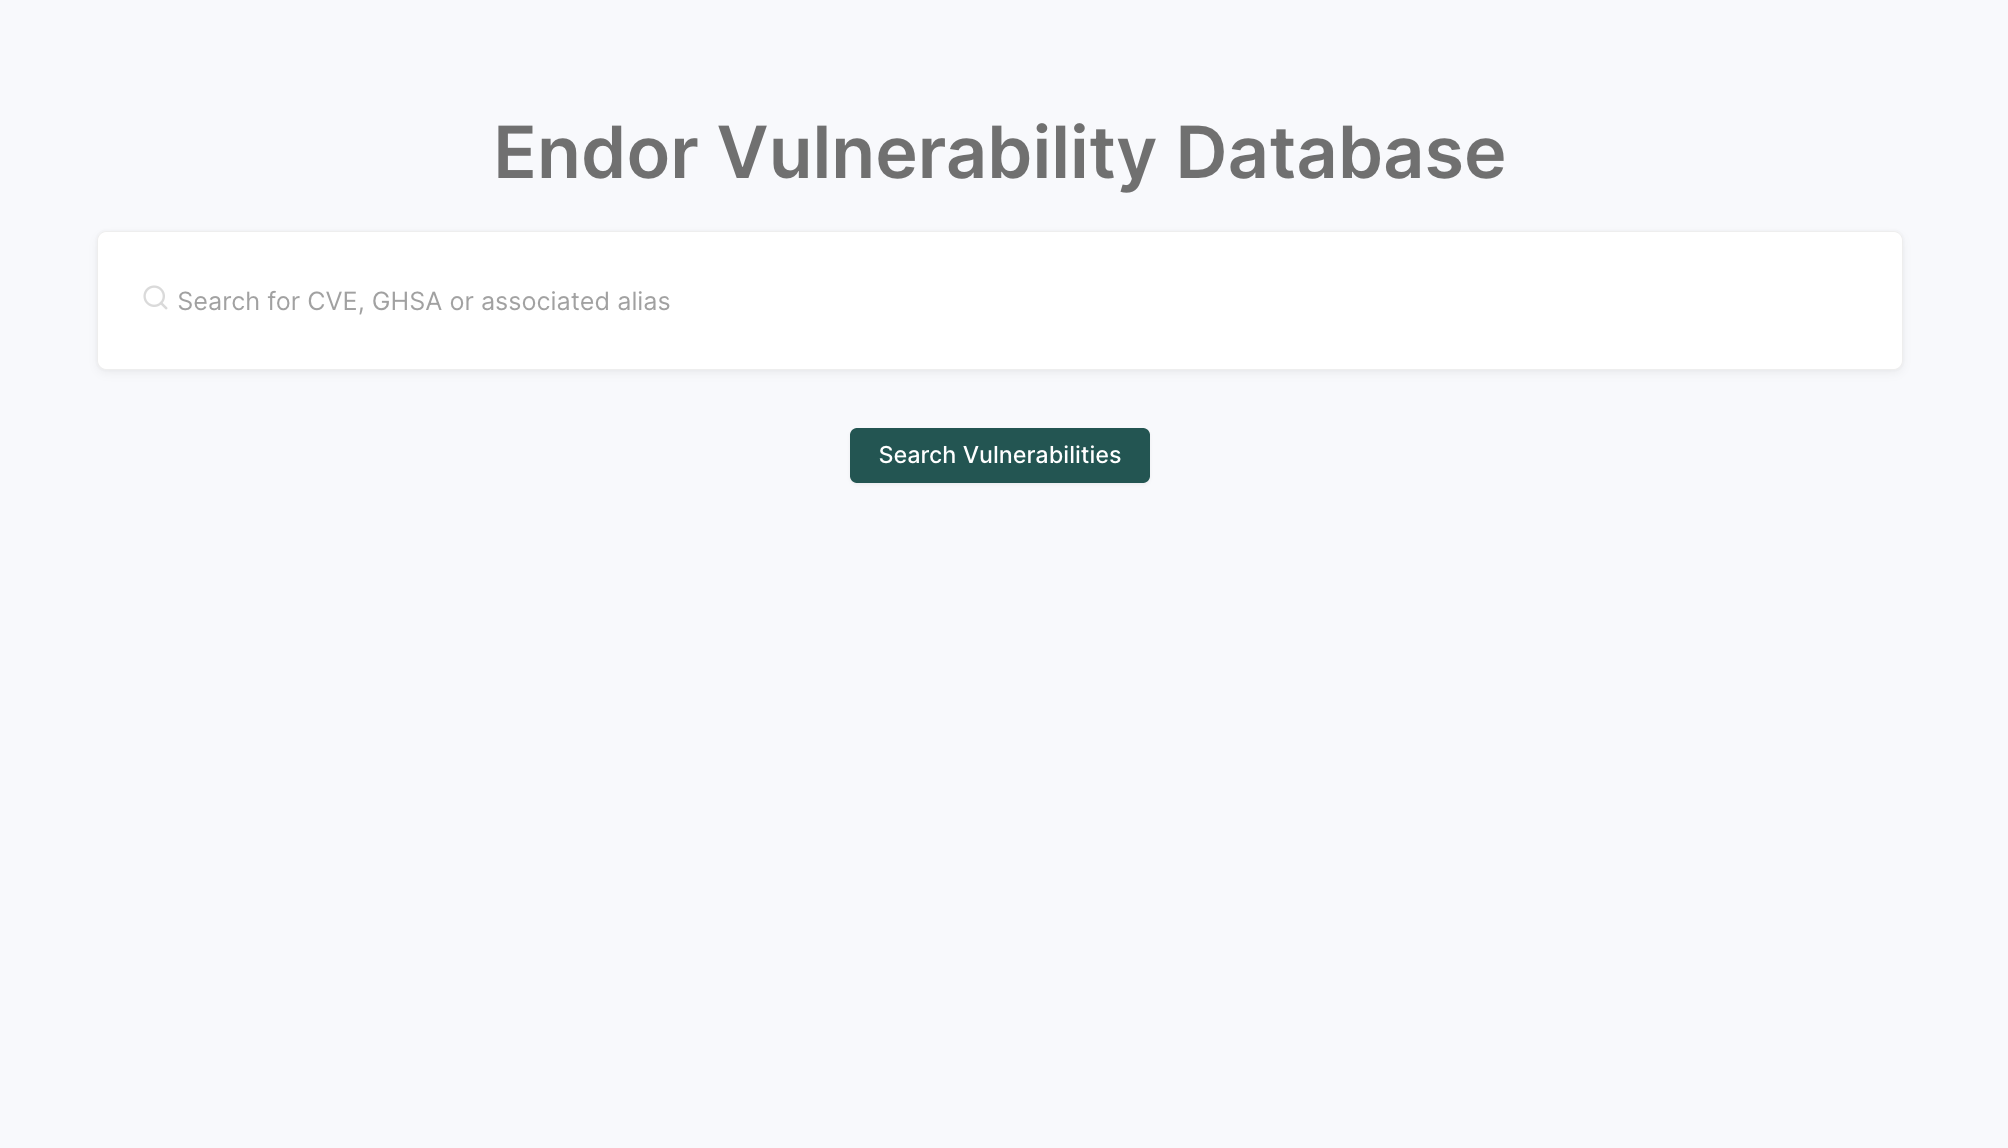
See Endor Labs vulnerability database for more information.
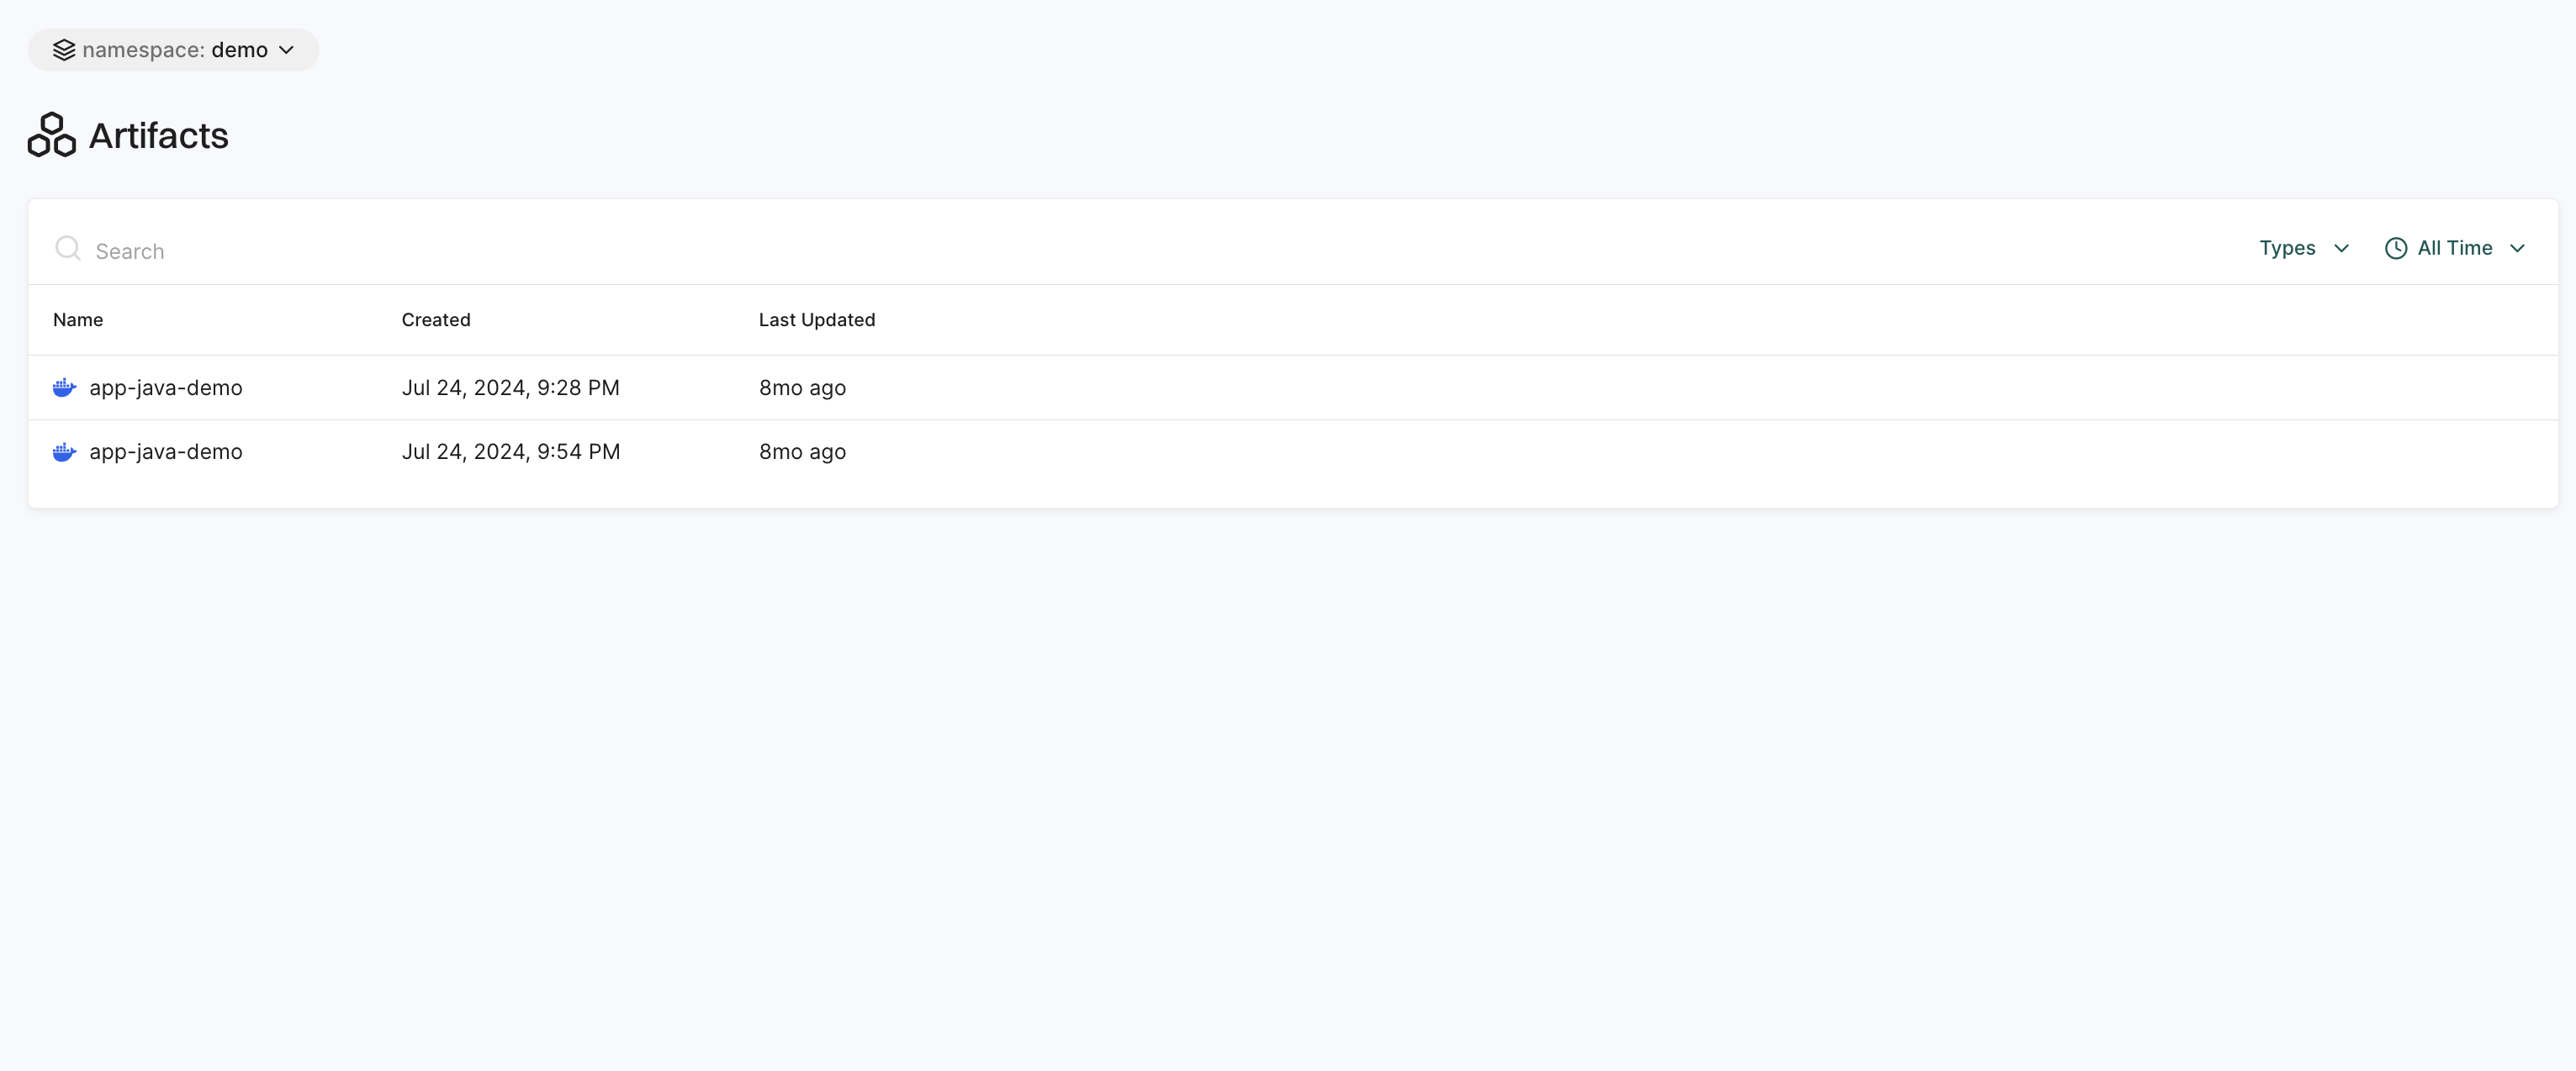
Artifacts
The Artifacts page displays signed artifacts along with detailed provenance data. This helps ensure that artifacts are securely generated, traced, and verified within the CI/CD pipeline, reducing the risk of tampering or unauthorized modifications.
See Sign artifacts for more information.
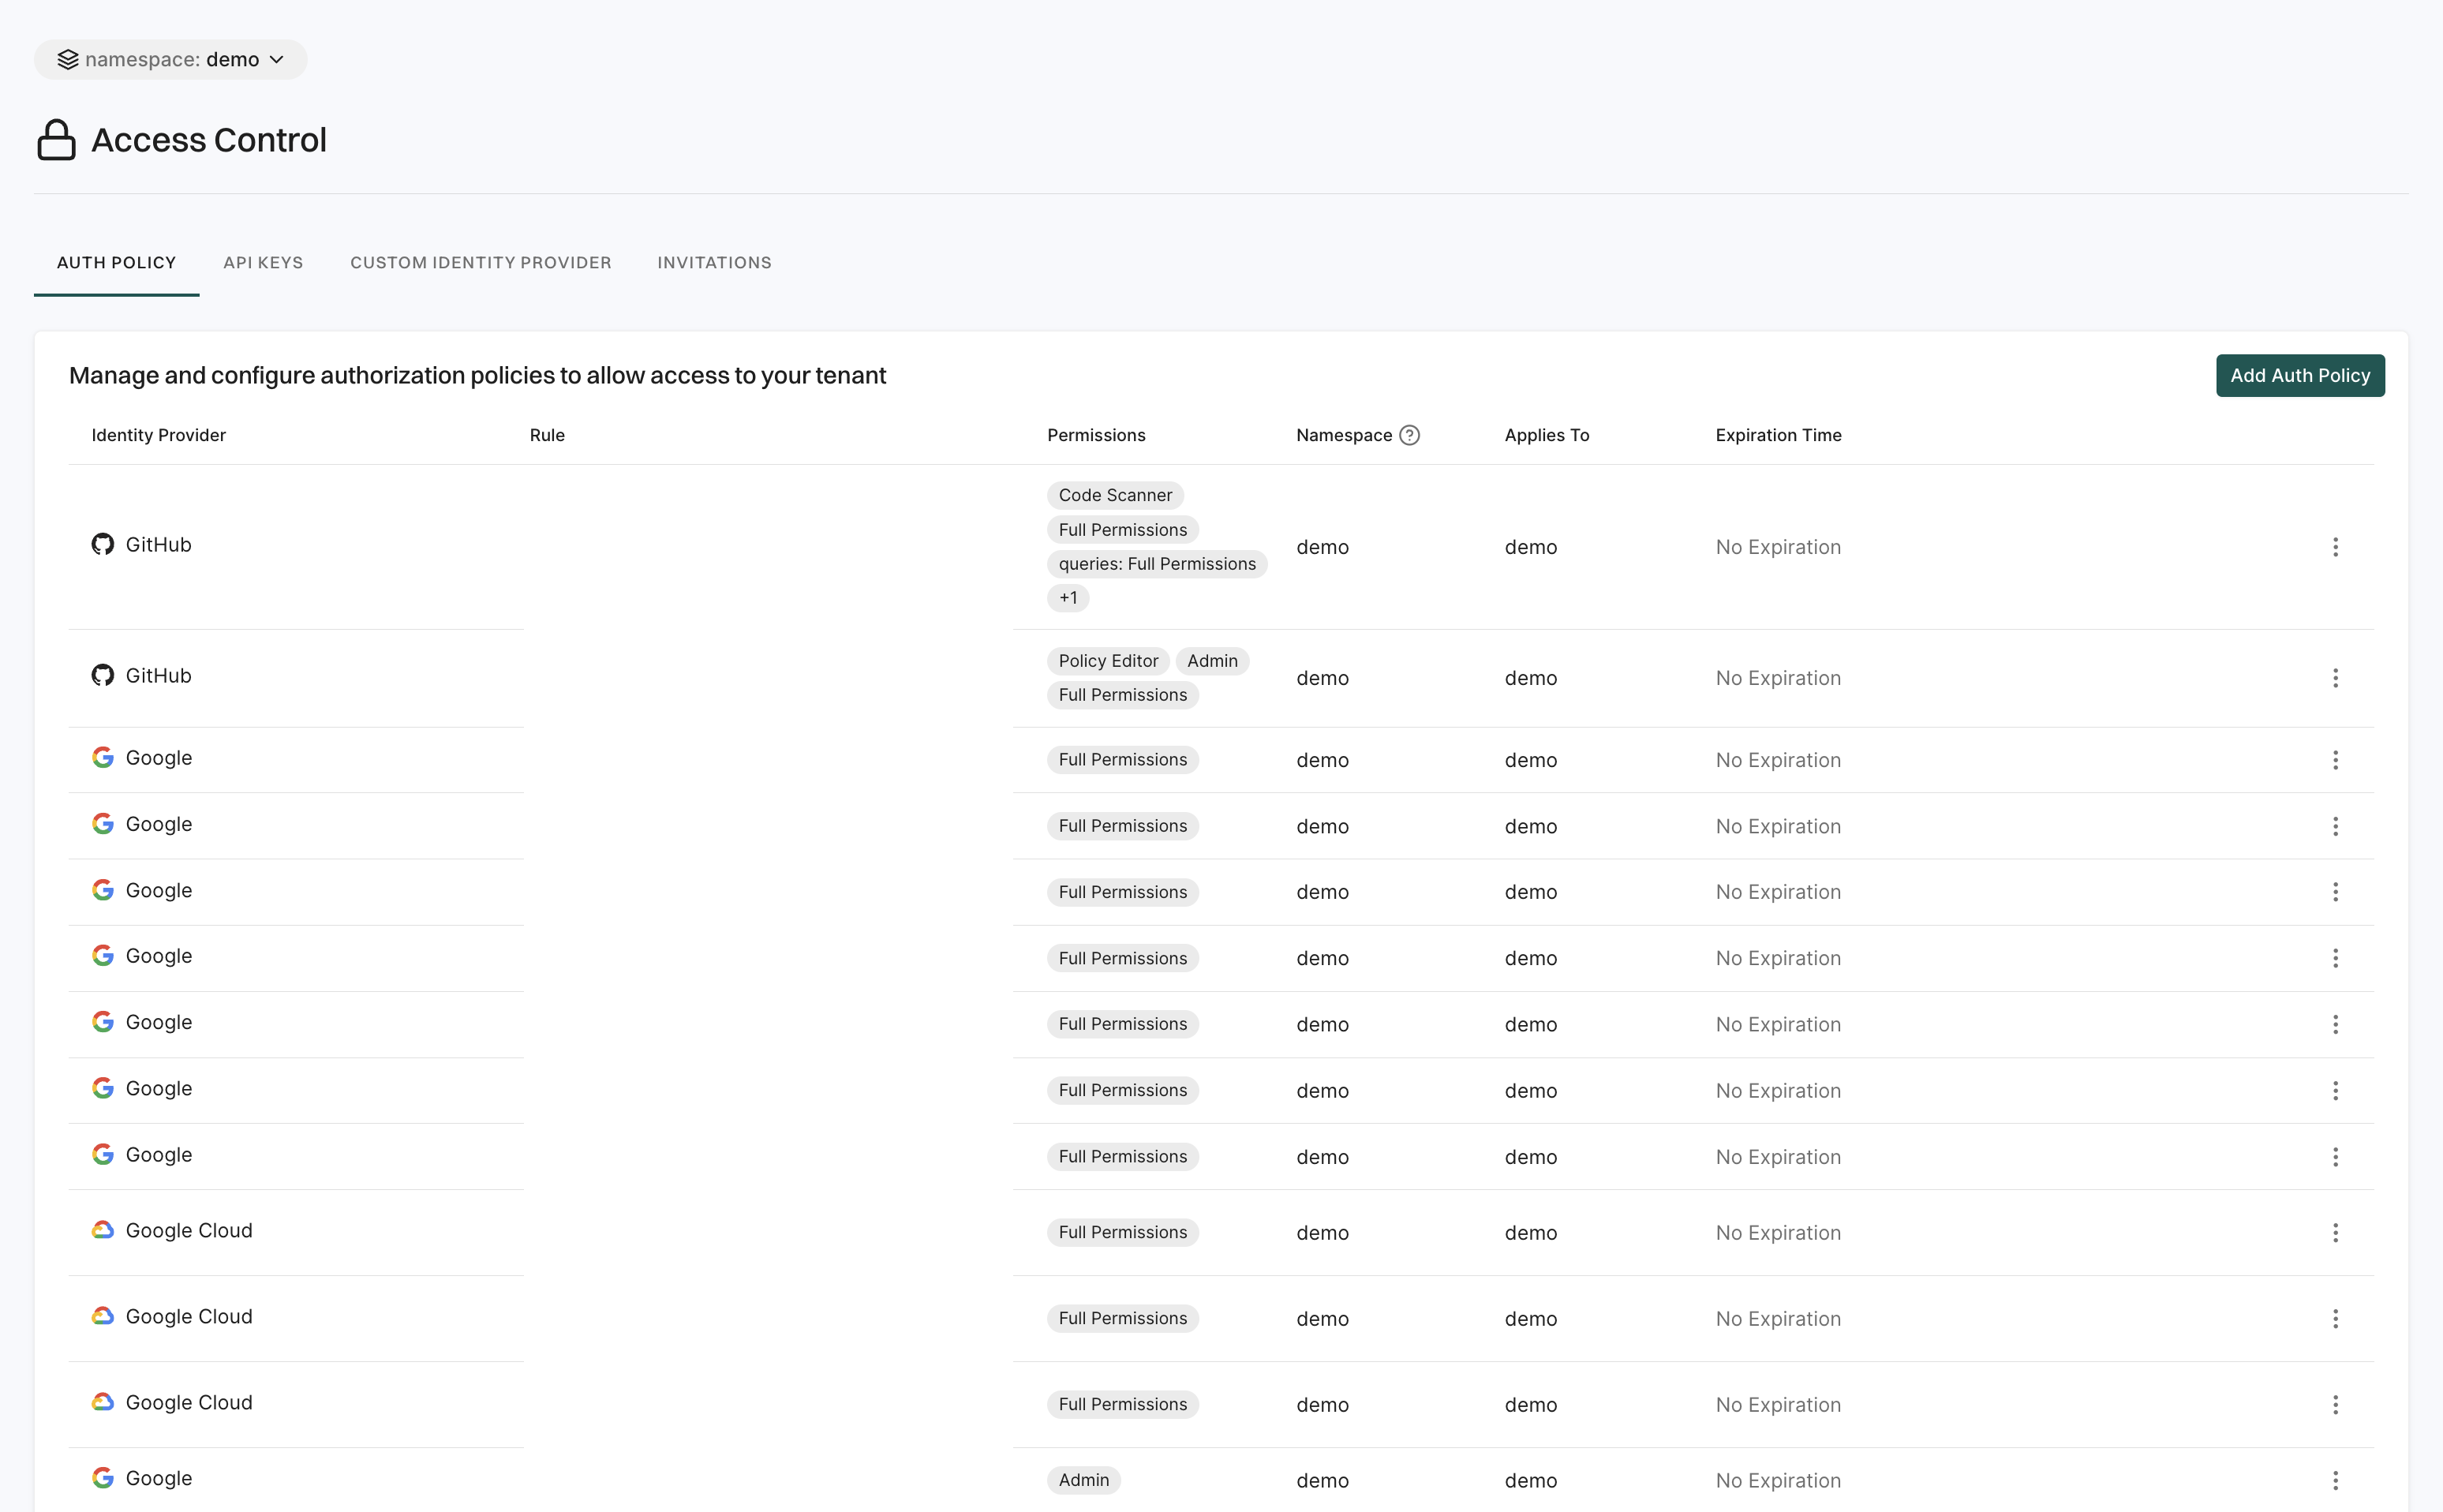
Access control
The Access Control page lets you manage who can access your workspace and how they authenticate.
It includes the following features:
- Auth Policy: Set rules for user authentication and access control, including password policies, multi-factor authentication (MFA) requirements, and session management settings, ensuring that only authorized users can access the system.
- API Keys: Users can create and manage API keys to enable secure system access for automated processes, integrations, and external applications.
- Custom Identity Provider: Connects third-party authentication providers to enable Single Sign-On (SSO) and centralized authentication for user.
- Invitations: Users can send and manage invitations for new users to join the workspace. It allows to invite users via email, track the status of invitations, and resend or revoke invitations.
See Manage access to Endor Labs for more information.
Integrations
The Integrations page allows you to connect Endor Labs with external tools and services to enhance functionality and streamline workflows. You can set up integrations with security scanners, CI/CD pipelines, ticketing systems, and more. These integrations help automate security checks, improve vulnerability tracking, and ensure seamless communication between Endor Labs and other development tools.
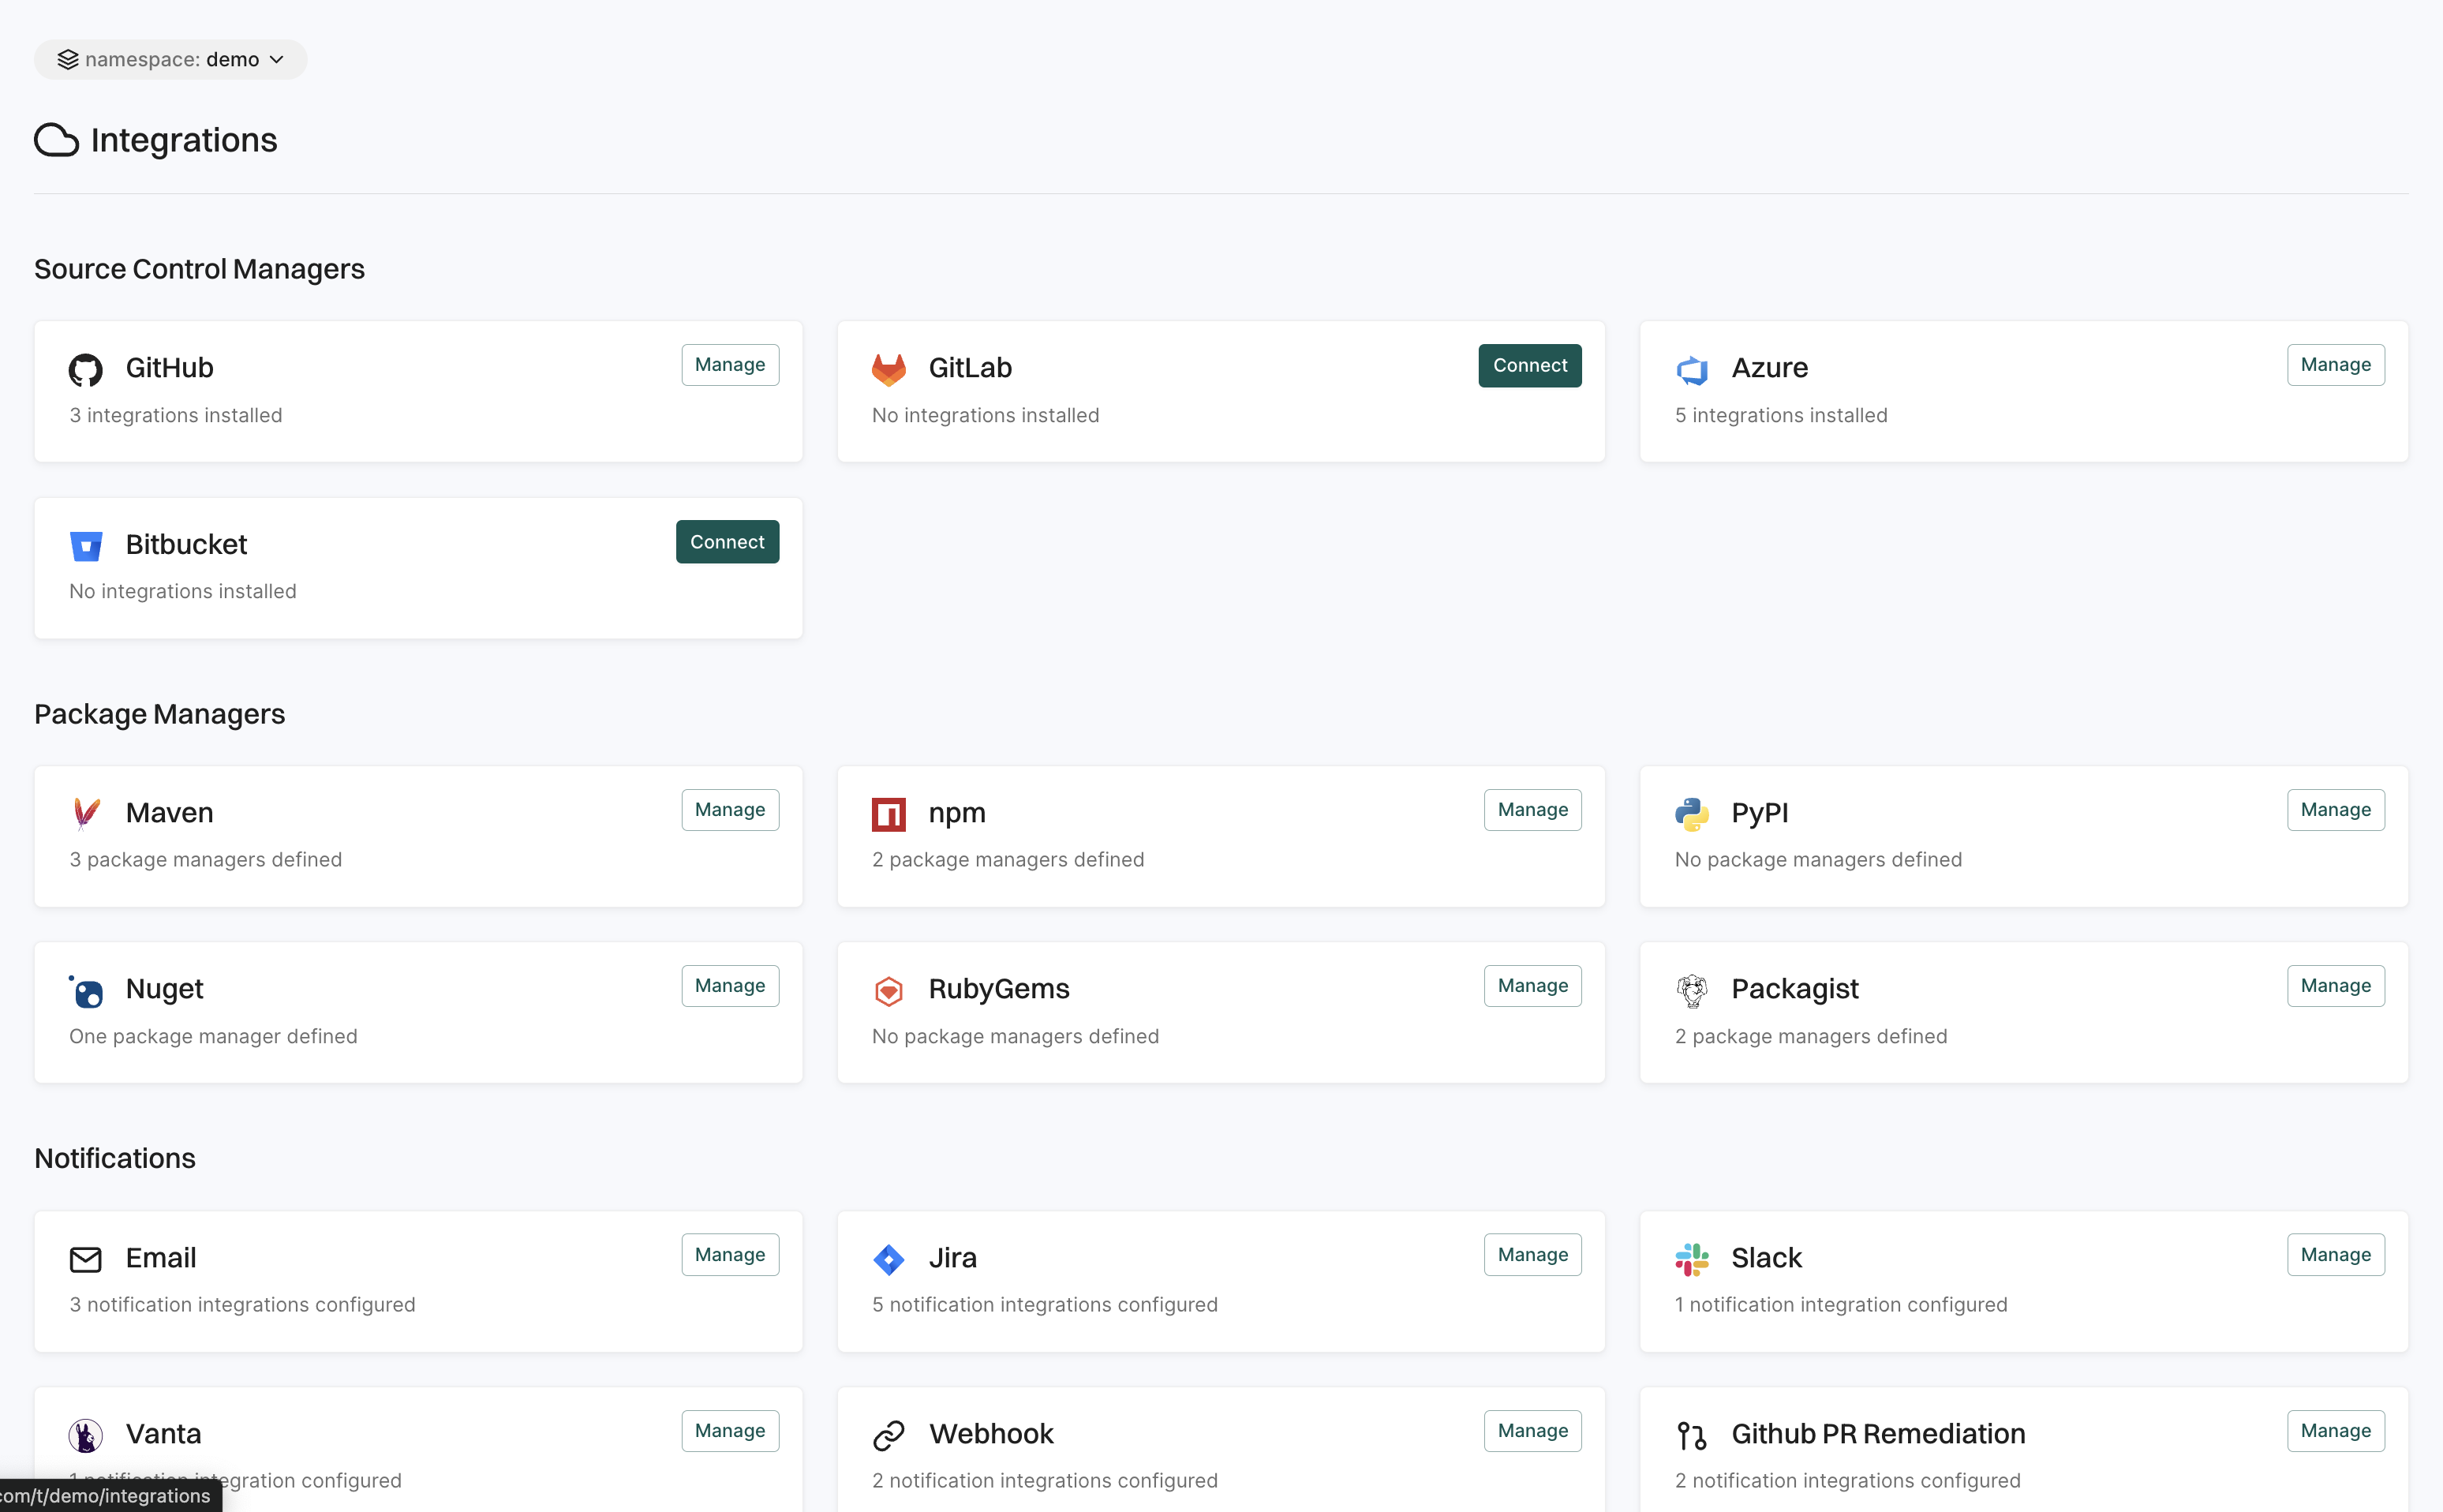
See Endor Labs Integration for more information.
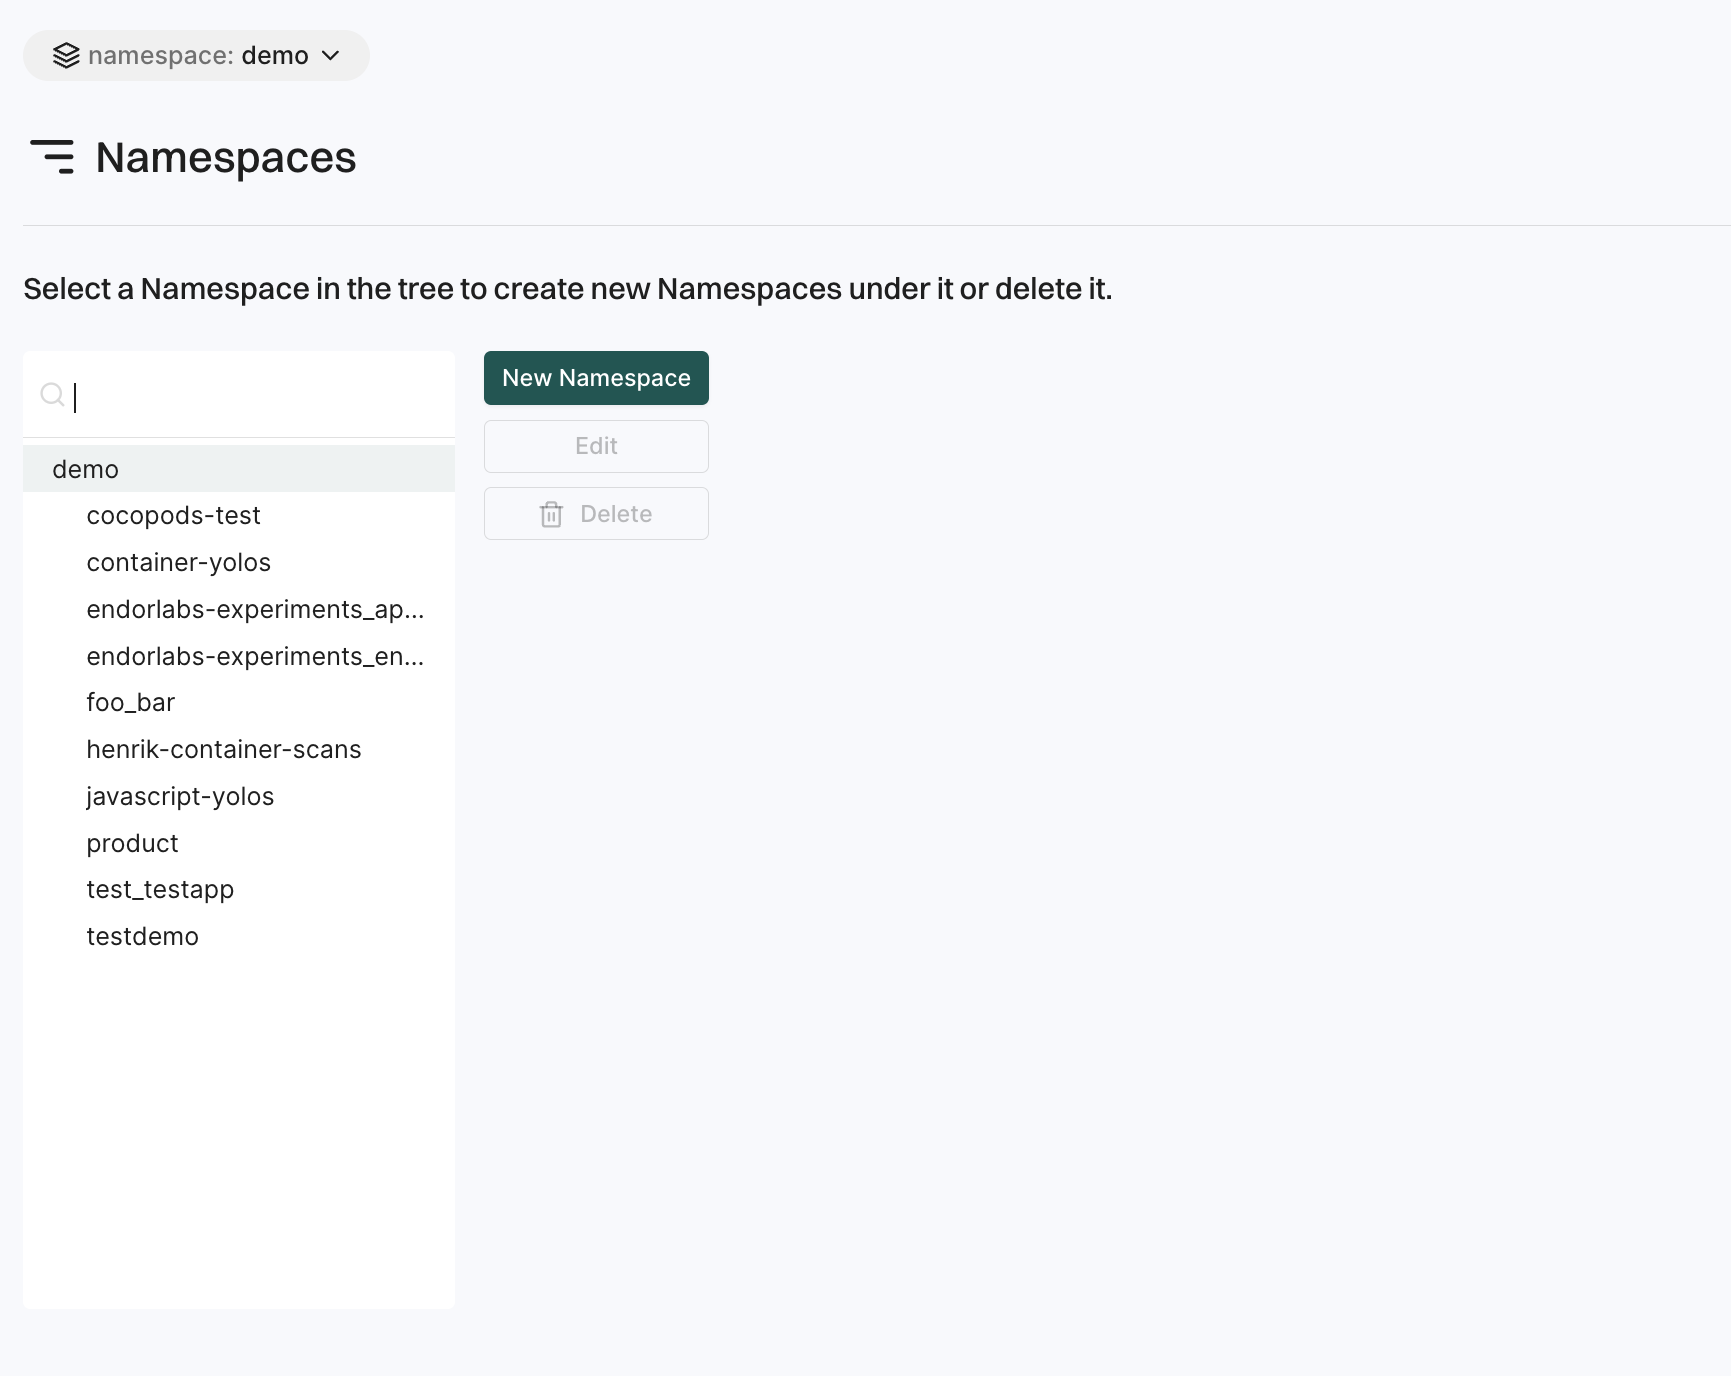
Namespaces
The Namespaces page allows users to organize their projects logically and manage access controls within the organization.
- Create a namespace: Users can create namespaces to group projects according to organizational units, project requirements, or teams.
- Edit a namespace: Users can modify the description and tags of an existing namespace.
- Delete a namespace: Users can delete a namespace which will permanently remove all its child namespaces and projects within it.
See Namespaces for more information.
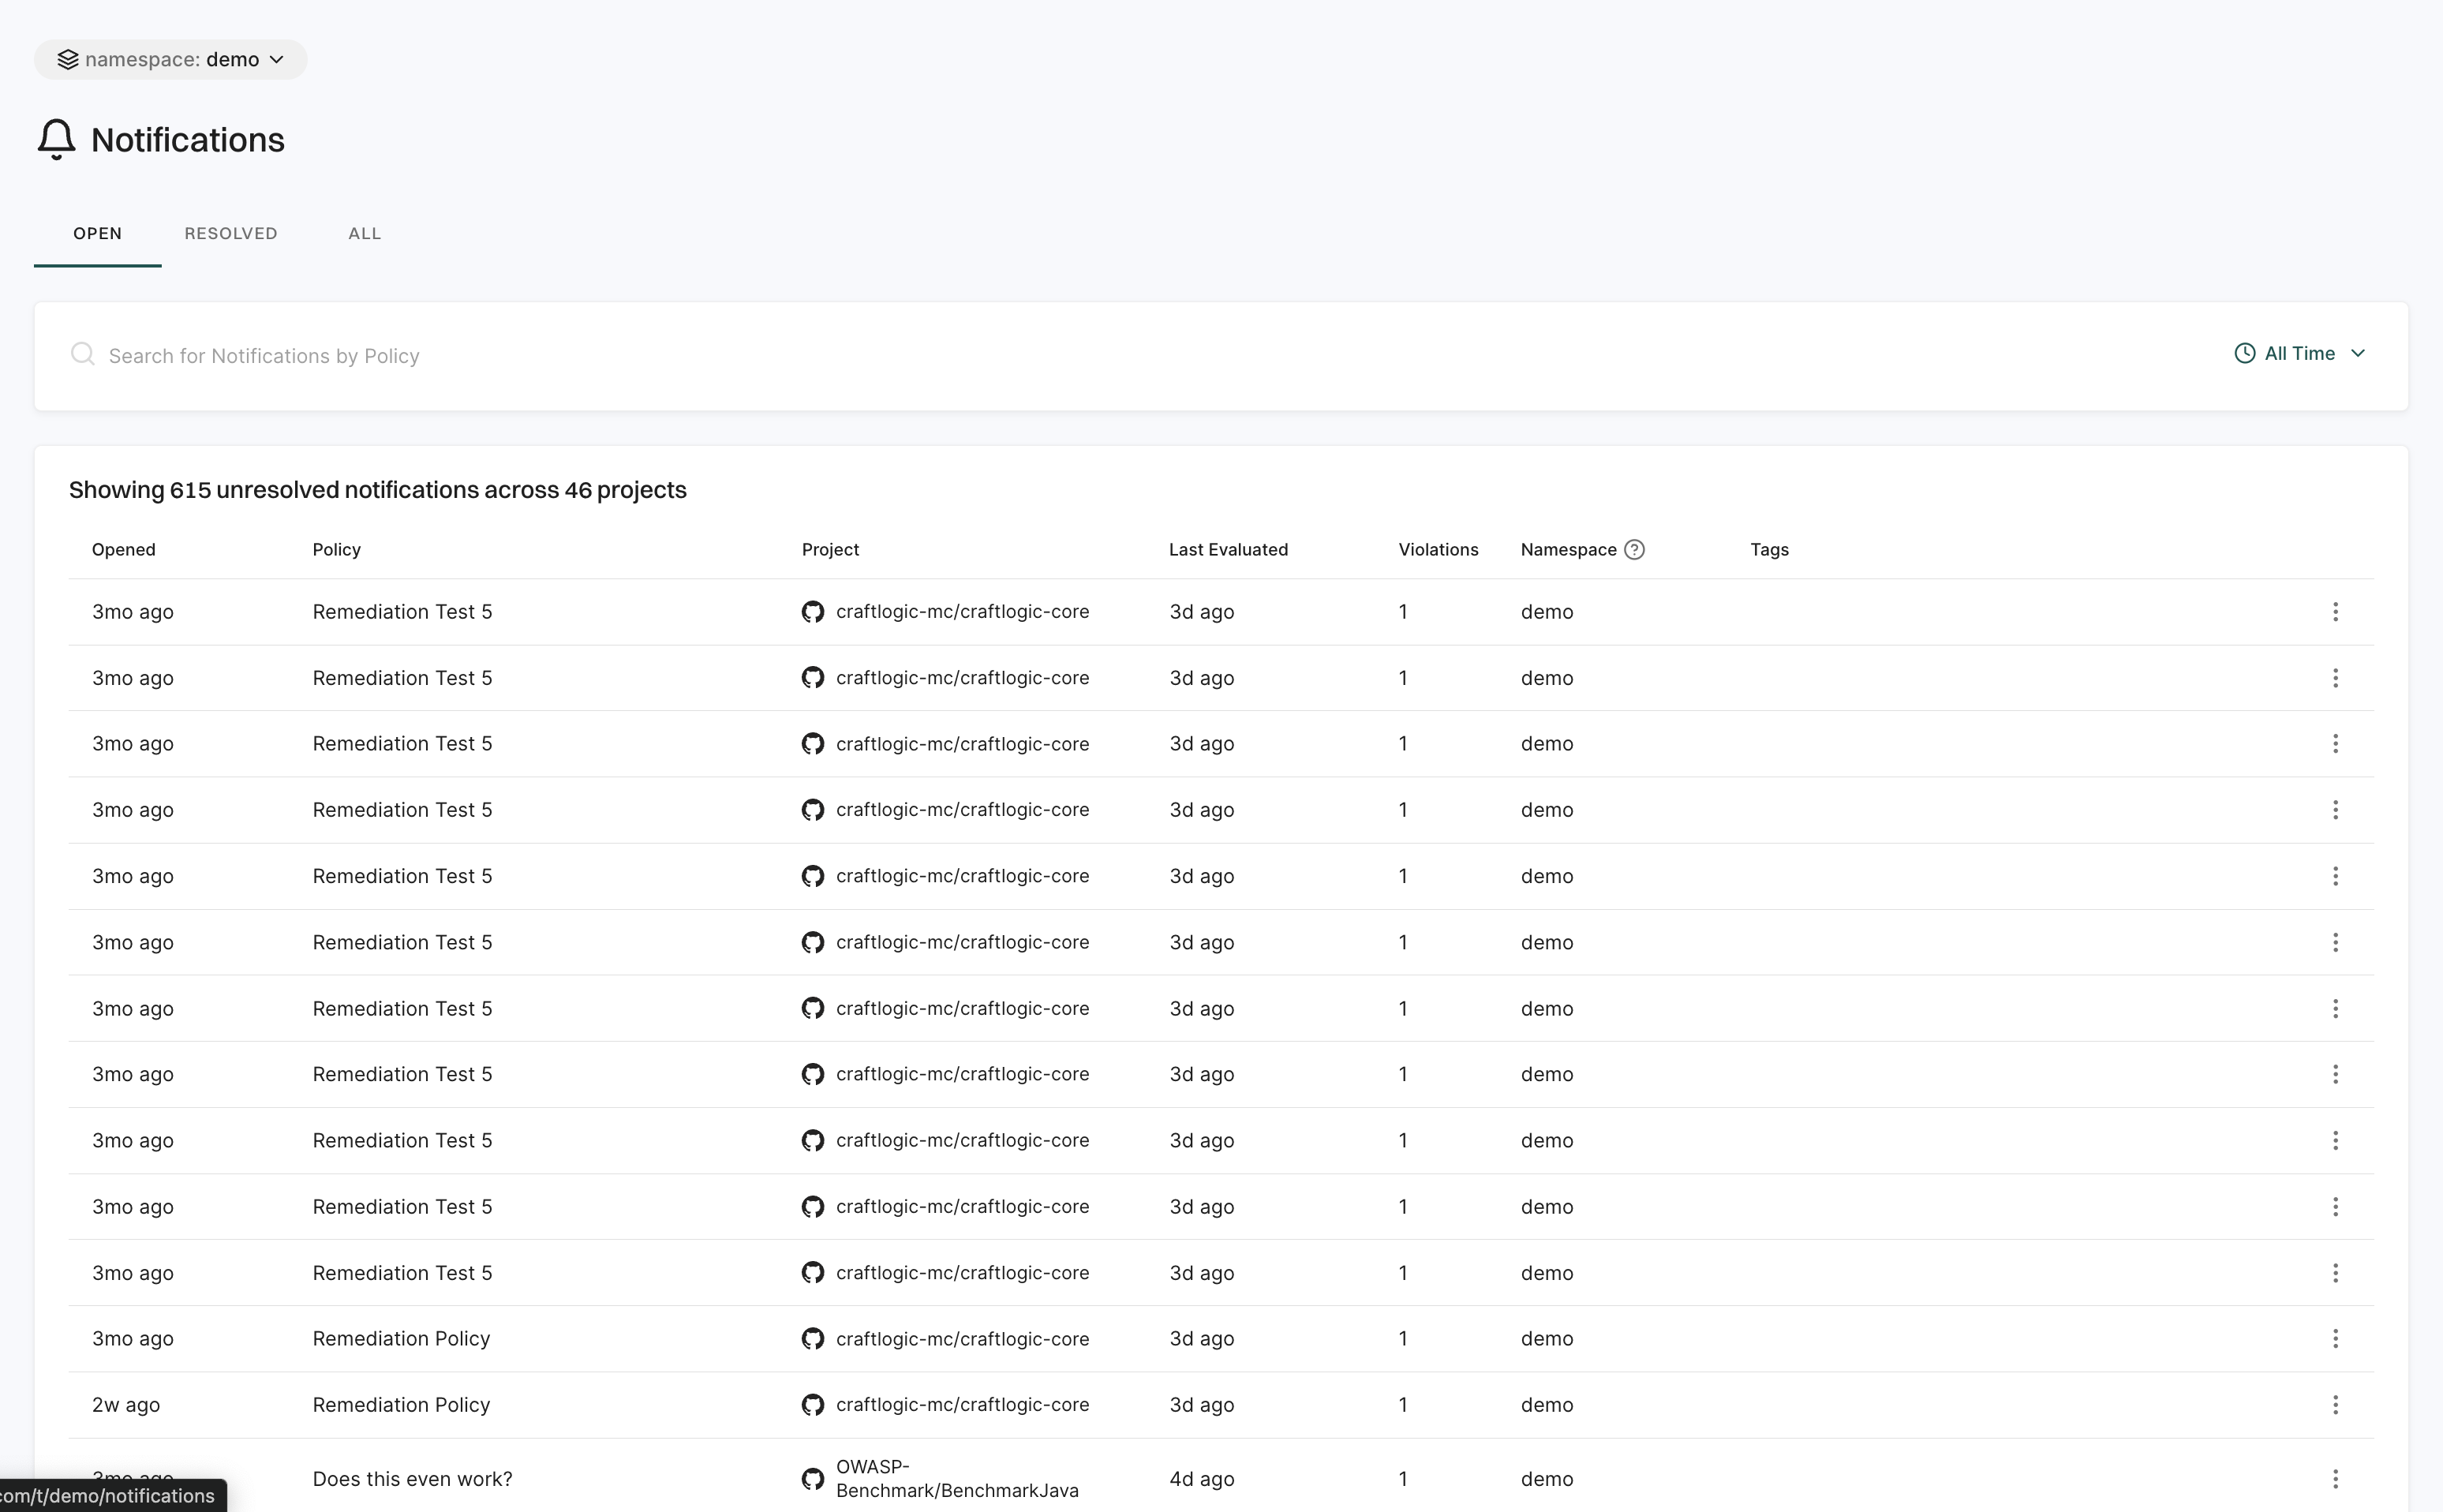
Notifications
The Notifications page keeps you updated on security events and policy violations.
It is organized into three categories:
- Open: Displays active notifications that require attention.
- Resolved: Displays notifications that have been addressed.
- All: Displays a complete history of all notifications.
Users can set up notification integrations for email, Jira, Slack, Vanta, webhooks, GitHub PR remediation, and GitHub PR comments.
Use filters to sort by time range and quickly find key details like timestamps, related policies, project names, evaluation times, violations, namespaces, and tags.
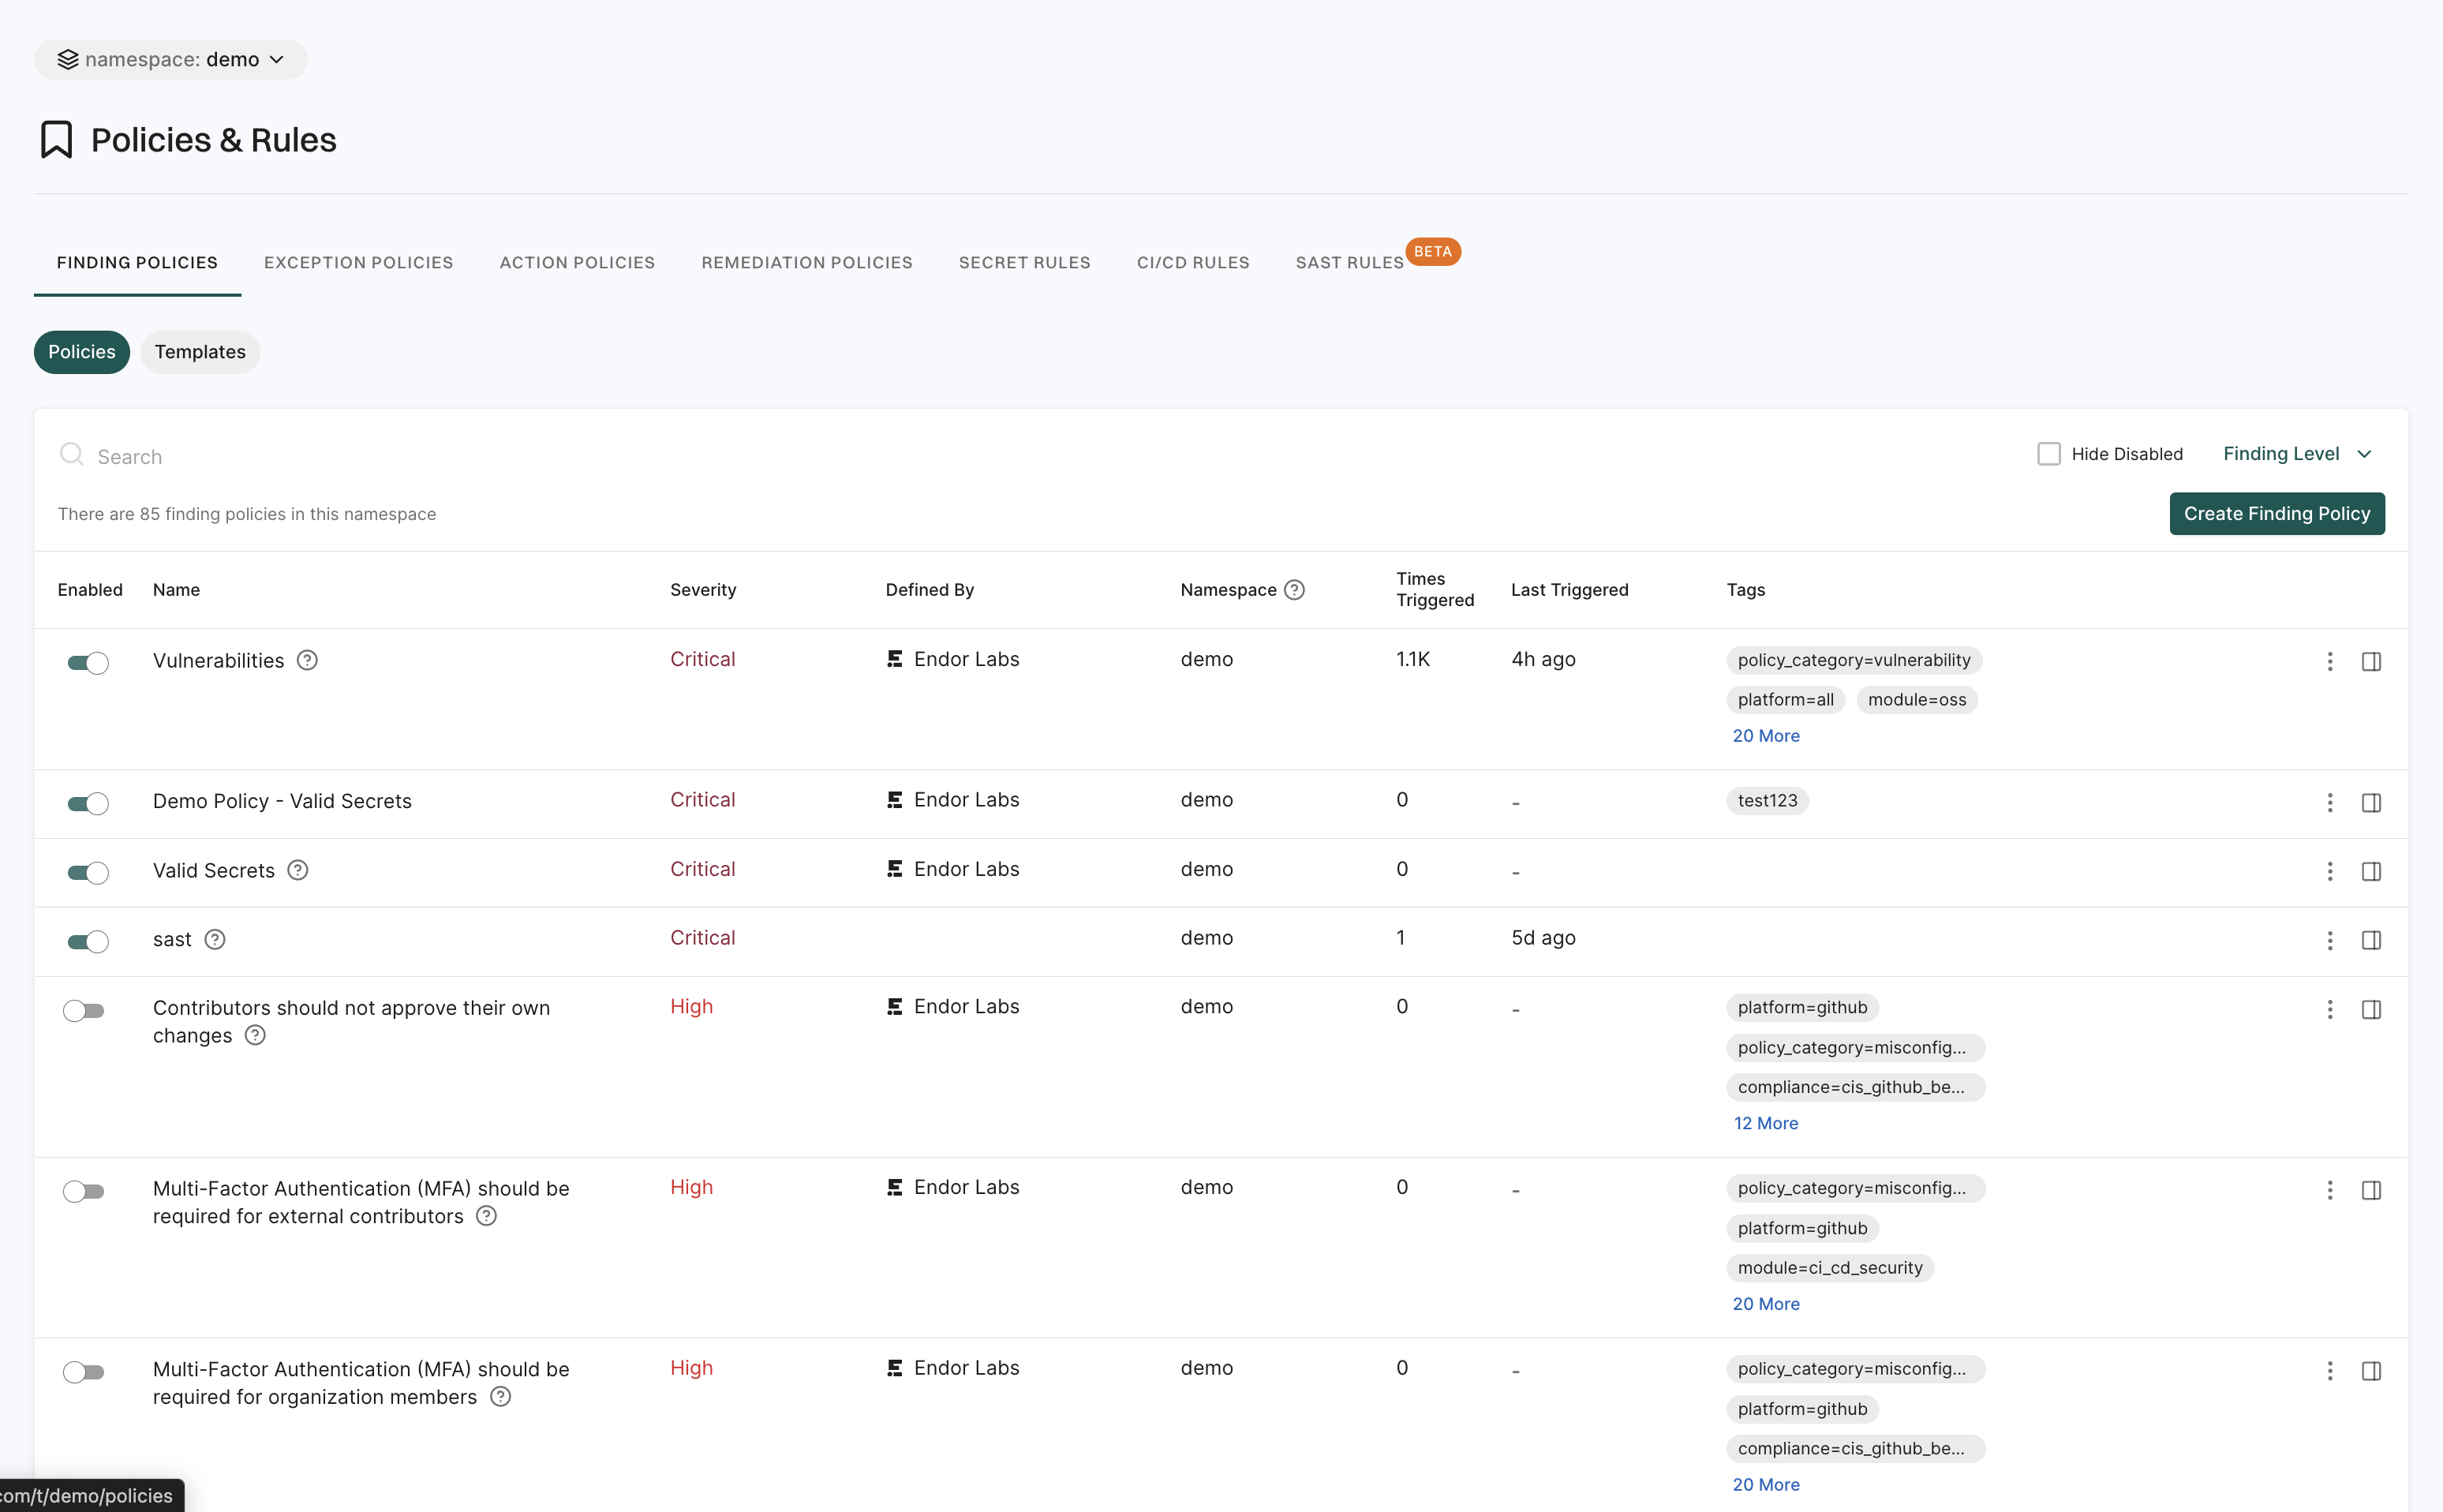
Policies and rules
The Policies & Rules page allows users to define security and compliance policies for their projects.
It includes:
- Finding Policies: These policies enable users to detect and categorize security issues within their projects. Administrators can create custom finding policies to address specific security needs and ensure the detection of vulnerabilities.
- Exception Policies: These policies allow users to define conditions under which certain findings can be marked as exceptions. This helps in filtering out known issues that have been accepted as risks.
- Action Policies: These policies enable the automation of responses to policy violations.
- Remediation Policies: These policies define guidelines for fixing identified security issues.
- Secret Rules: These rules are used to detect and manage exposed secrets within the codebase. They help in identifying sensitive information.
- CI/CD Rules: These are rules specifically designed to enforce security standards within CI/CD pipelines. They ensure that security checks are integral to the build process.
- SAST Rules: These rules enable users to perform automated analysis on their source code to detect potential security vulnerabilities.
See Policies for more information.
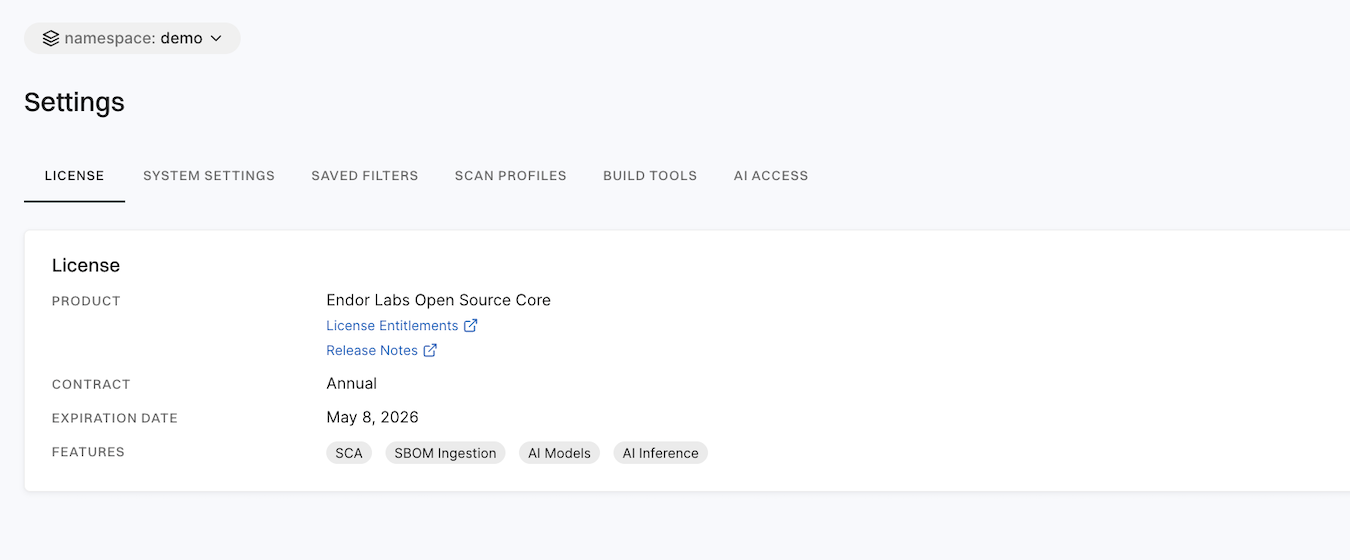
Settings
Settings enables users to configure platform preferences, security policies, and integrations.
It includes:
- License: This section provides details about the licensing information for Endor Labs products. Users can view current license status, contract, expiration date and features.
- System Settings: These settings allow users to manage essential configurations such as Data Privacy, Endor Patches, Policies & Rules, and SBOM configurations.
- Saved Filters: Users can create and manage reusable filters for findings and dependencies. They help users to apply custom views and criteria to their data.
- Scan Profiles: This feature allows users to define and customize scanning configurations. A scan profile can include specific parameters, toolchains, and paths to different projects.
- Build Tools: This allows users to set up integrations for dependency analysis ensuring that the software build process incorporates dependency checks.
- AI Access: This section provides details about AI powered features in Endor Labs that enhance security analysis and code insights. It includes capabilities like LLM code processing, DroidGPT, and C/C++ embeddings.
See Administration for more information.
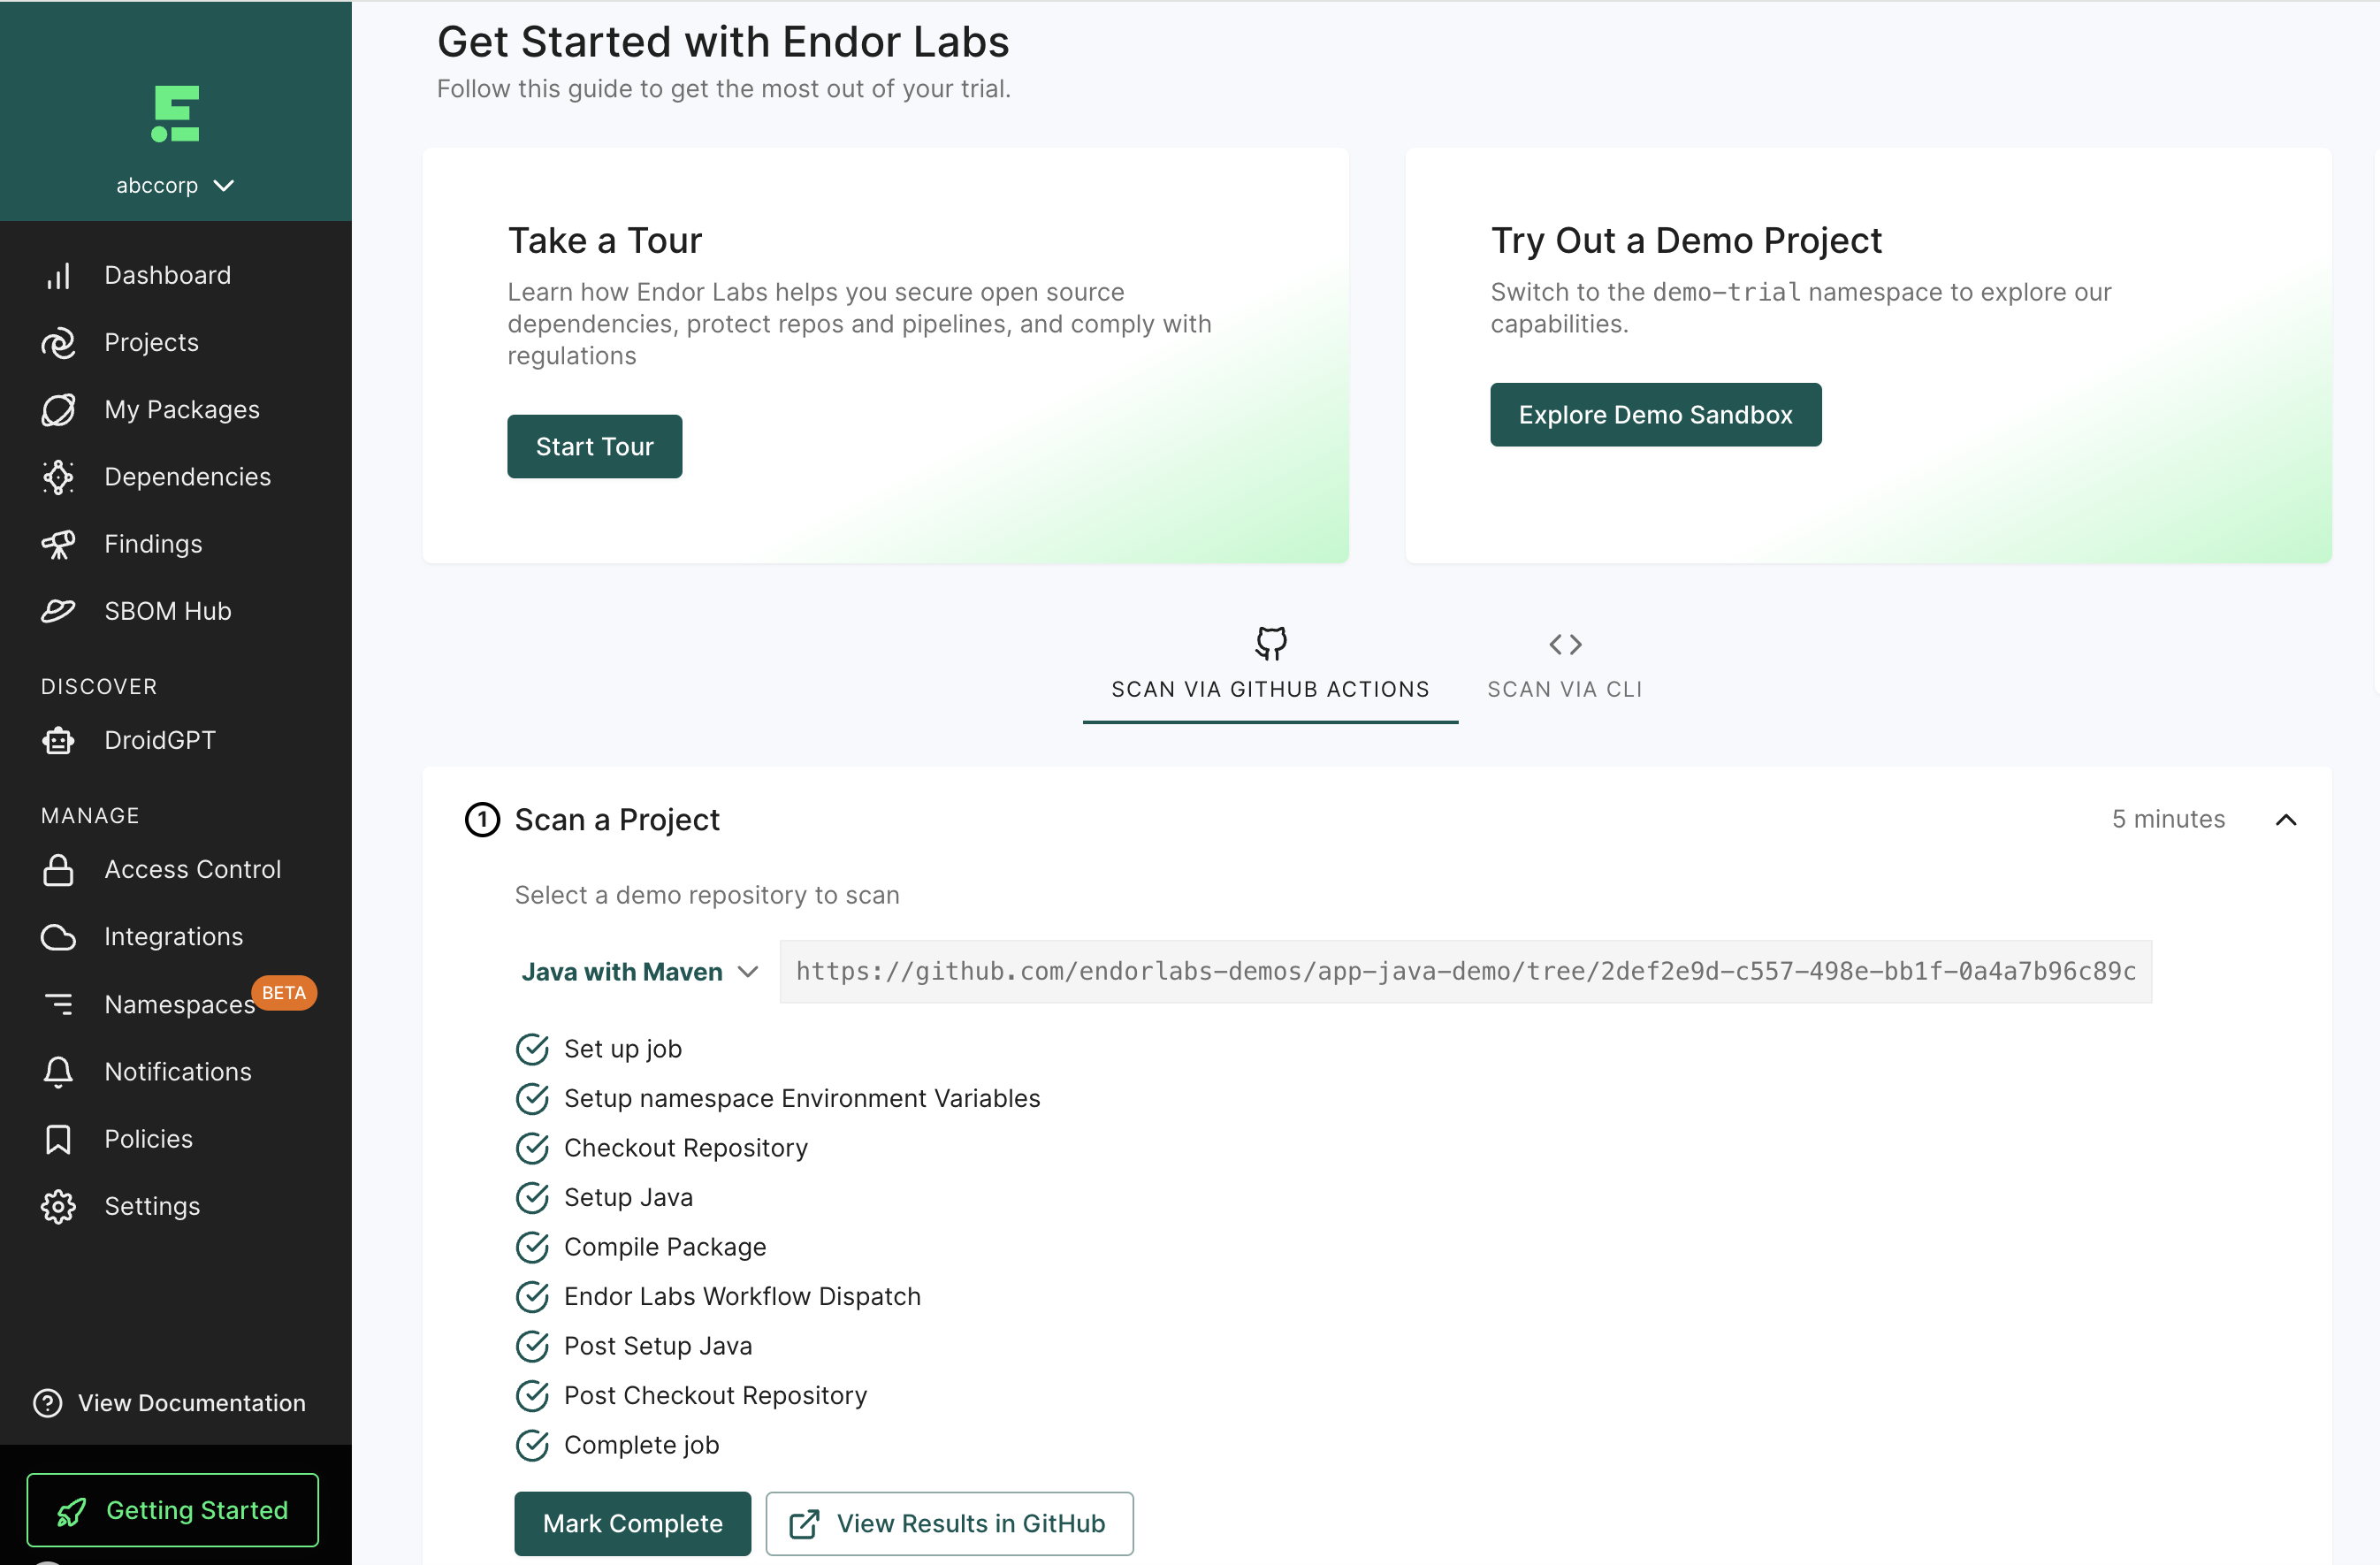
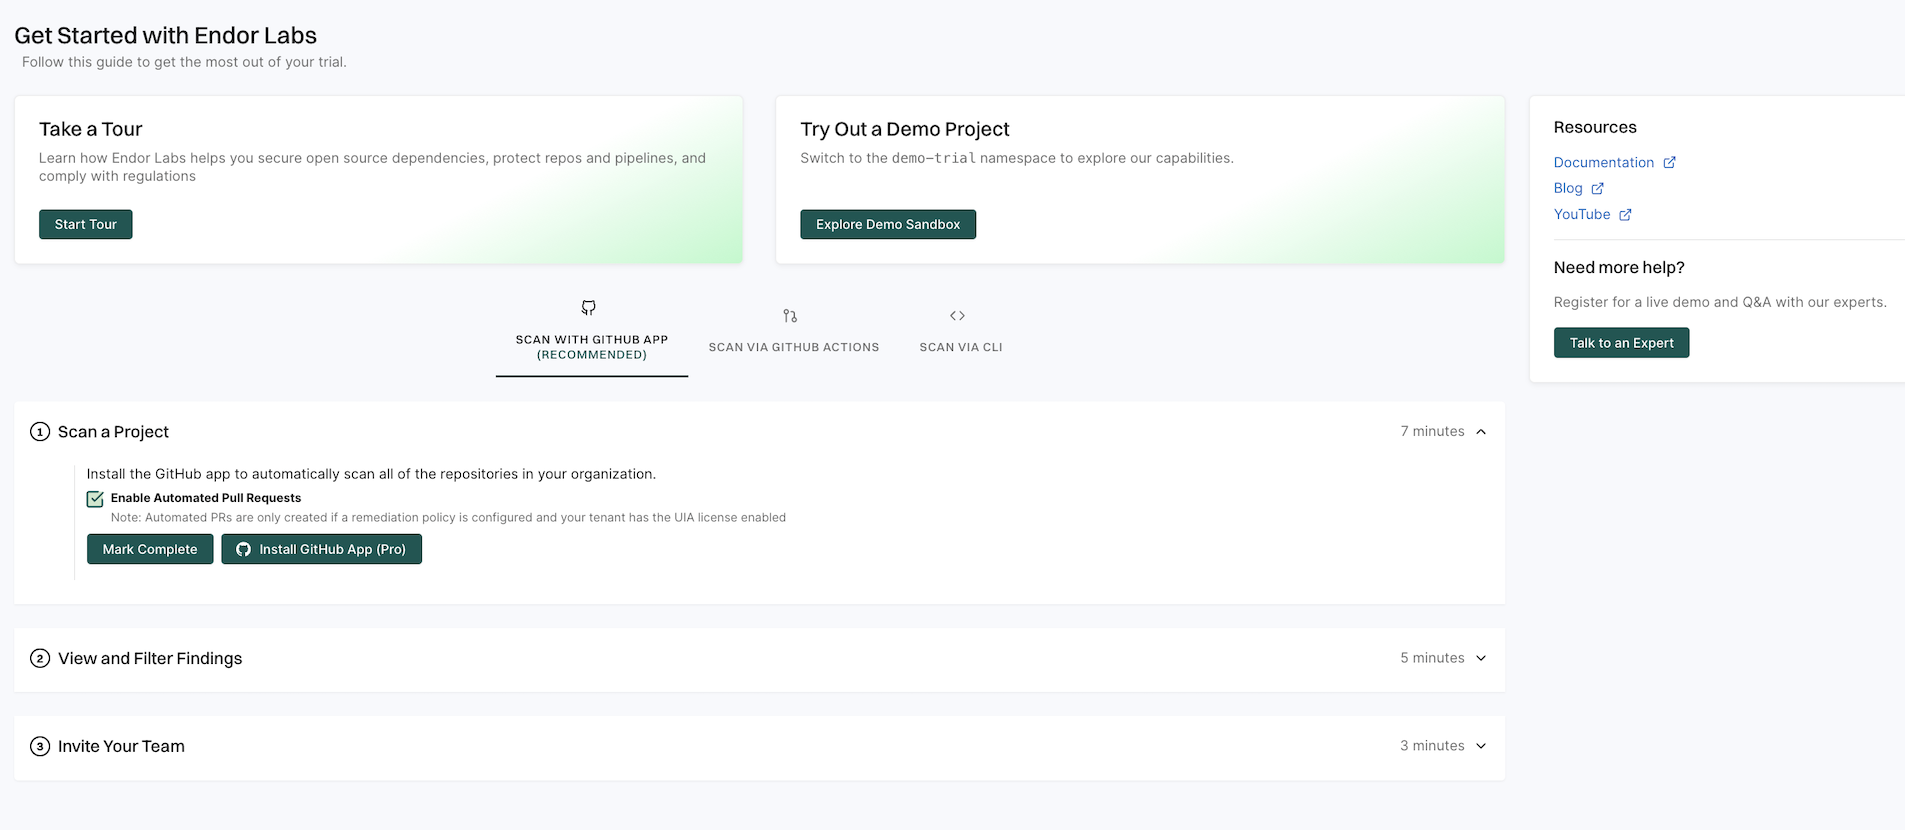
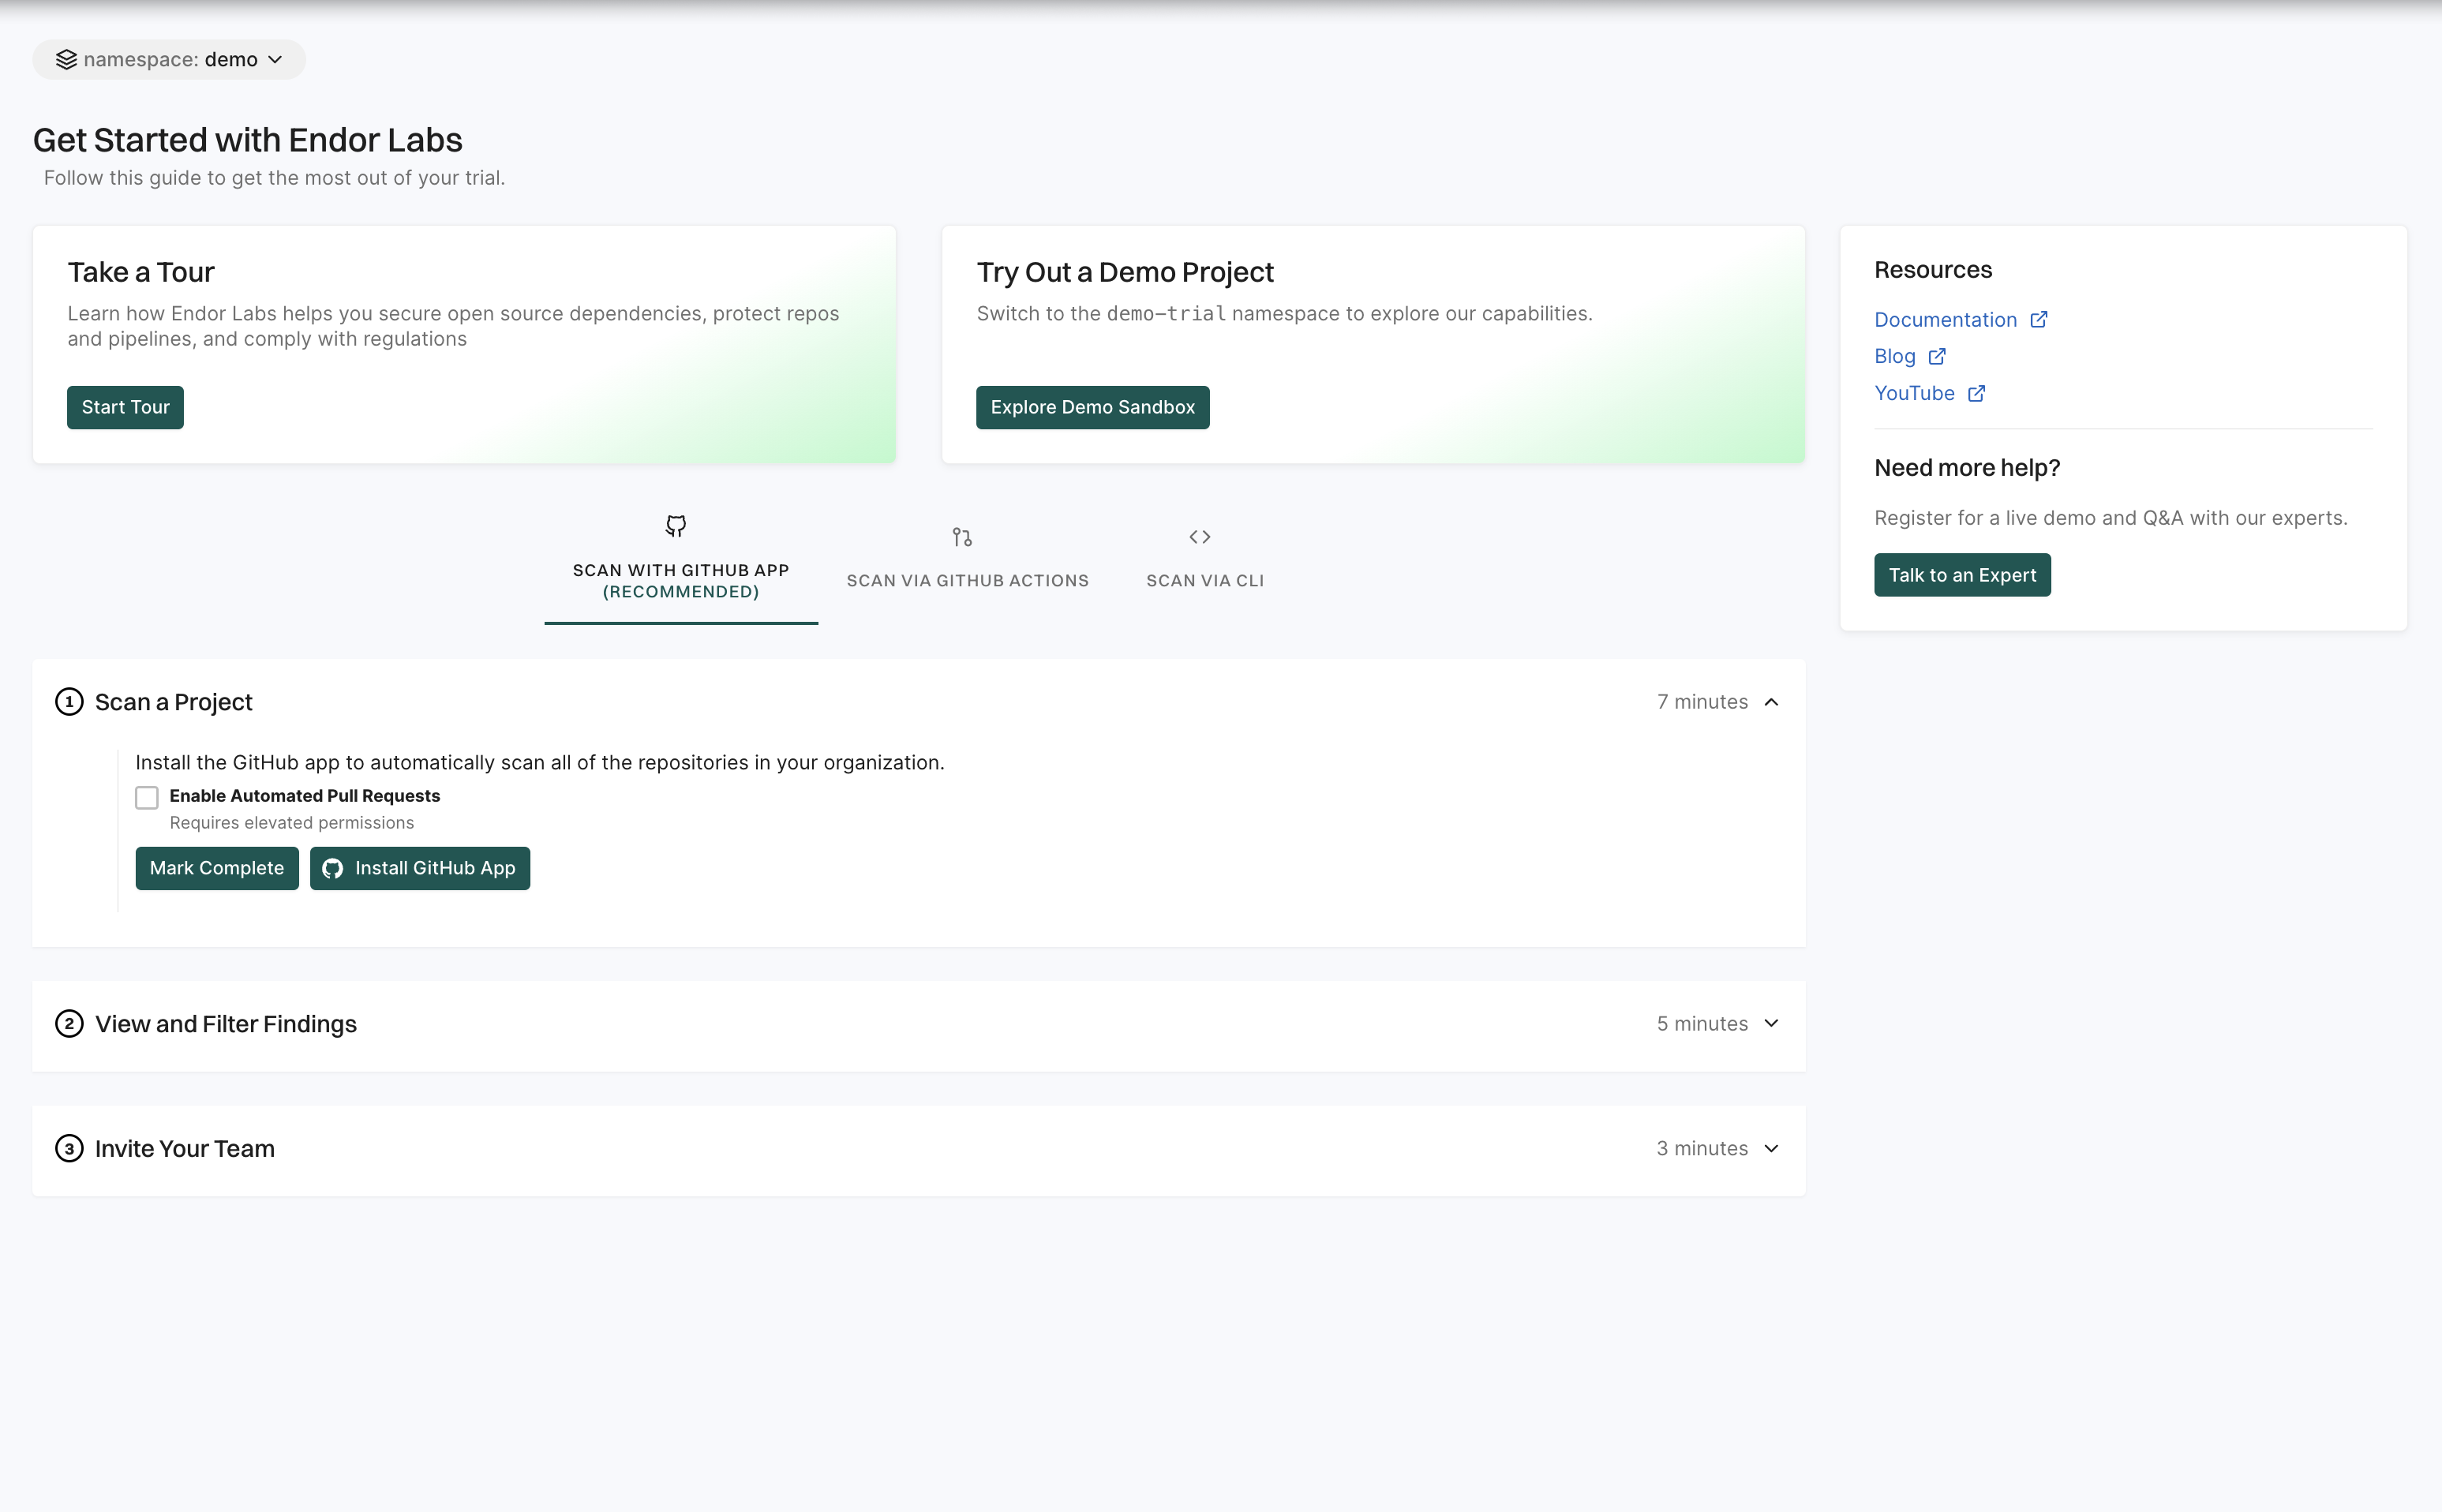
Getting started
The Getting started page is designed to help you quickly familiarize yourself with Endor Labs and make the most of its features. It provides a step-by-step guide to setting up your first project and understanding key functionalities.
See Getting started for more information.