Namespaces in Endor Labs define a way to group projects and create logical partitions in an organization based on organizational units, business units, project requirements, or teams.
Using namespaces, administrators can:
- Define hierarchy and control access to project resources within a namespace.
- Establish policy governance by defining the rules of engagement and setting different or same guardrails across namespaces.
Namespaces in an organization
In Endor Labs, you can partition each tenant into multiple namespaces and further divide each namespace into sub-namespaces called child namespaces. Each namespace has its own authorization rules and integrations.
Child namespaces inherit settings, policies, and features from their parent namespace but can also define their own authorization rules, policies, and configurations. This structure helps organizations model hierarchical environments, with each level managing its own access controls and operational settings.
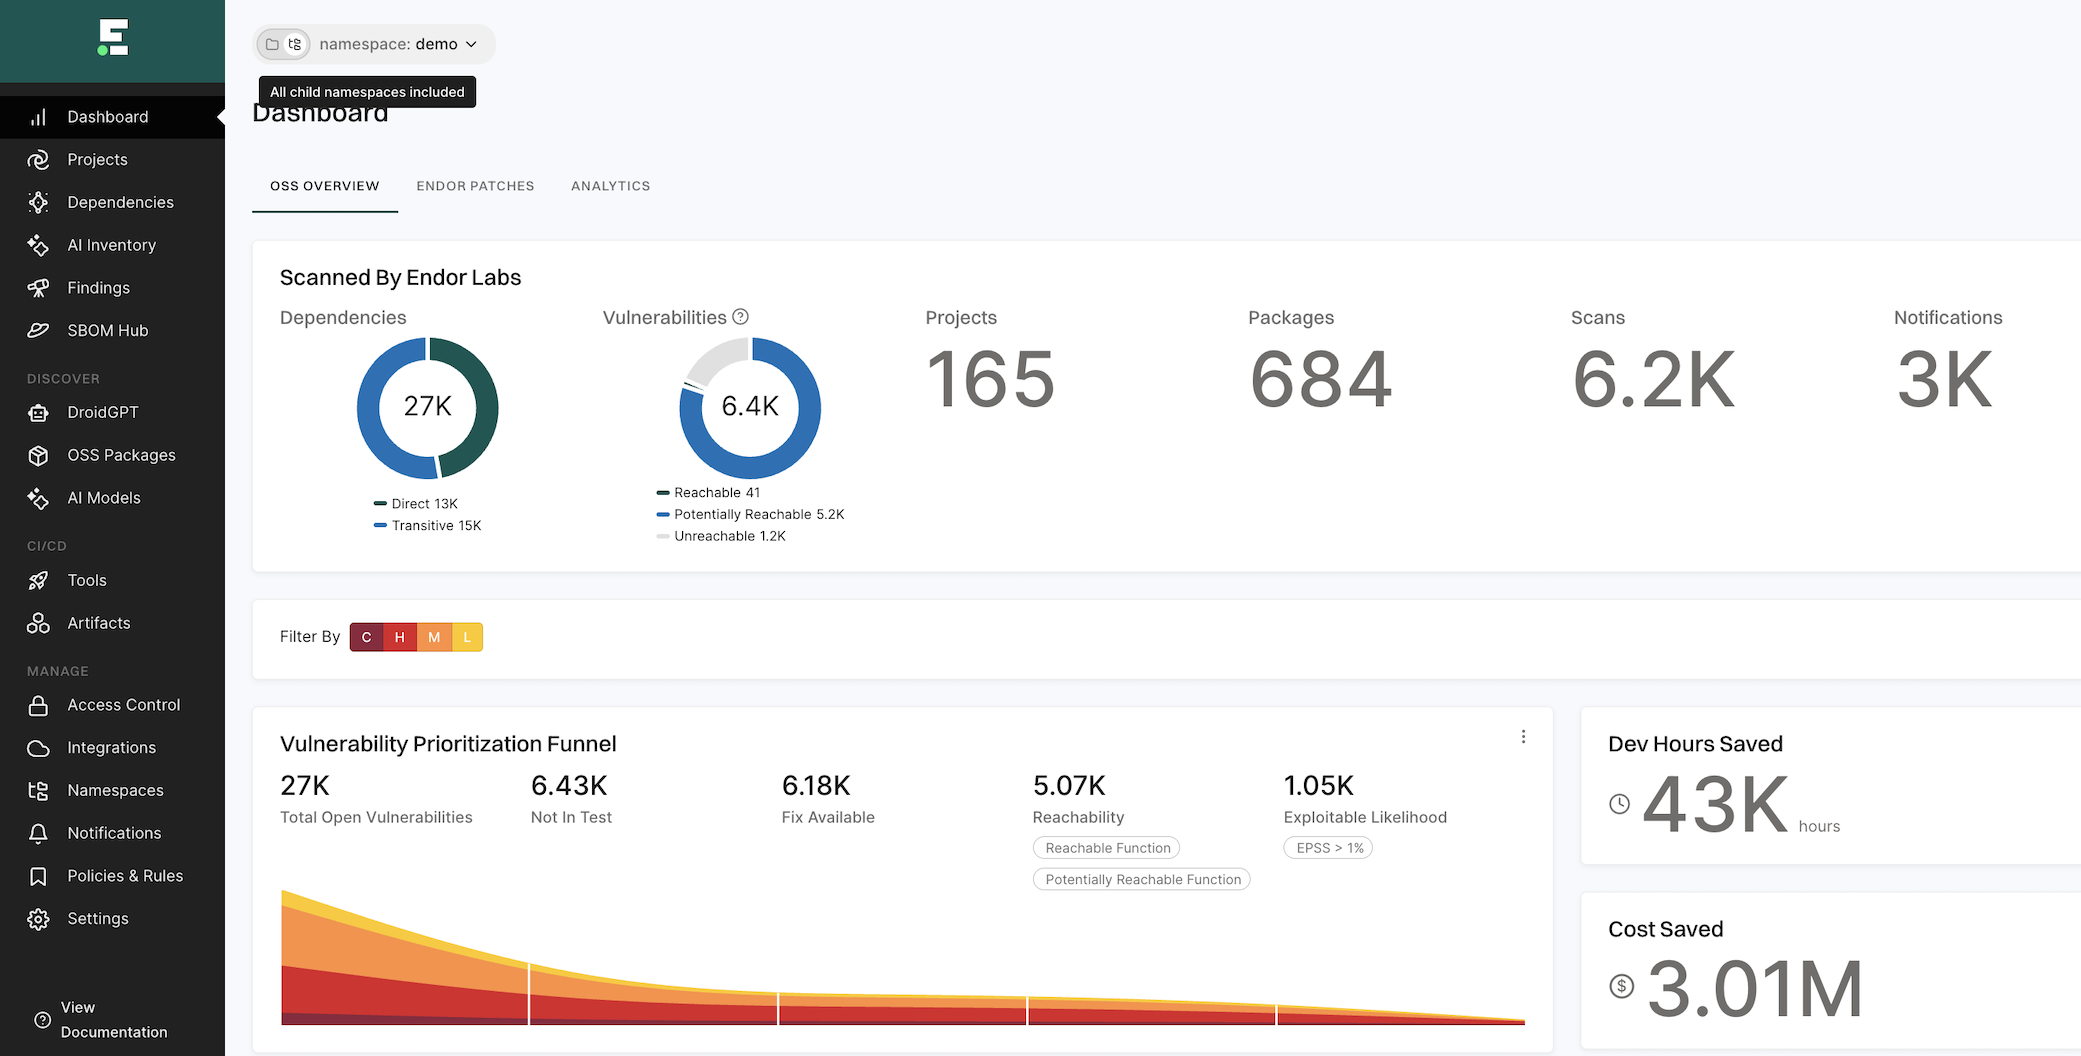
When you access your tenant, Endor Labs includes data from all child namespaces in the dashboard by default, such as vulnerabilities, dependencies, packages, and more. In namespace, toggle the setting to All child namespaces excluded to exclude child namespaces and view data and metrics for only the selected namespace.
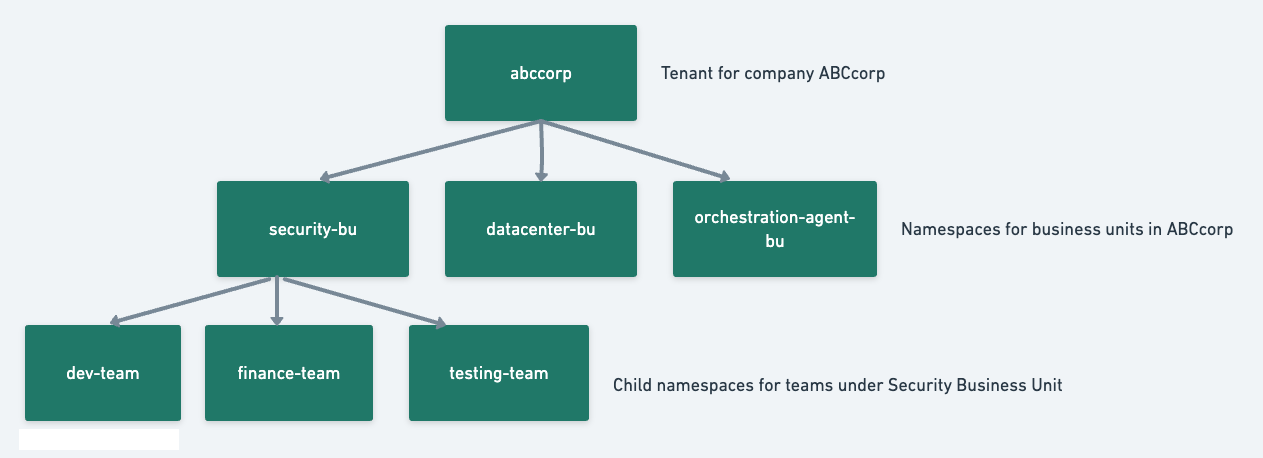
When you sign in to Endor Labs for the first time, create a tenant for your organization, such as abccorp.
-
Now you can create logical separations in the form of namespaces for different business units in your organization, such as Security Business Unit (security-bu), Datacenter Business Unit (datacenter-bu), and Orchestration Agent Business Unit (orchestration-agent-bu), inside your main tenant abccorp.
-
You can further partition the Security Business Unit into sub-namespaces, such as the Development team (dev-team), Finance Team (finance-team), and Testing Team (testing-team).
- There can be several namespaces within
abccorp. For example, the dev-team namespace that hosts projects belonging to the development team of the Security Business Unit and the test-team namespace that hosts projects belonging to the testing team of the Security Business Unit.
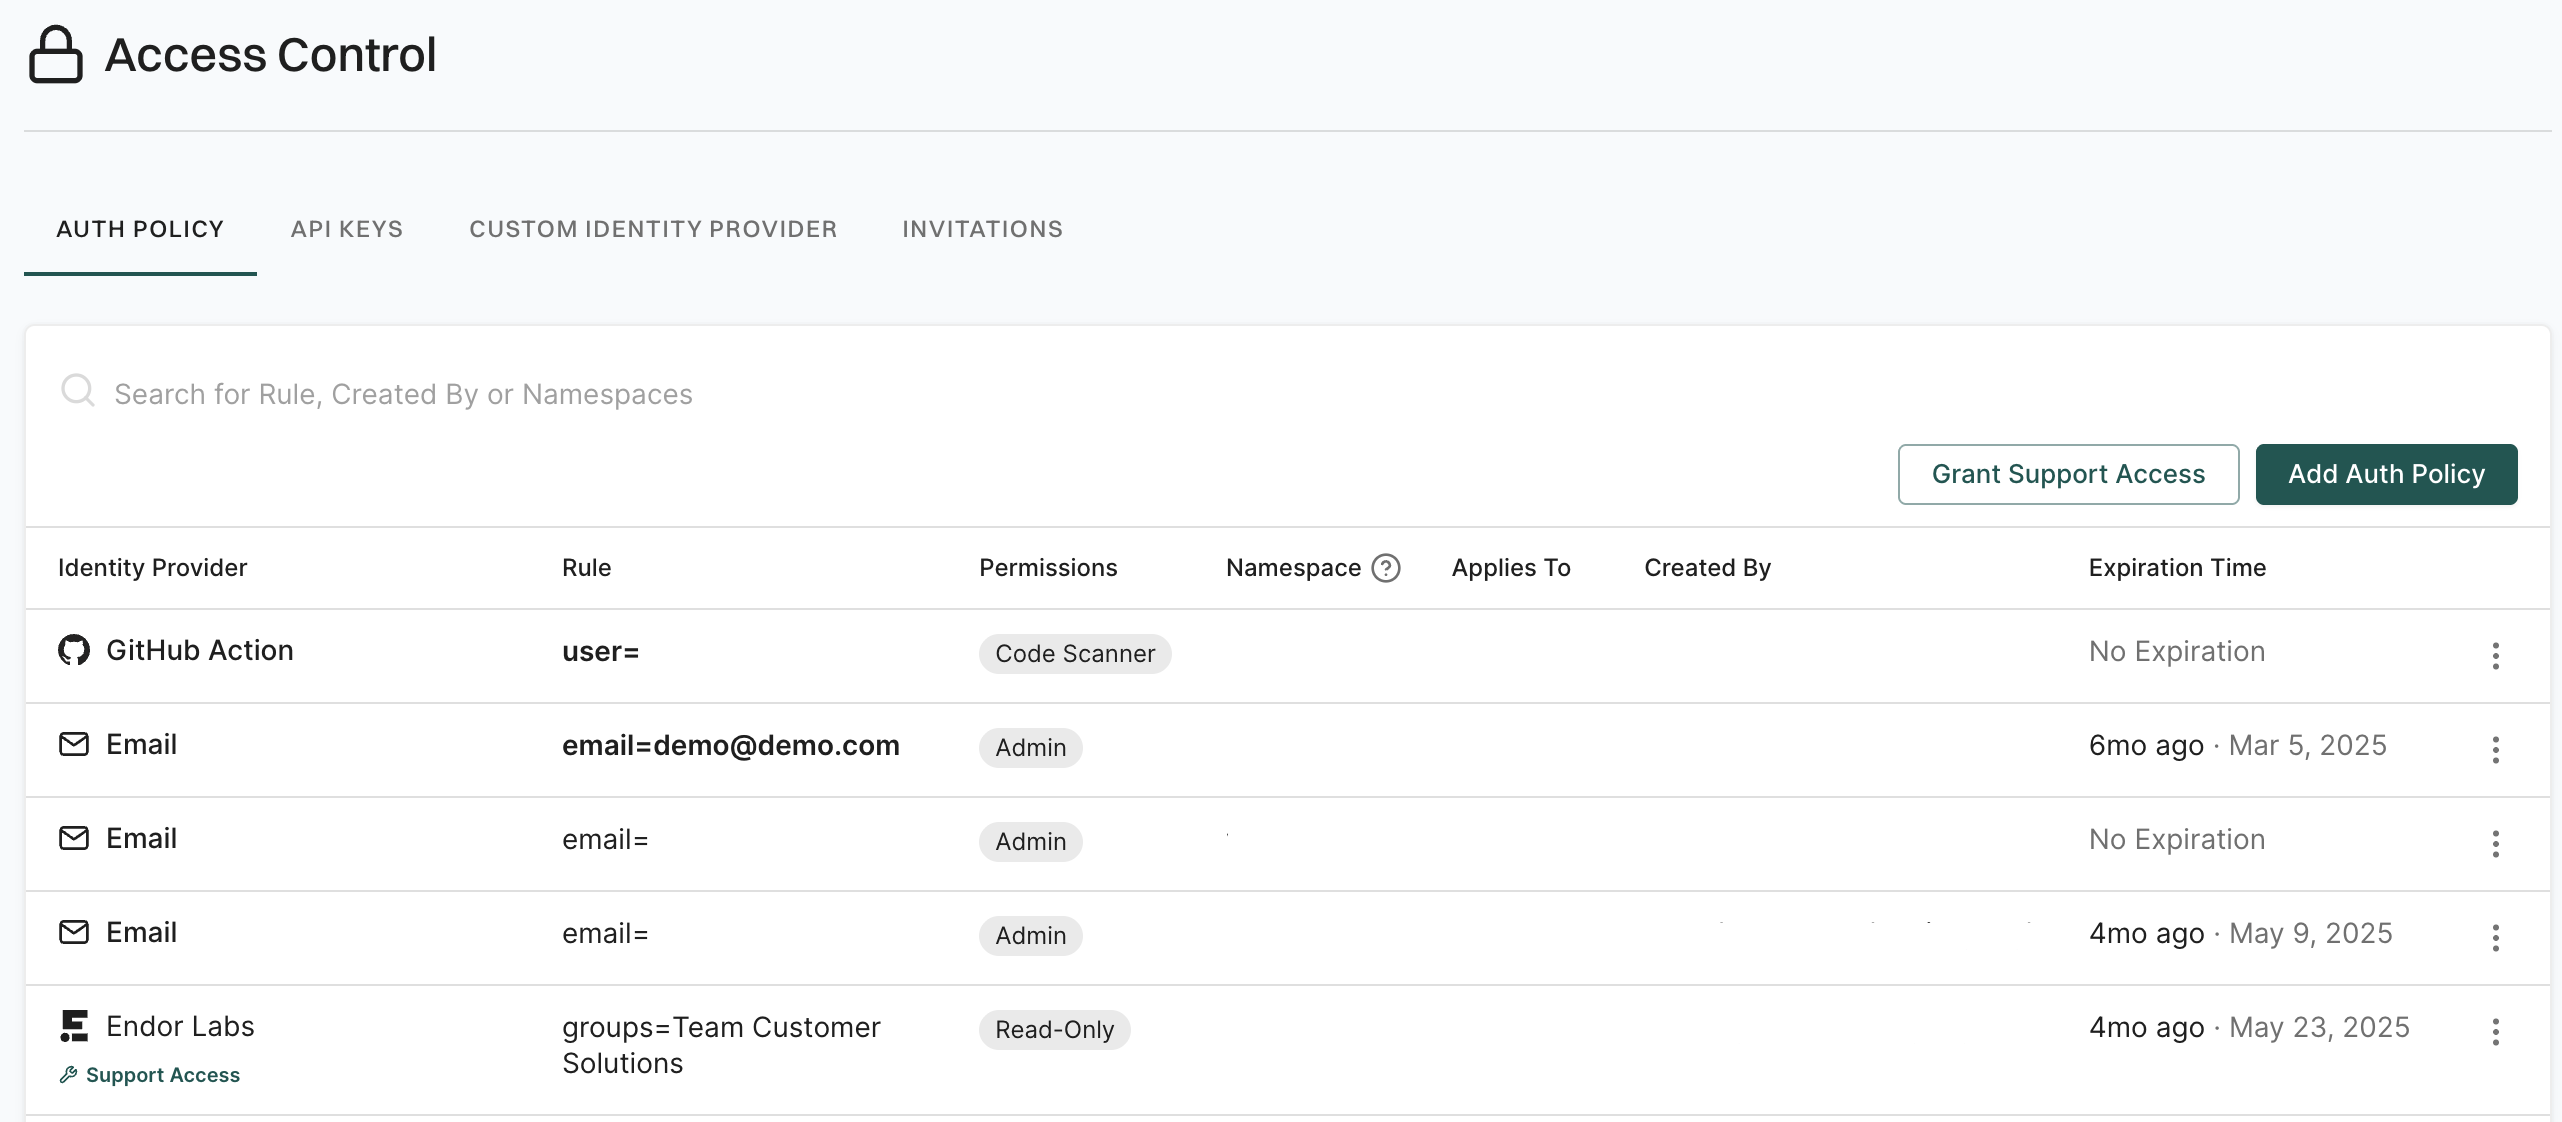
Use namespaces for authorization
Large enterprises with multiple business units, teams, or groups can assign different namespaces to different groups and apply authorization policies that restrict access to specific groups. This ensures least privilege access to critical information is available in the organization.
Organizations can also provision namespaces to provide read access to security teams in specific namespaces while they provide write access to AppSec teams for managing policies.
-
Create an authorization policy giving users in the development team of the security business unit permissions to scan their projects. Users from group @developers.abccorp.ai can have code scanner permissions for the namespace dev-team.
-
Users from group @applicationsecurity.abccorp.ai can have policy editor permissions for the namespace dev-team. The developers can scan the code, and the application security professionals can define the policies for code compliance.
-
The application security professionals can also choose to define the policies at the tenant level abccorp and choose to apply the same policies to all the child namespaces. This way, they won’t need to create policies individually for every child namespace. The development team inherits the policies from the organization and won’t be able to modify them. They can, however, add additional policies that are specific to engineering to their namespace dev-team and define specific rules and conditions applicable only to them.
Use namespaces for policy governance
Administrators can use namespaces effectively for policy governance and make sure that teams in their organization adhere to industry-wide policy standards enforcing compliance.
Let us assume that the application security team in ABCcorp wants to define organization-wide rules for code compliance, vulnerability management, and secret detection. They also need Jira tickets filed for all cases.
The application security engineers can create the following objects at the ABCcorp tenant level and propagate these objects to all the namespaces under abccorp so that it applies to the entire organization.
- Define action policy to break the build when critical vulnerabilities are detected.
- Define action policy to warn the user of detected code compliance misconfigurations.
- Define action policy to break the build when valid secret tokens are detected in their code.
- Create Jira tickets and notify the appropriate team to take remediation measures.
Create a namespace
To create a namespace in your tenant:
-
Sign in to Endor Labs.
-
Select Manage > Namespaces from the left sidebar.
-
Click New Namespace.
-
Enter a title and description for the namespace.
The title can have a maximum of 32 characters and must contain only lowercase letters (a-z), numbers (0-9), and characters (_-).
-
Enter tags that you want to associate with this namespace.
Tags can have a maximum of 63 characters and must contain letters (A-Z), numbers (0-9), and characters (=@_.-).
Edit a namespace
You can choose to modify the description of a namespace or include tags for it. You can’t modify its title once a namespace is created. To edit details of a namespace in your tenant:
- Sign in to Endor Labs.
- Select Manage > Namespaces from the left sidebar.
- Choose the namespace and click Edit.
- Edit the description or include tags for the namespace.
- Click Update Namespace.
Delete a namespace
Deleting a namespace permanently deletes all its child namespaces and its projects. To delete a namespace:
- Sign in to Endor Labs.
- Select Manage > Namespaces from the left sidebar.
- Choose the namespace and click Delete.
- Select and confirm the deletion.
- Click Delete Namespace.
Data propagation from parent to child namespaces
Data propagation defines how the data is inherited by the child namespace from its parent namespace.
-
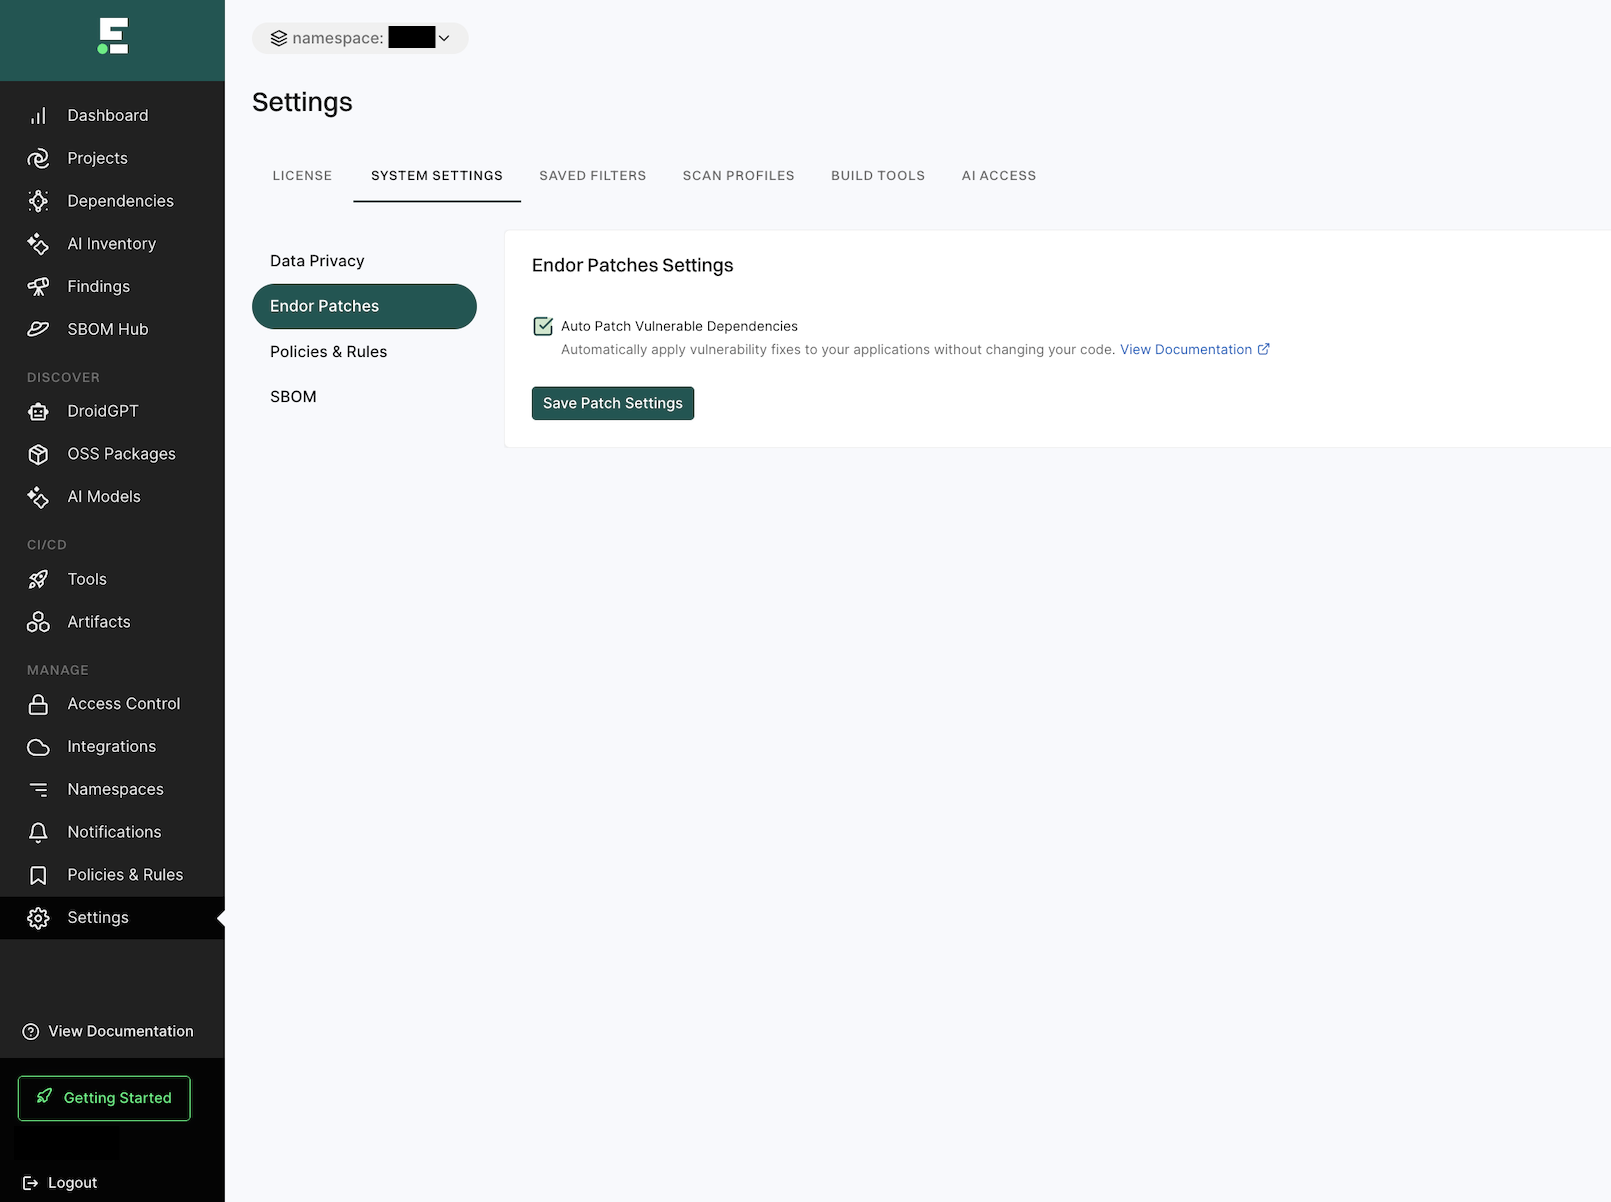
Finding Policies - When a new namespace is created, all the finding policies in the parent are inherited by the child namespaces. Any new finding policy you create in the parent, you can choose to apply it to the child namespaces by selecting Propagate this policy to all child namespaces.
-
Action Policies - When a new namespace is created, all the action policies in the parent are inherited by the child namespaces. Any new action policy you create in the parent, you can choose to apply it to the child namespaces by selecting Propagate this policy to all child namespaces.
-
Remediation Policies - When a new namespace is created, all the remediation policies in the parent are inherited by the child namespaces. Any new remediation policy you create in the parent, you can choose to apply it to the child namespaces by selecting Propagate this policy to all child namespaces.
-
Exception Policies - When a new namespace is created, all the exception policies in the parent are inherited by the child namespaces. Any new exception policy you create in the parent, you can choose to apply it to the child namespaces by selecting Propagate this policy to all child namespaces.
-
Package Manager Integrations - Package manager integrations of the parent are not inherited by the child namespaces. Any new package manager integration you create in the parent, you can choose to apply them to the child namespaces by selecting Propagate this package manager to all child namespaces.
-
Integrations - Integrations in the parent are not inherited by the child namespaces.
-
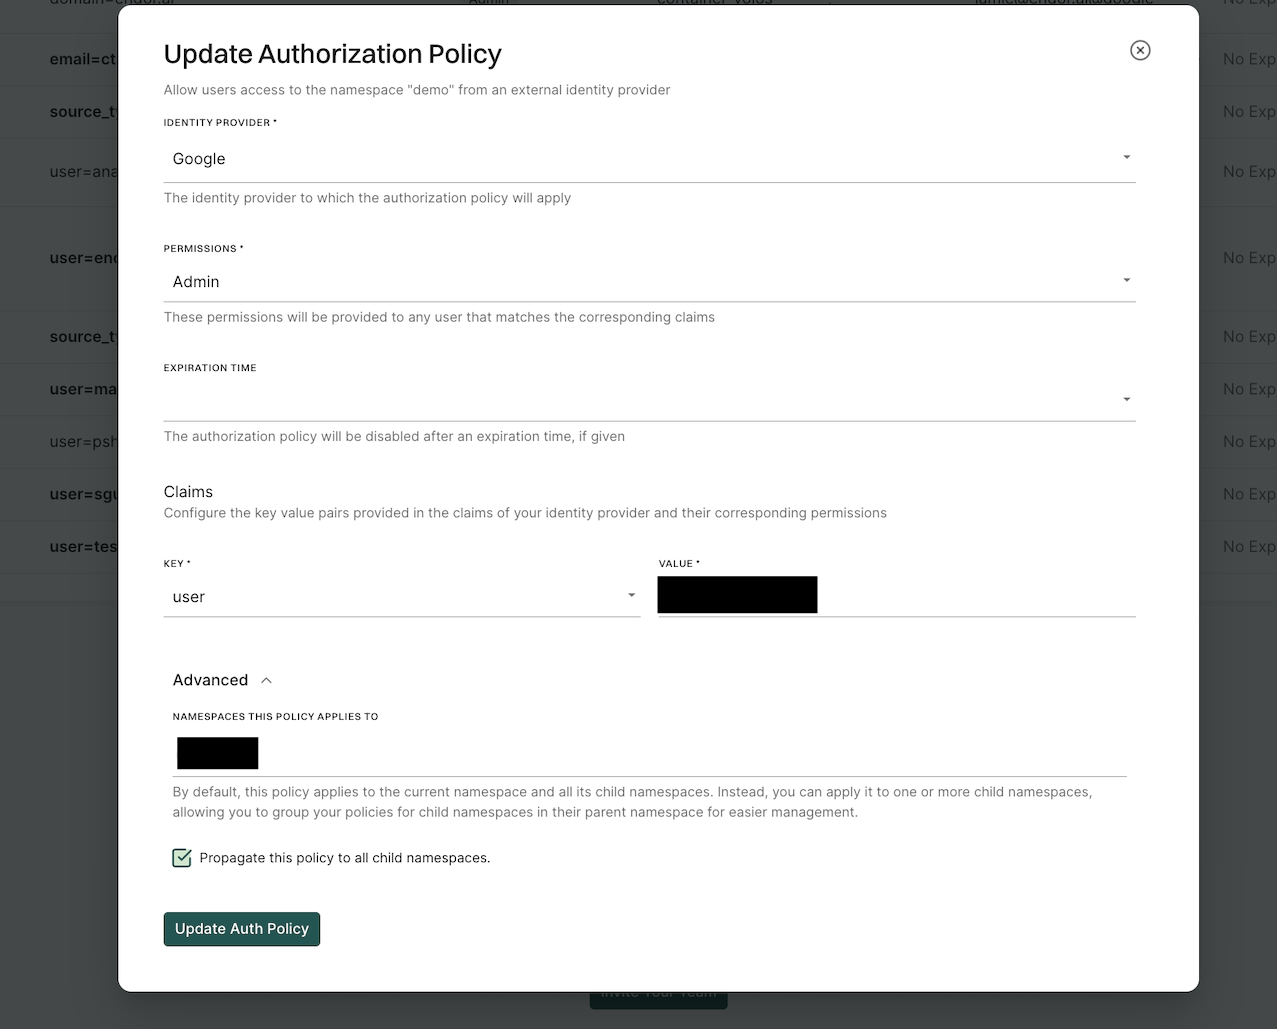
Authorization Policies - Authorization policies of the parent are inherited by all its child namespaces. You can choose to group the authorization policies of the child namespaces in their parent namespace and manage them easily.
-
Secret Rules - You can choose to apply custom secret rules created in the parent to its child namespaces by selecting Propagate this rule to all child namespaces.
-
API Key - You can create an API key in a namespace and select Propagate this rule to all child namespaces to apply the key to all child namespaces.
Tenant and namespace terminologies
Tenant is the top-level entity under which you can create namespaces and child namespaces.
To denote a namespace, always use its fully qualified name. Fully qualified name for a namespace is in the format tenantname.namespacename, and child namespace is in the format tenantname.namespacename.childnamespacename.
- In this example, the tenant is
abccorp and its child namespaces are abccorp.security-bu, abccorp.datacenter-bu, and abccorp.agent-bu. The child namespaces of abccorp.security-bu are abccorp.security-bu.dev-team, abccorp.security-bu.testing-team, and abccorp.security-bu.finance-team.
- Consider a tenant named
acme with a child namespace dev, which in turn has a child namespace app. The fully qualified namespace for app is acme.dev.app.